Select first main and safety tapes
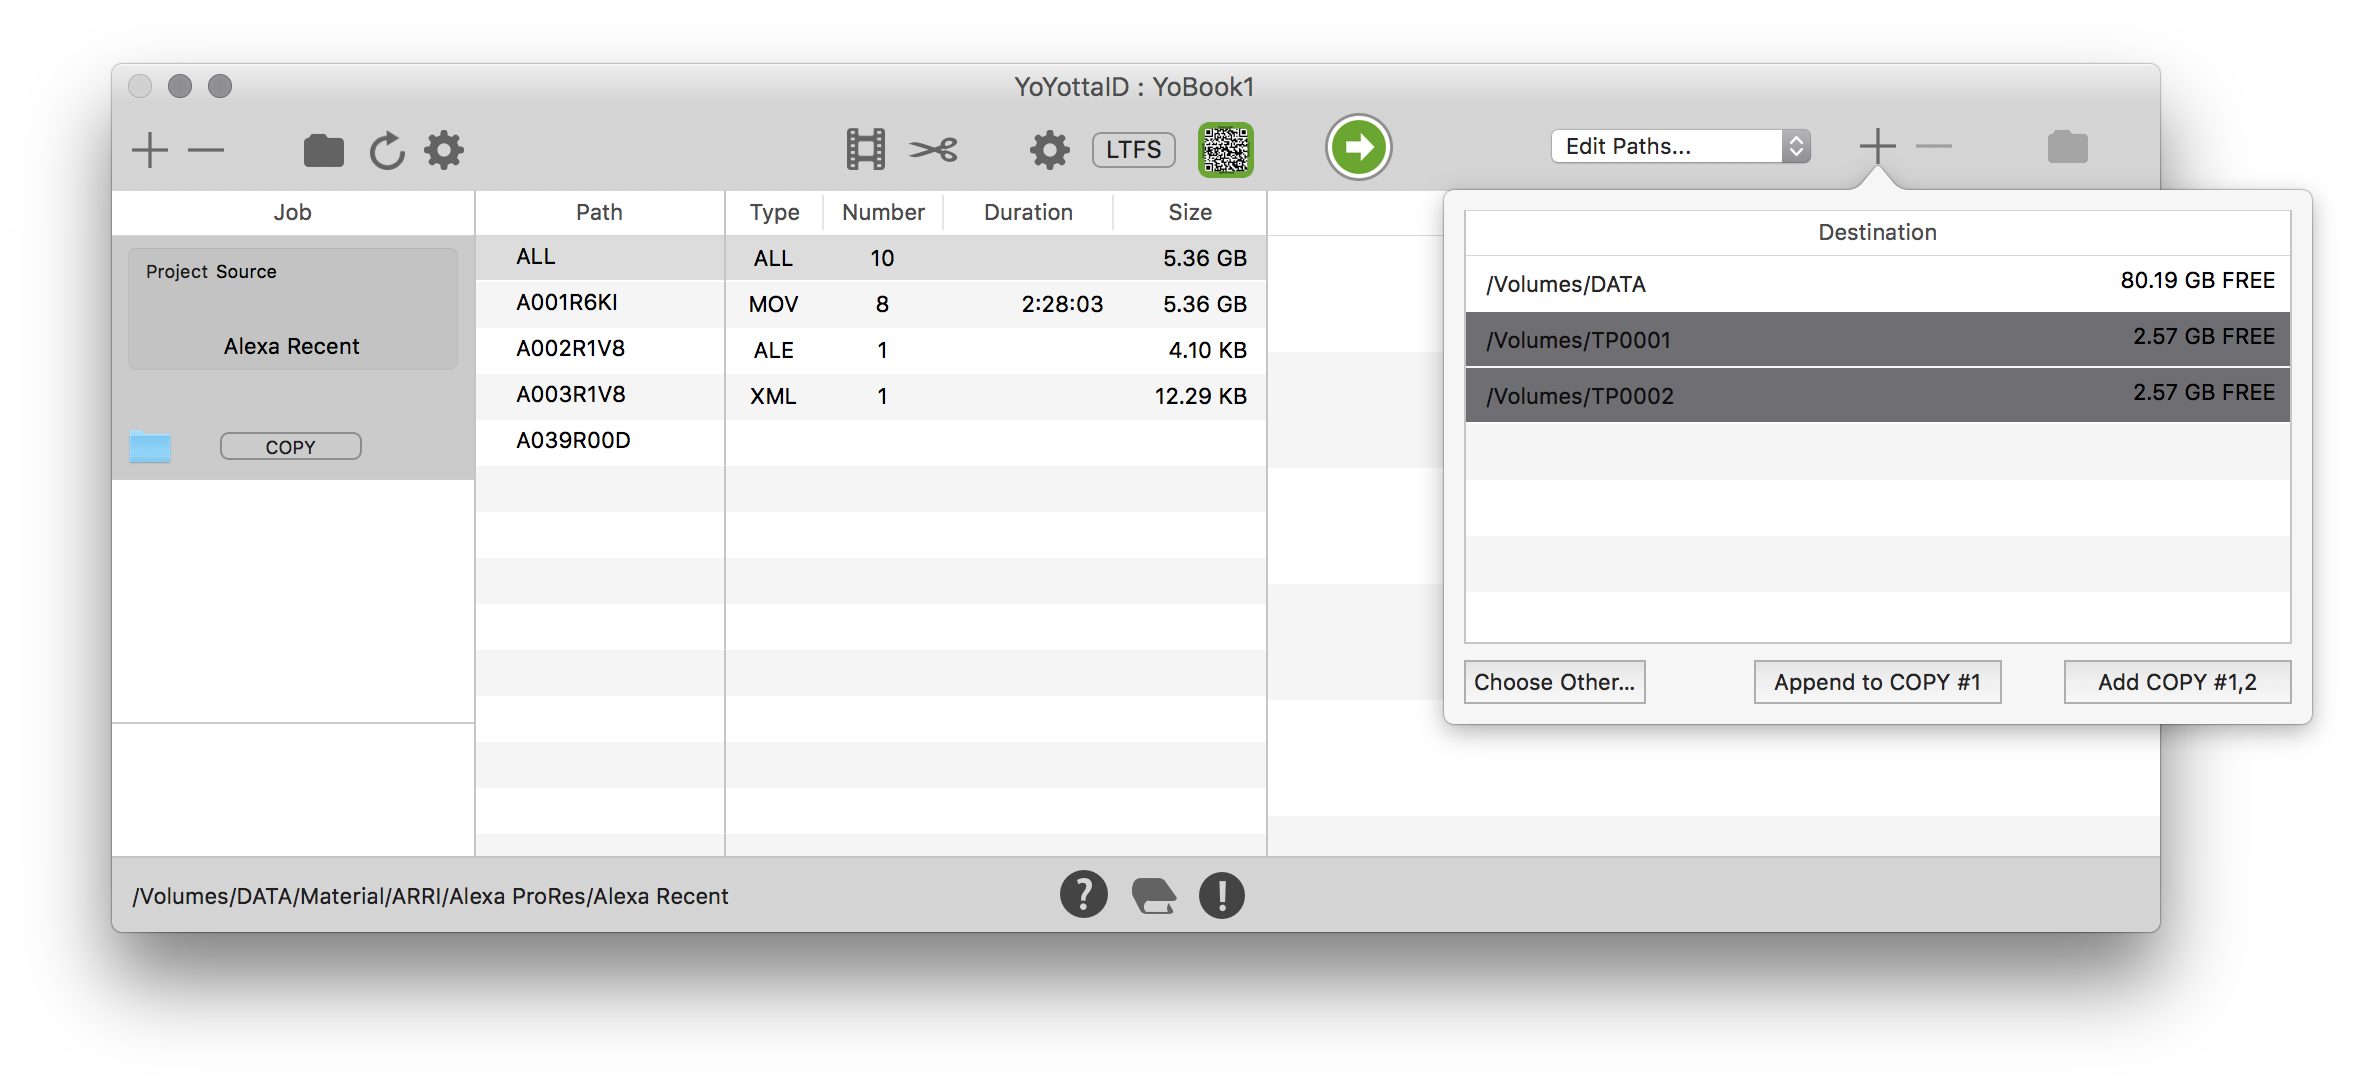
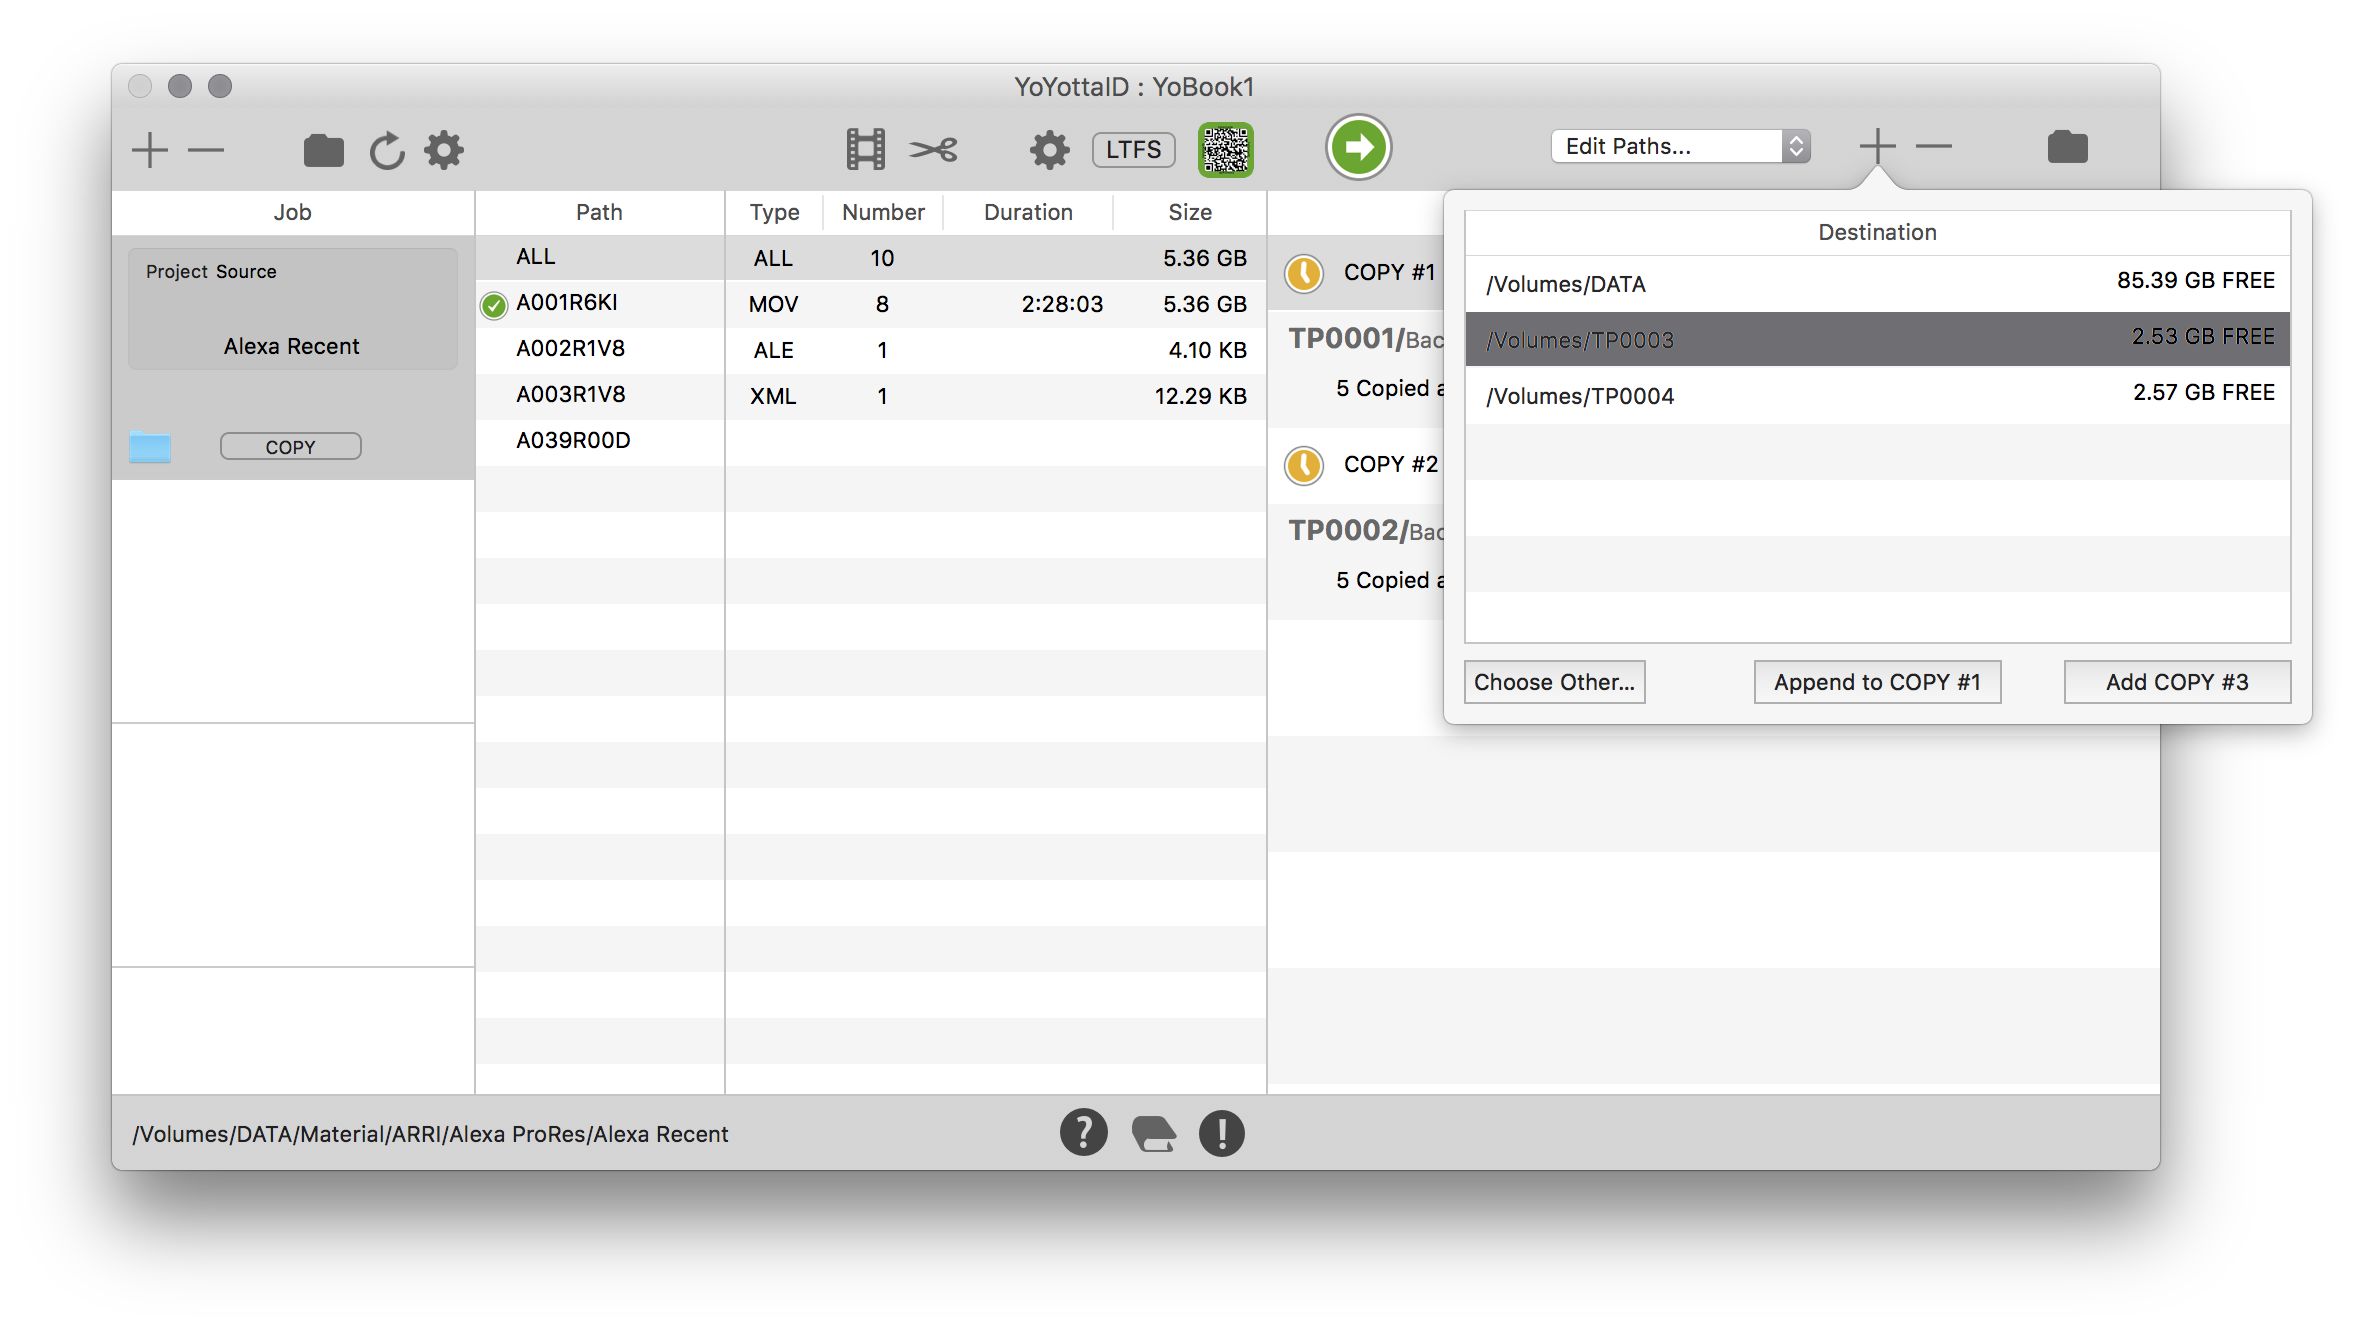
Load the tapes, if using a desktop drive format them in the LTFS panel. Click the + above the destination table. Select the tapes. Click Add COPY #1,2.
In this example all our main tapes have odd serial numbers and safety tape numbers are even.
Alternatively Add the first tape and then select and Append additional tapes to each COPY.
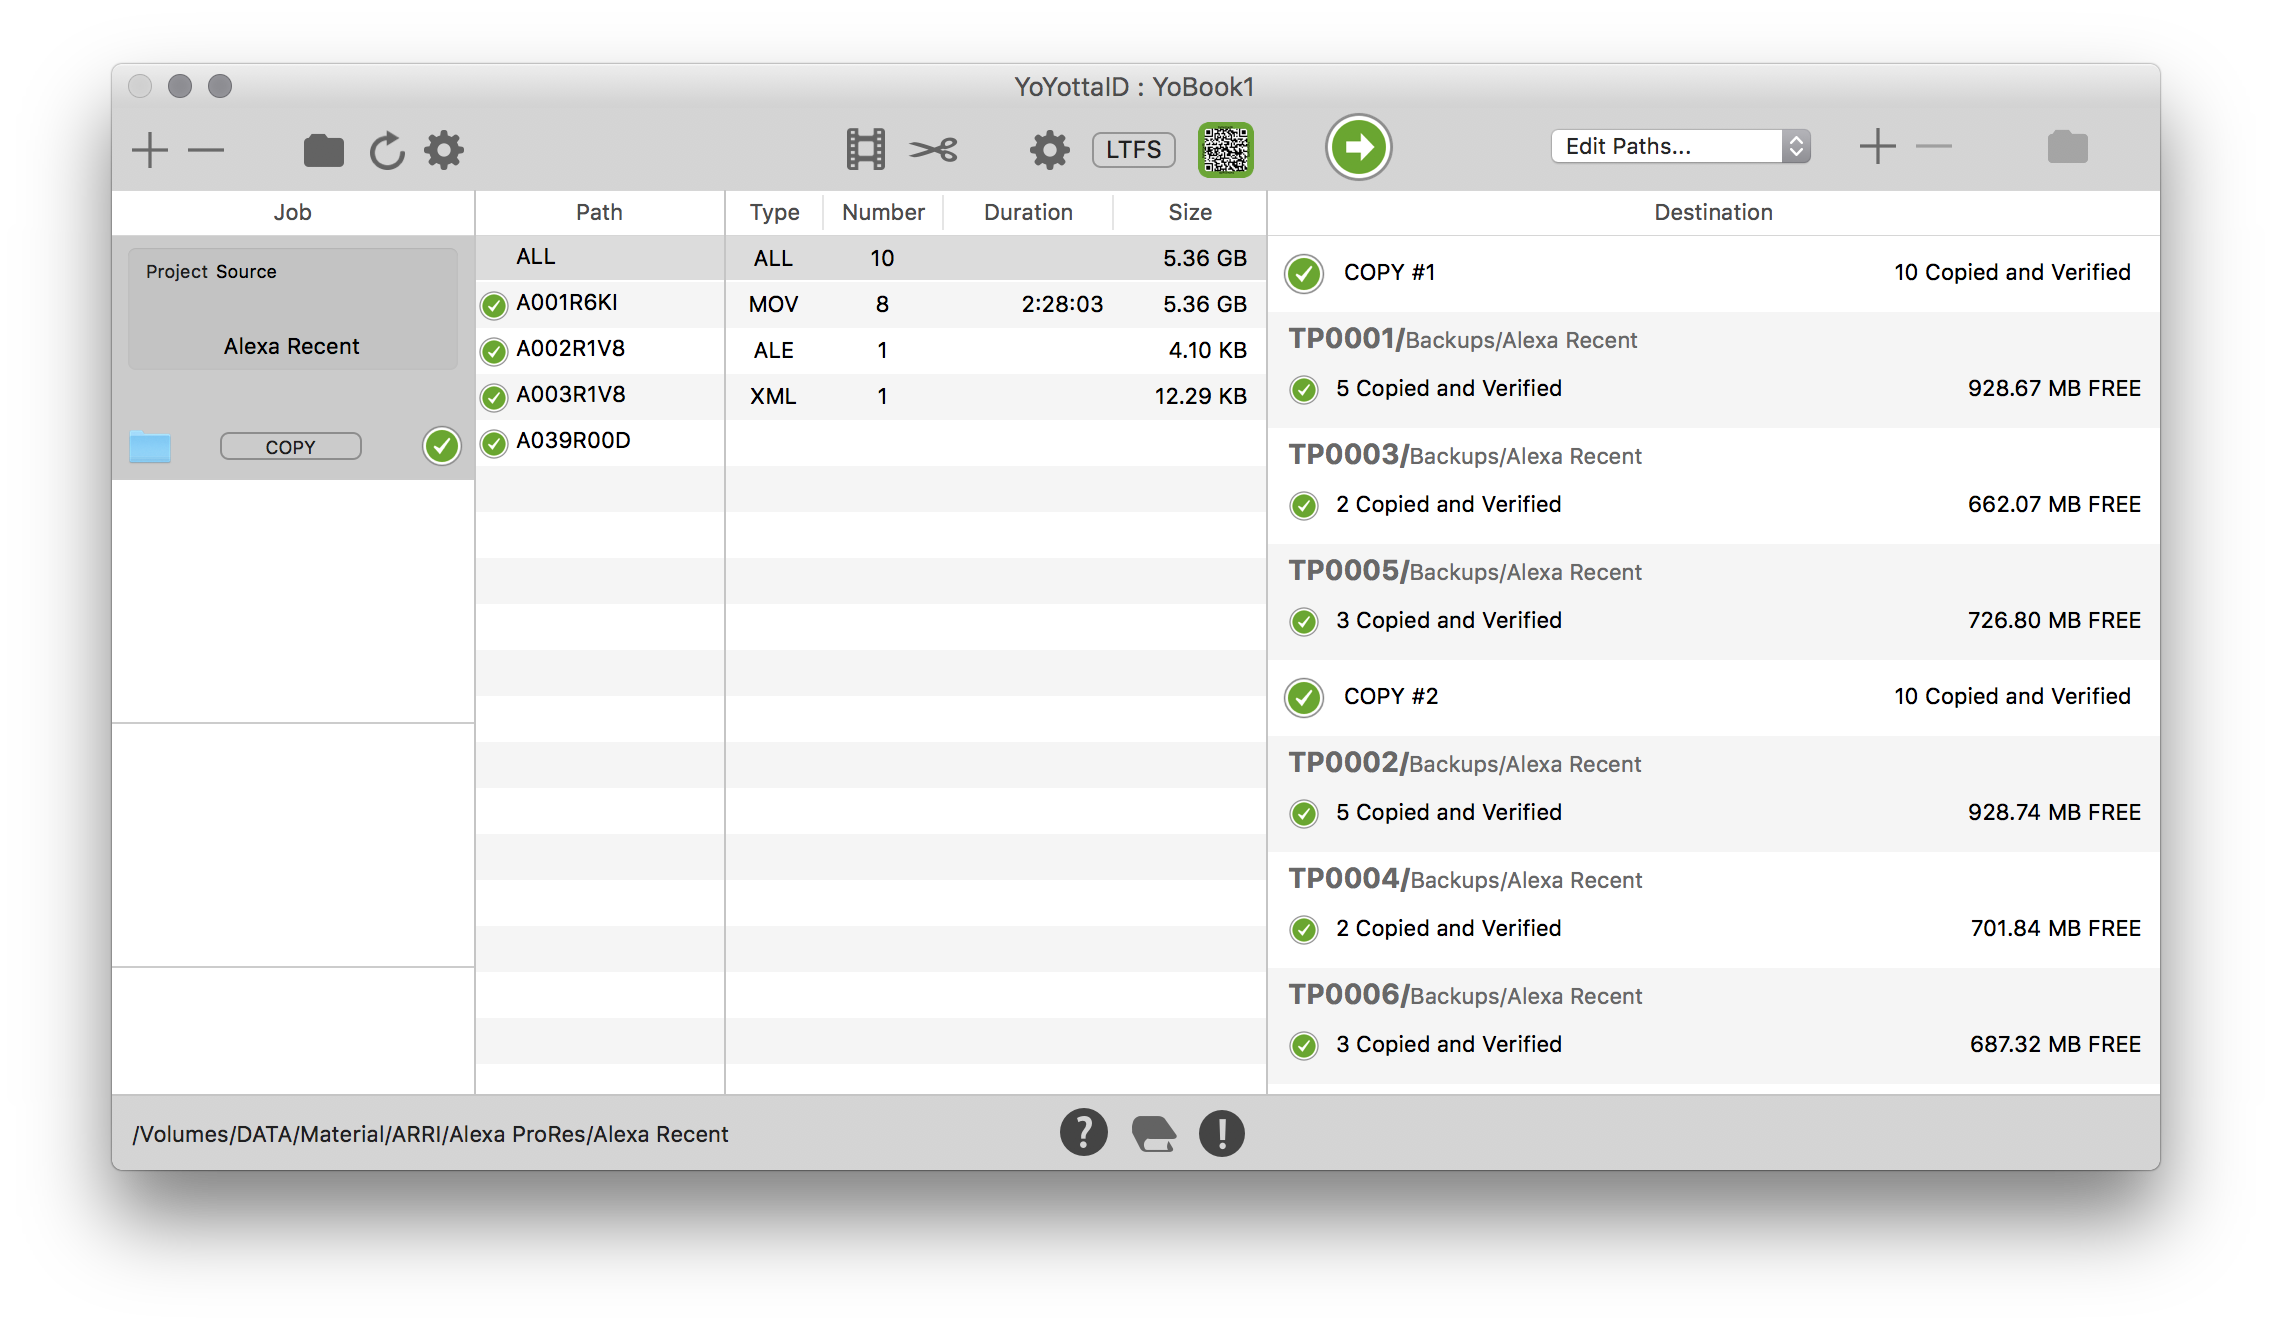
Ready to start
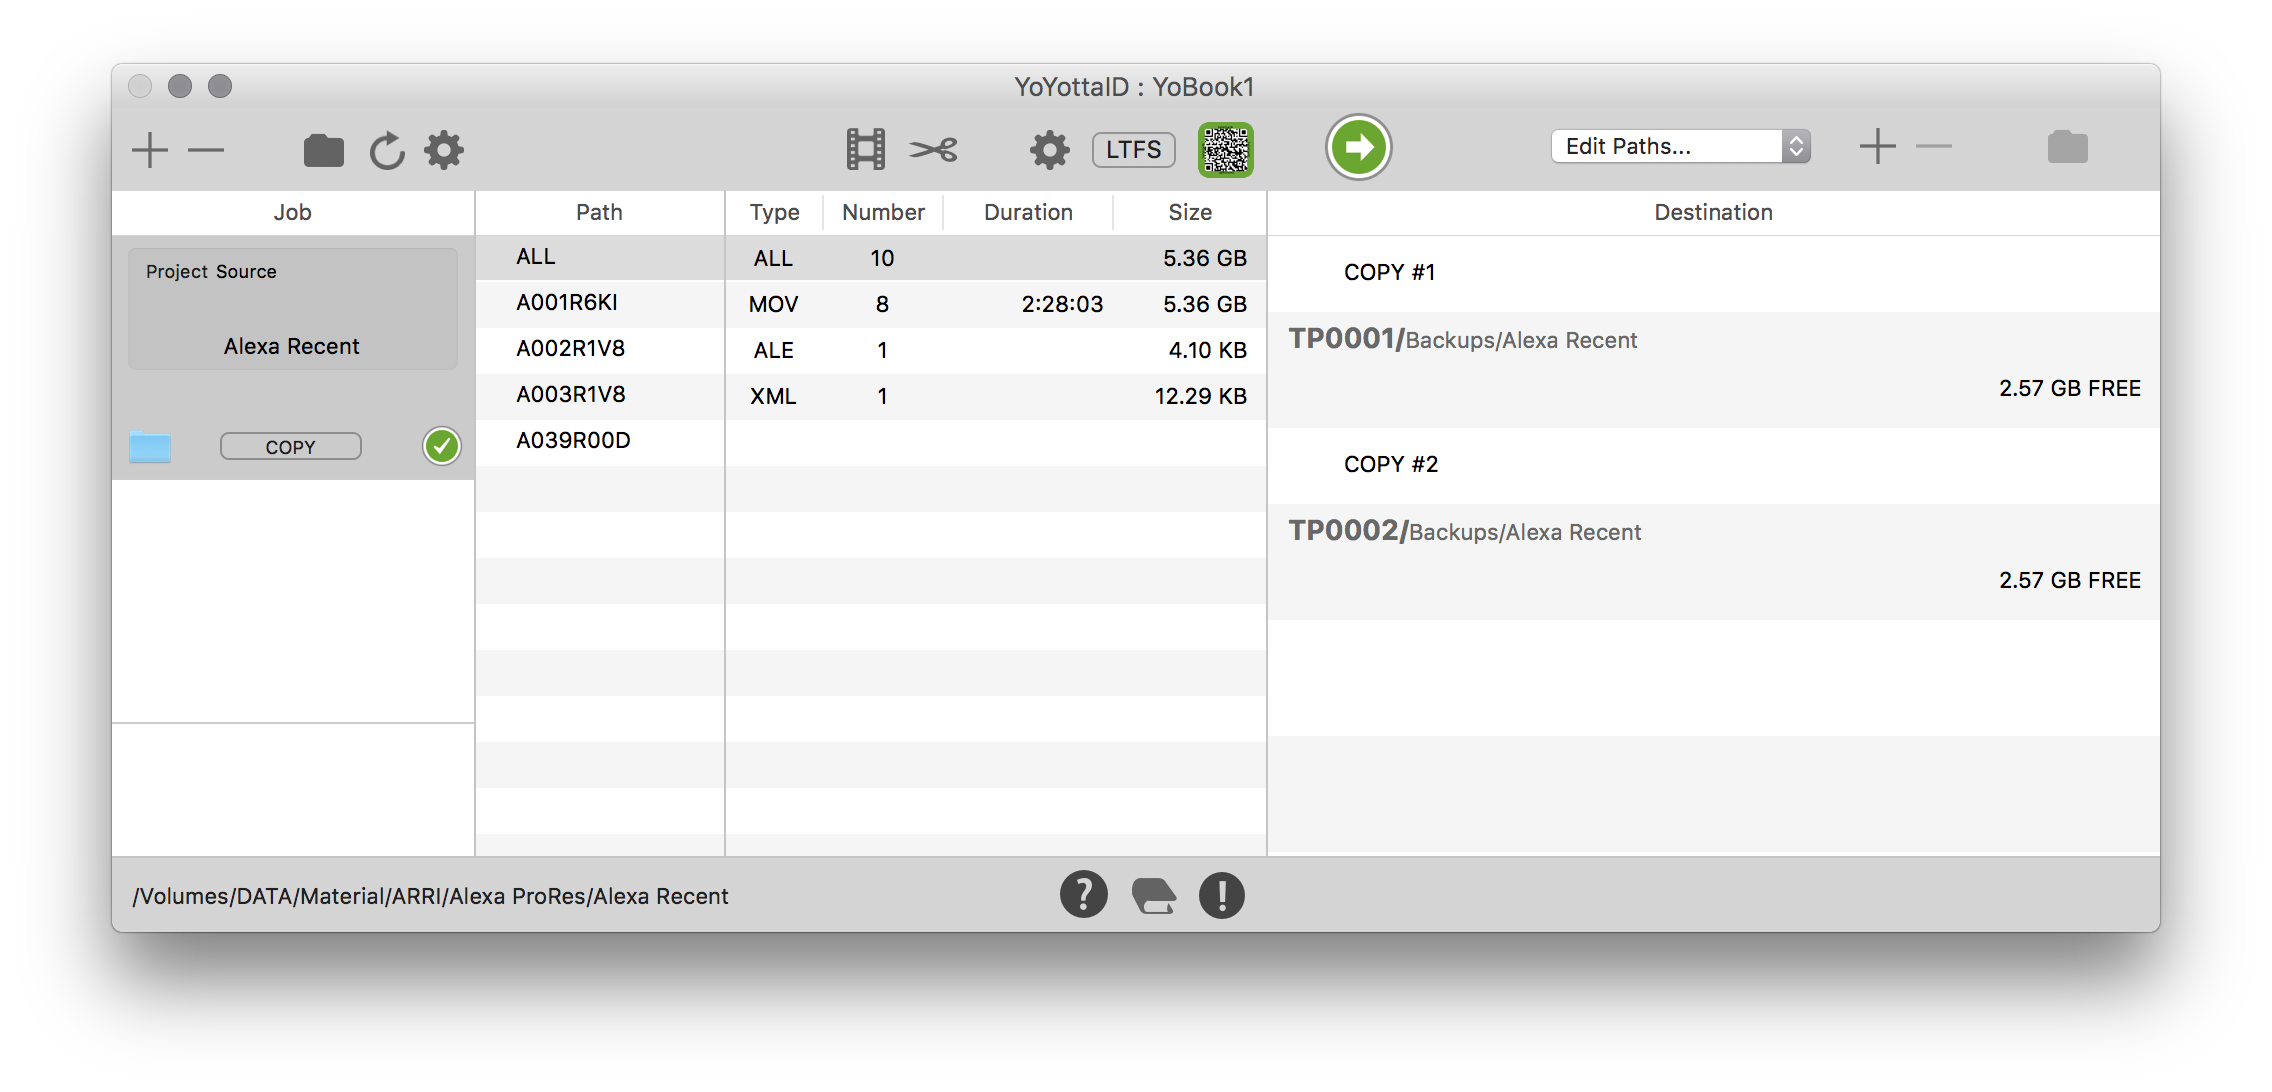
Now the two destinations are ready. COPY #1 is the main and COPY #2 will be the safety copy.
There are 10 files to copy, the first three will fit onto each tape. Click the green button to start.
If only one tape drive is available, then when the spanned archive is complete, remove all destinations and repeat the job again starting with the first safety tape.
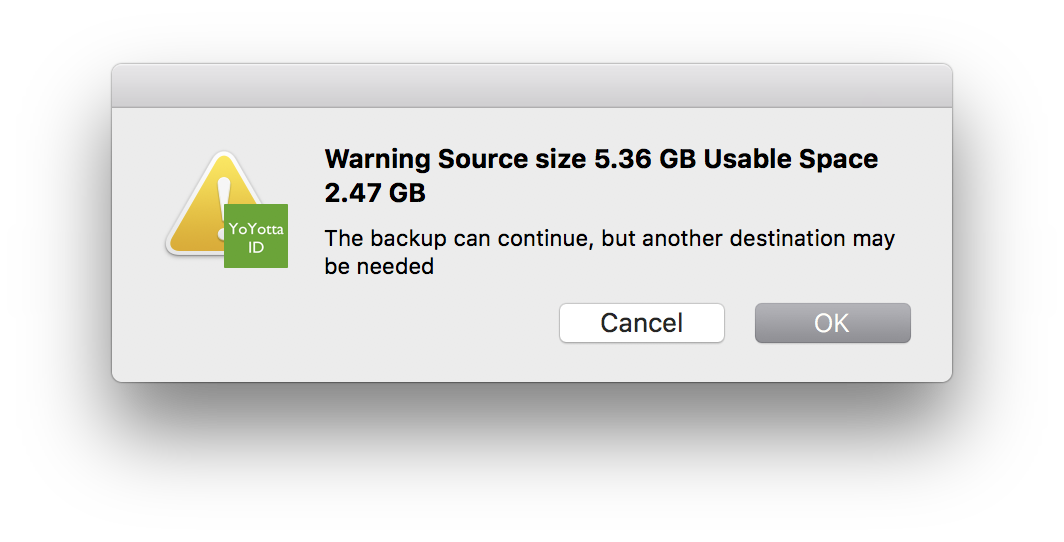
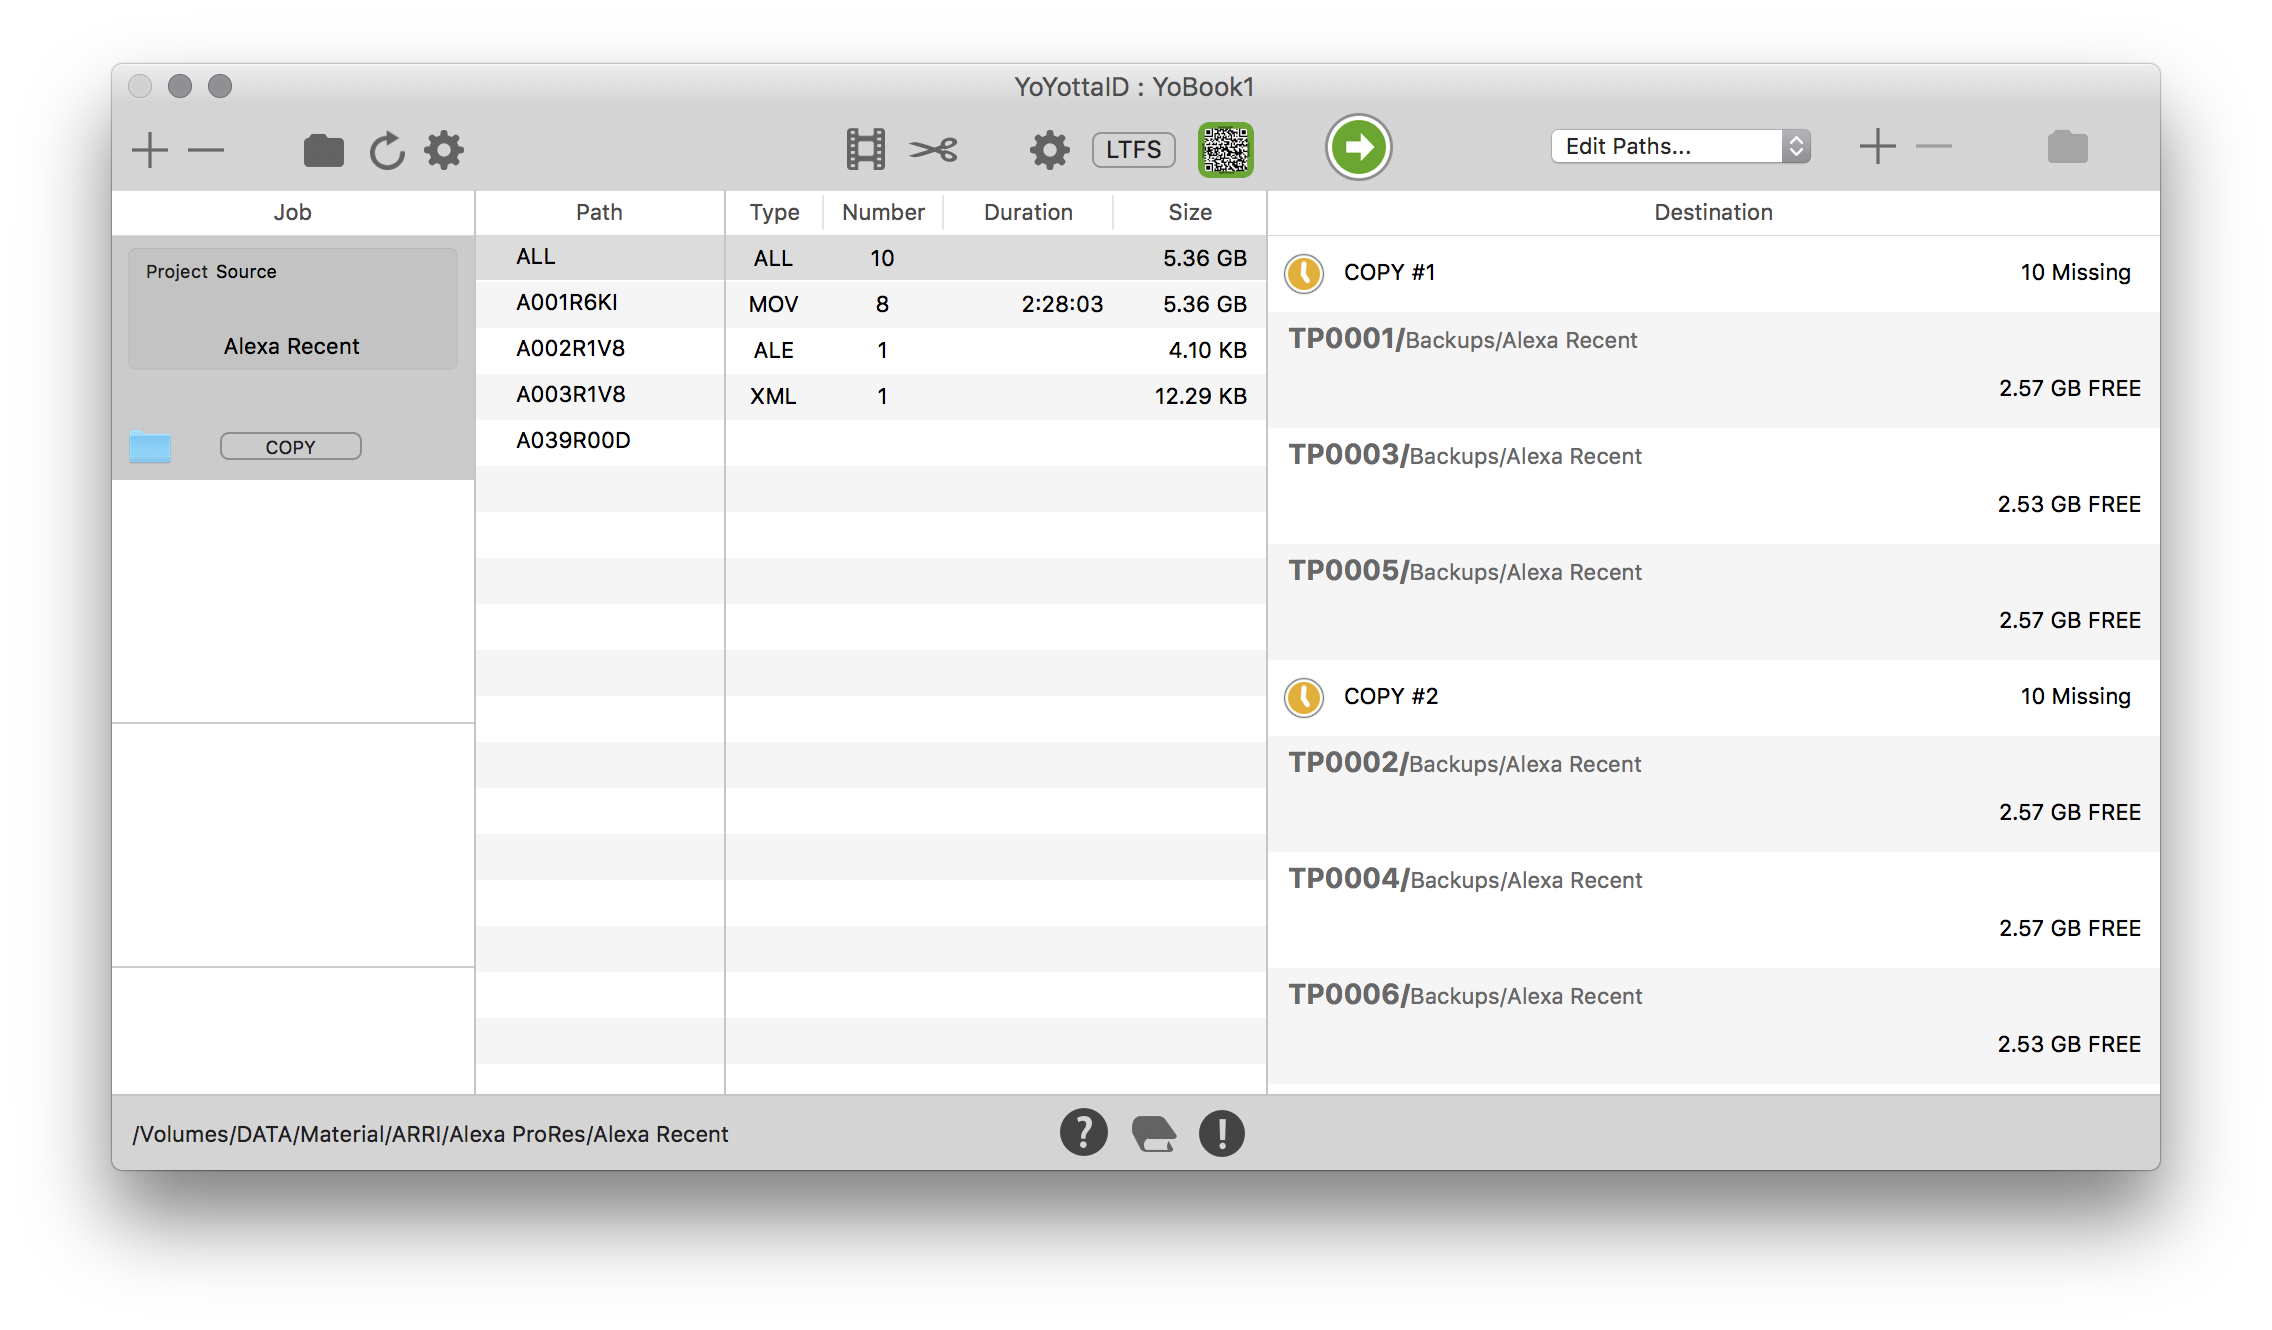
Backup space warning
YoYotta warns that the entire job will not fit on one tape. Click Continue.
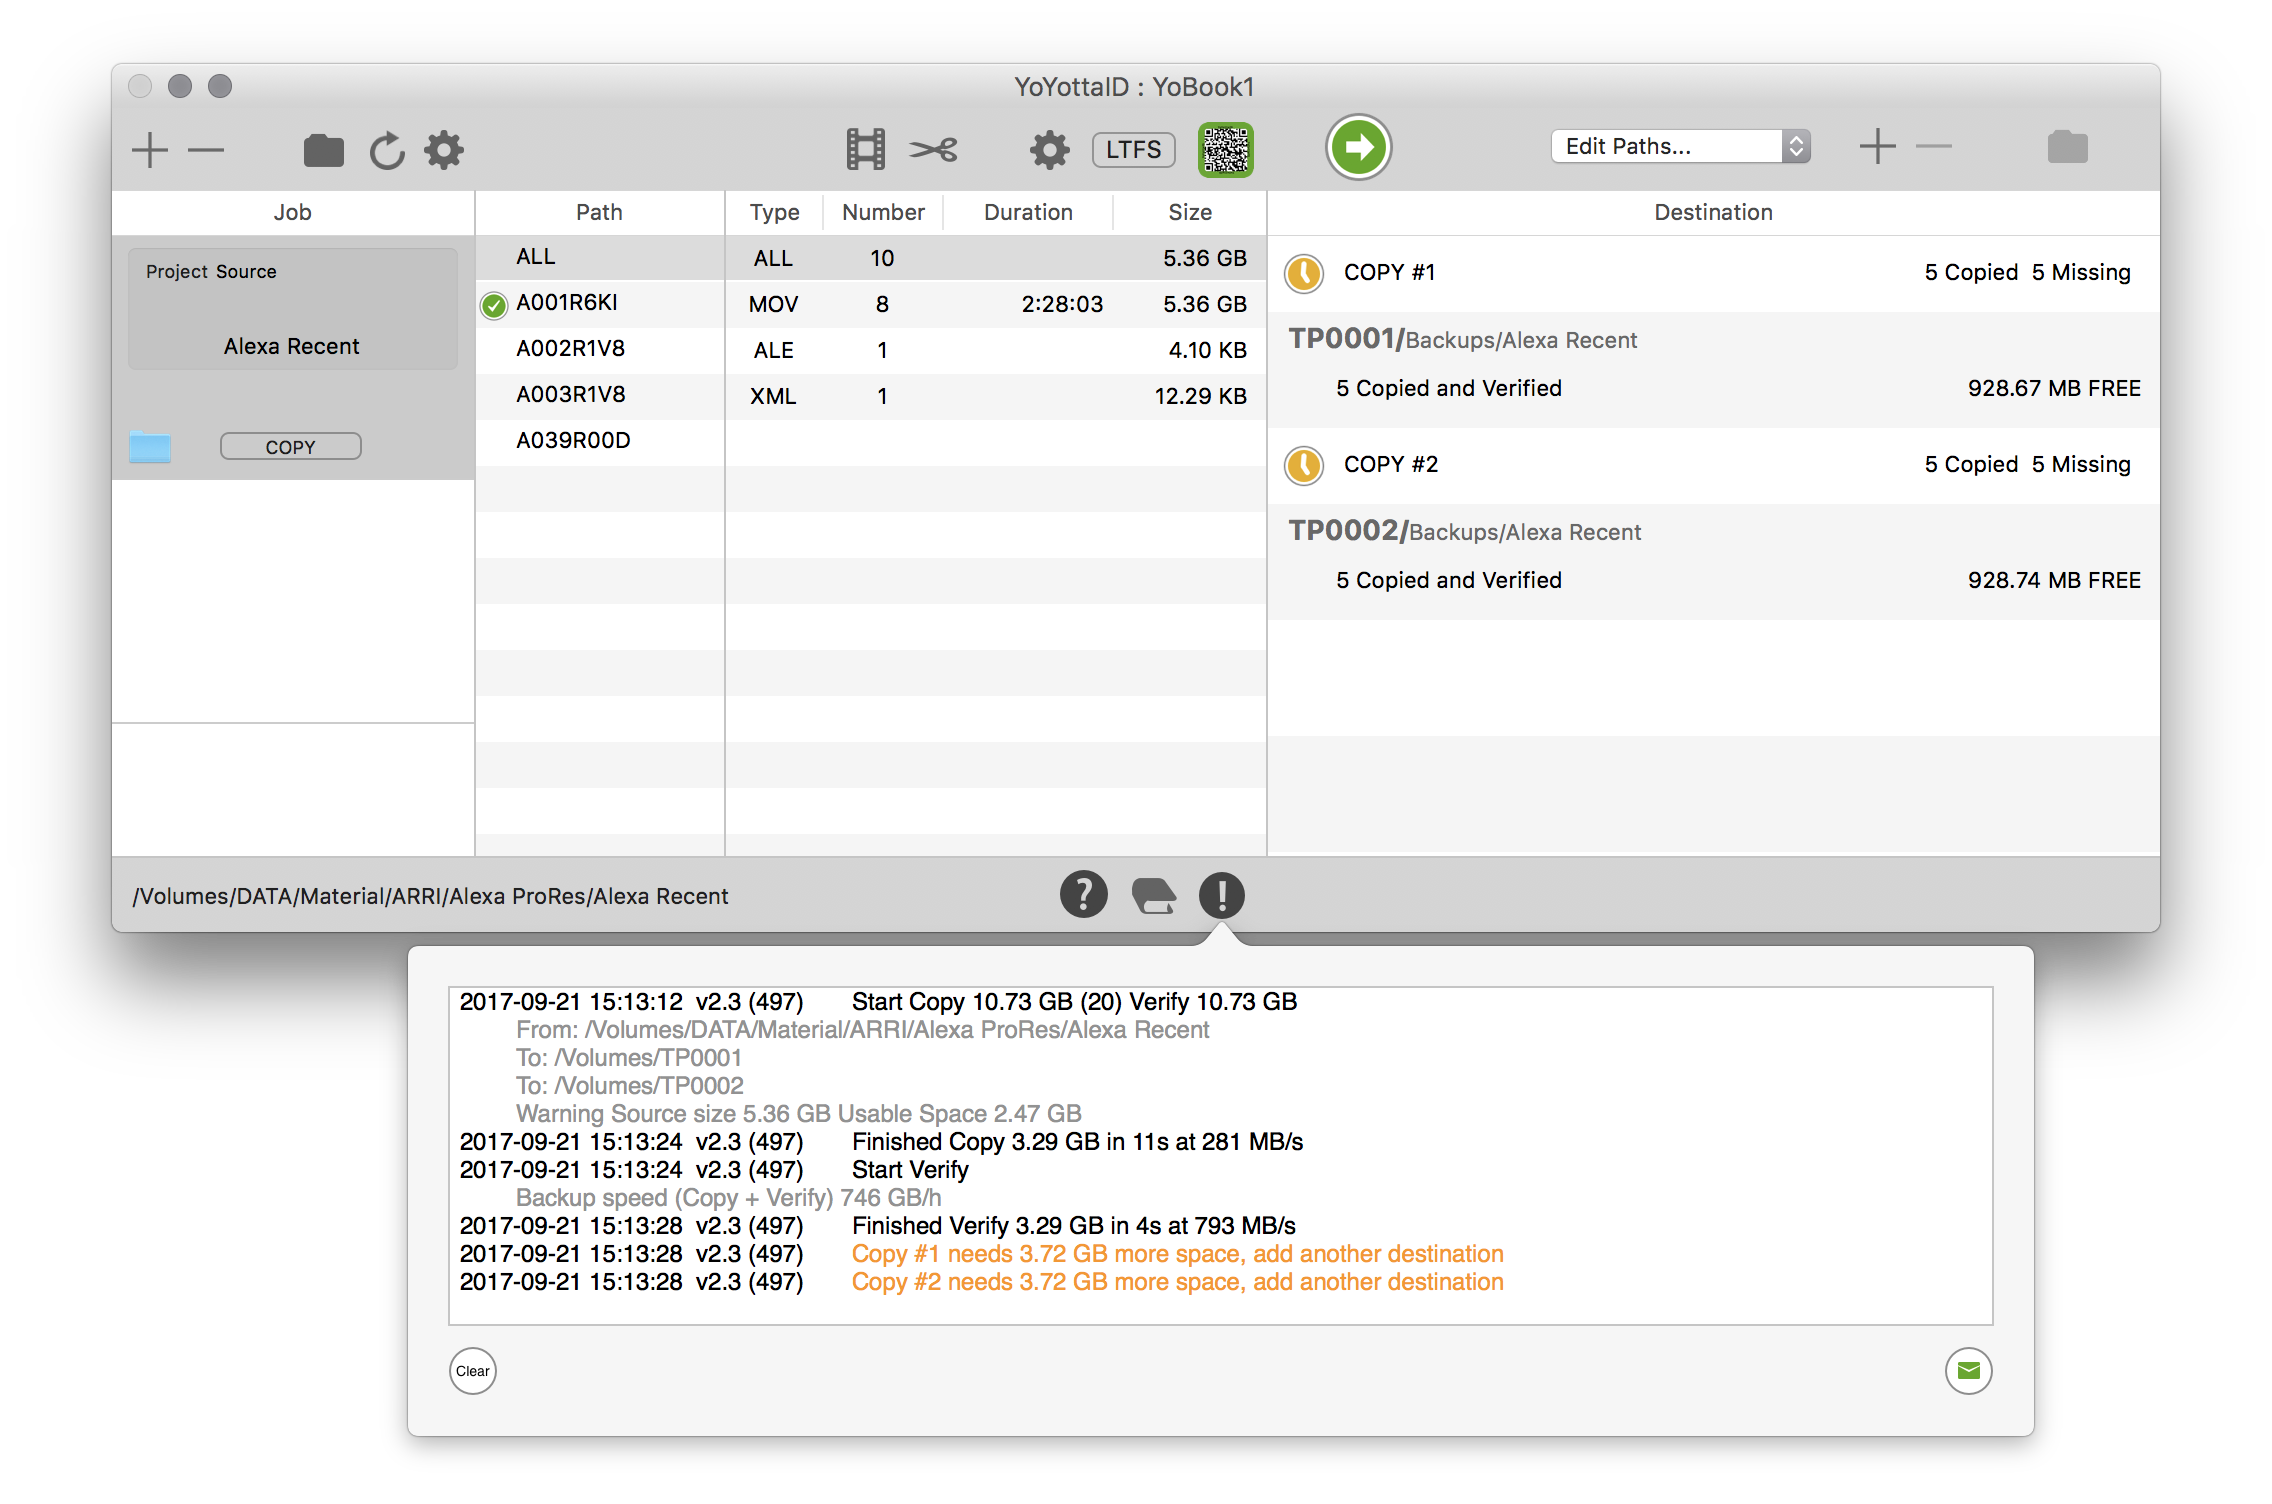
More space needed
After the copy and verify, more space is needed, so YoYotta prompts to add new destinations.
If using desktop drives and the tapes are not already ejected, then select the first tape TP0001, then press the Eject button in the top right. Repeat this for tape TP0002.
Append second Main tape
Important, don't delete the first tapes from the destination table, just eject them.
Once a spanned job has started it is important not to open Edit Paths or change any settings for the job.
Load new tapes, if using a desktop drive format them. Click the + above the destination table. Select tape TP0003 and click Append to COPY #1. This appends a new tape to the main copy.
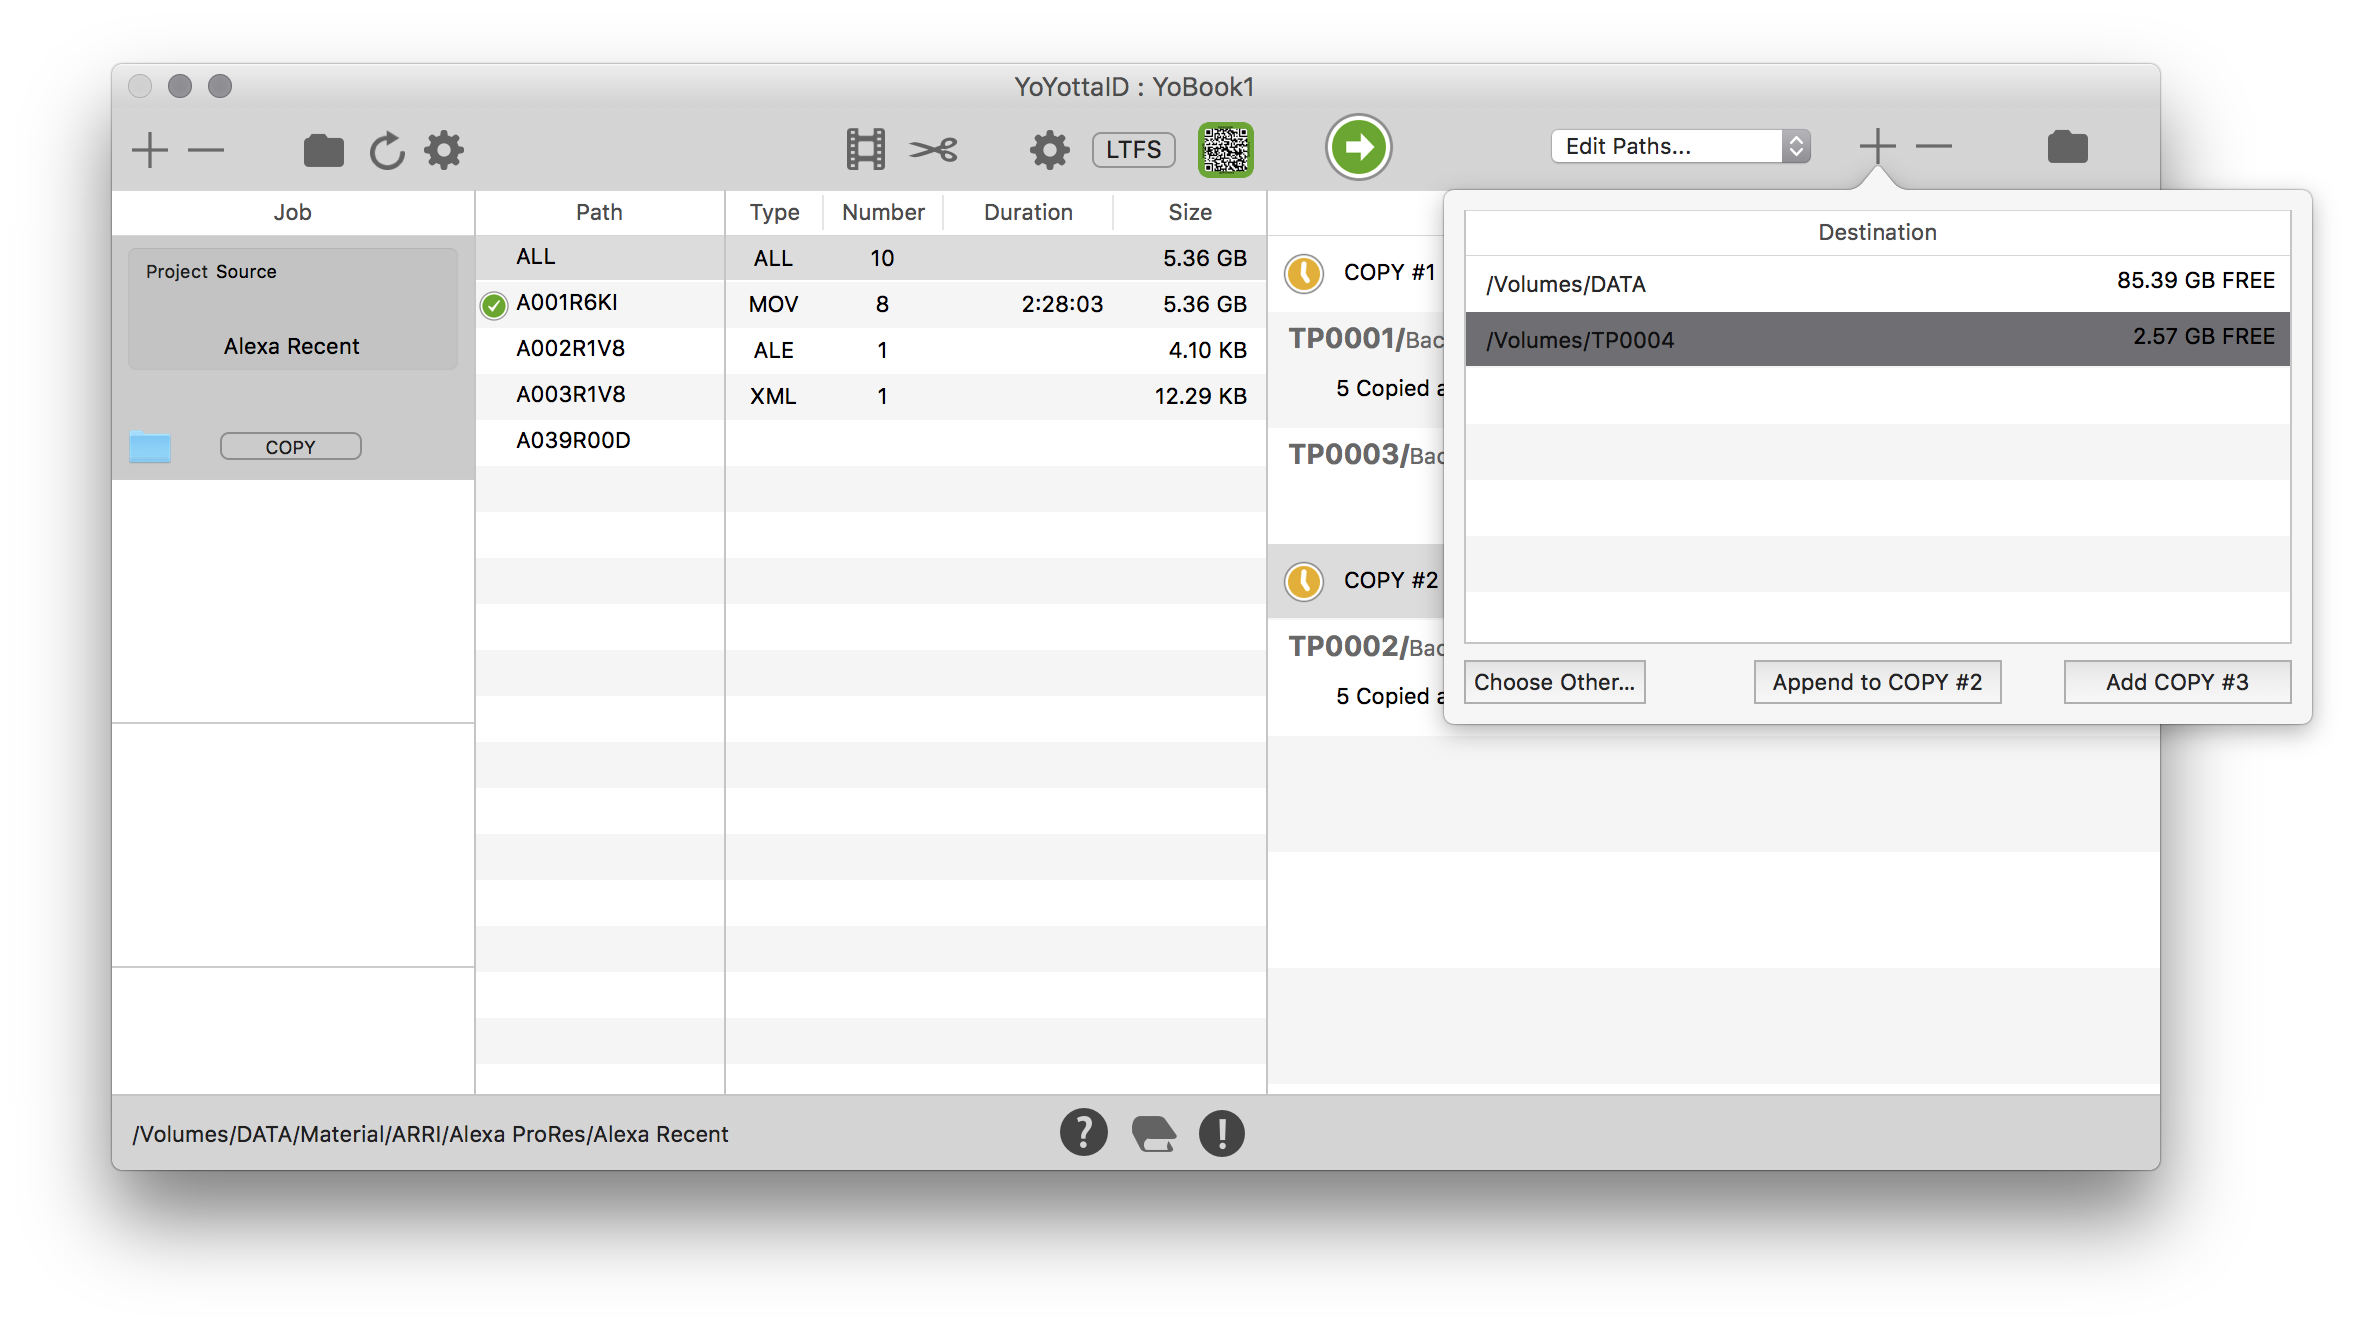
Append second Safety tape
Select COPY #2 in the destination table. Now click the + above the destination table. Select tape TP0004 and click Append to COPY #2. This appends a new tape to the safety copy.
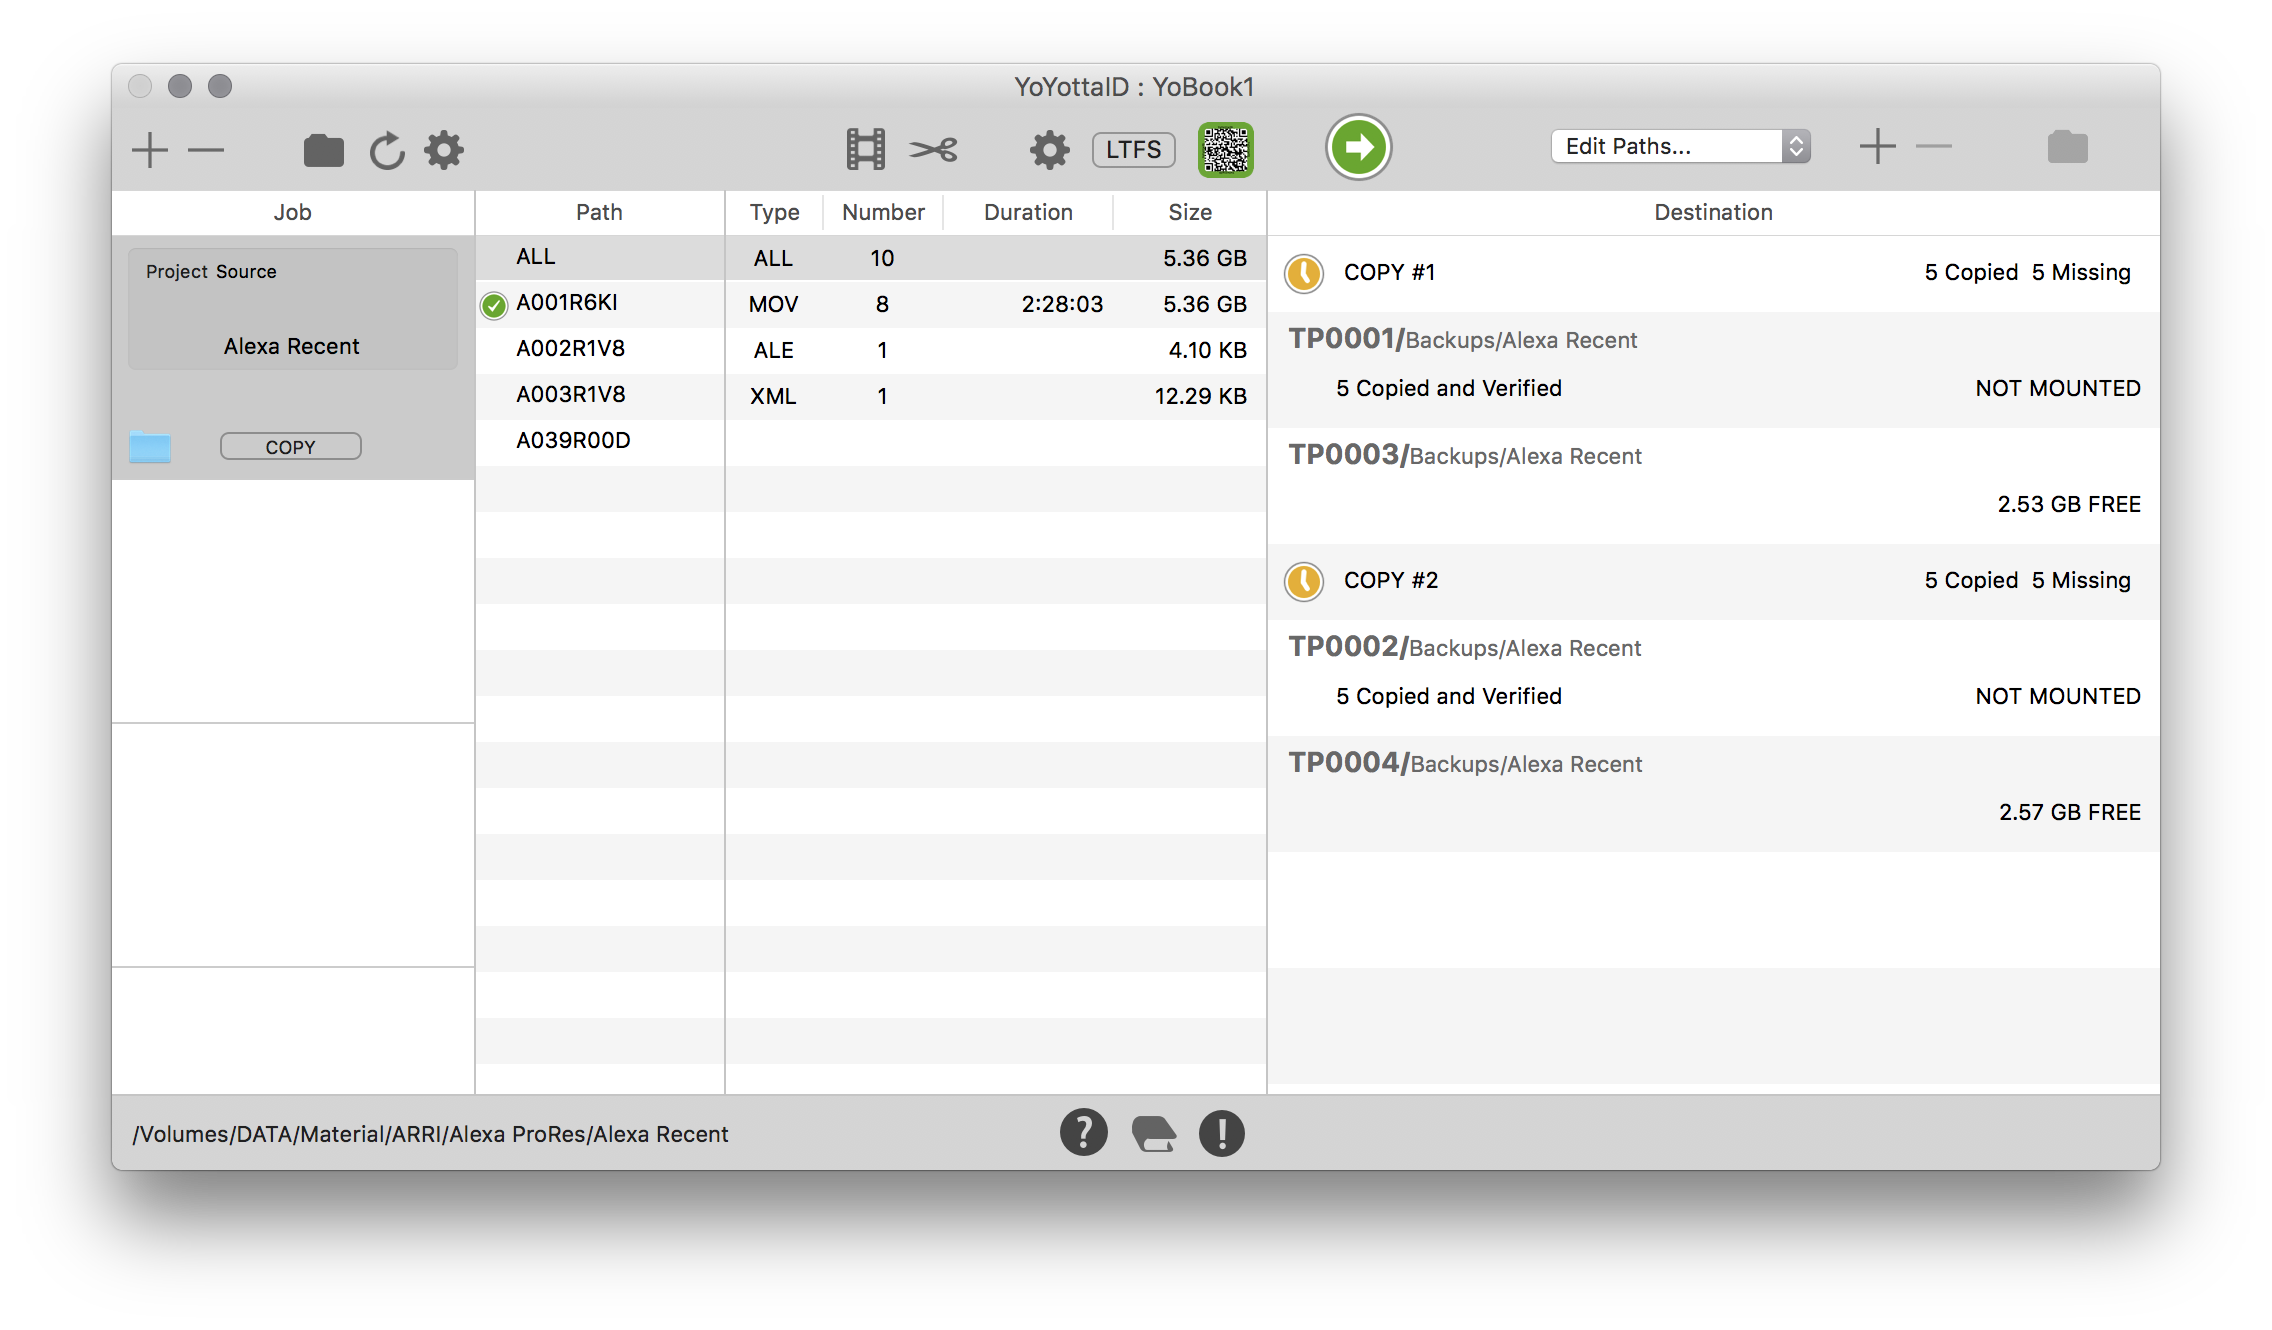
Second tapes ready
Click the green arrow to start the job.
Before starting make sure that you see the Copied and Verified count for the previous tapes as shown here.
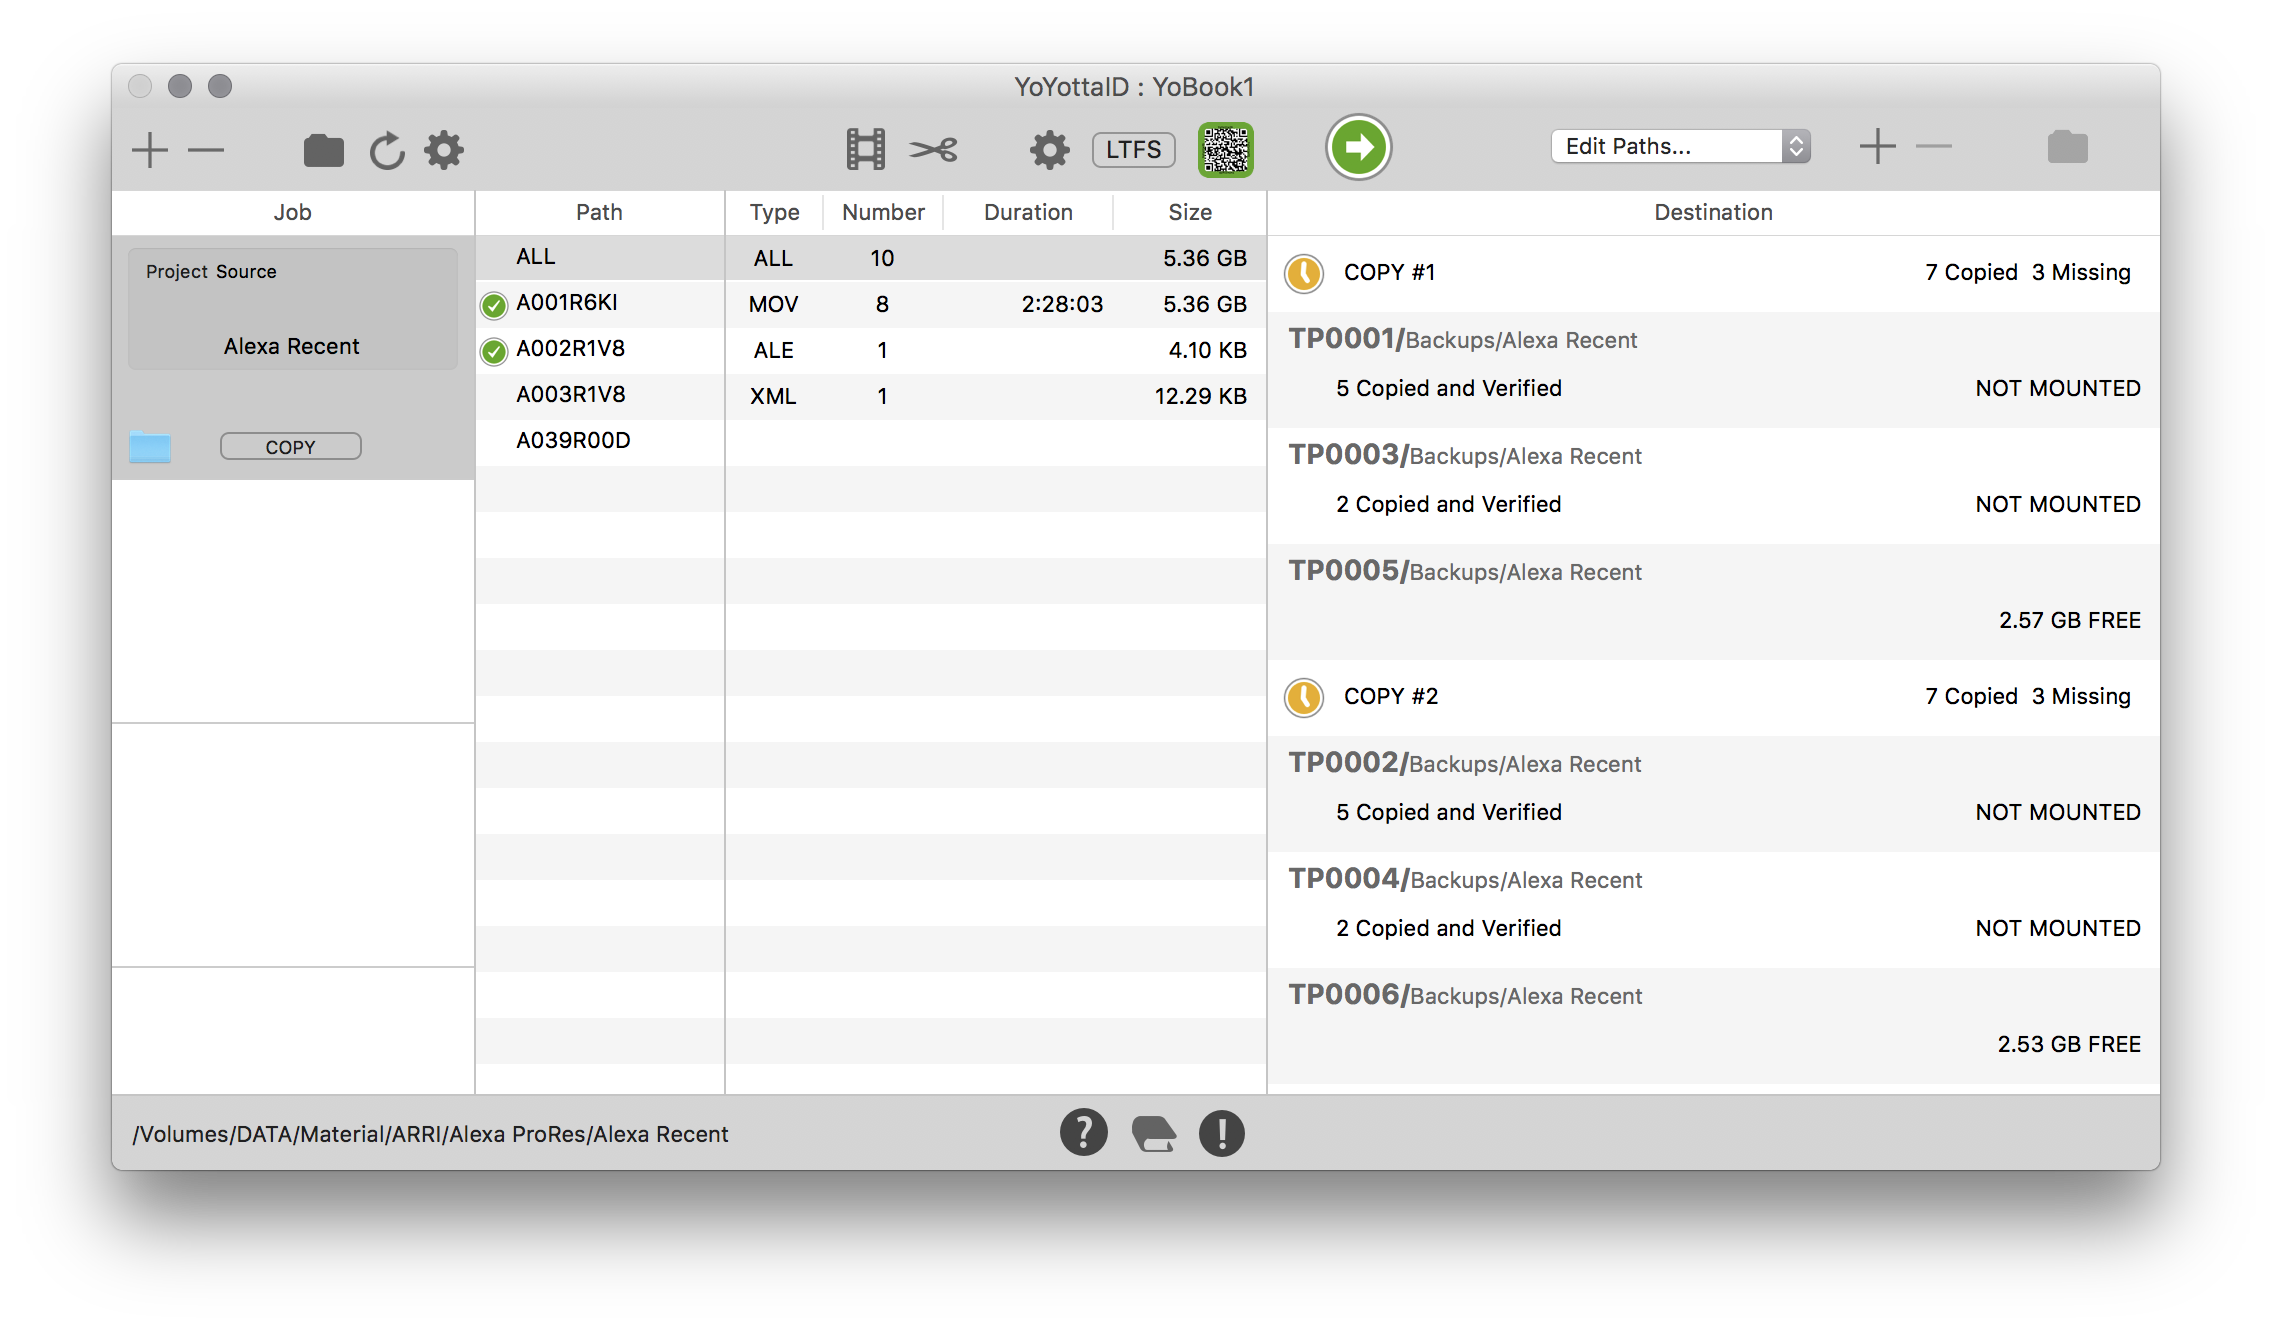
Second tapes complete
Now tapes are complete. There are some files left to copy. Eject the tapes and mount two more and start.
All finished
Now there is a green confirmation tick for COPY #1 and COPY #2. Eject the last two tapes.
Resuming a spanned job
If there is an issue during a spanned job, then the copied and verified file status for the job will be lost.
For example a power cut or if the source or destination drives are disconnected. Or if YoYotta or the Mac crashes.
Note that once a spanned job has started it is important not to open or try to adjust settings in the destination panel. Also don't remove tapes from the destination table.
Also make sure that you do NOT have Quick Verify turned on in Preferences as spanning tapes requires full verification to be enabled.
If you have tried to resume the job then you may have seen the remaining size and file count jump back to the full job size.
This means that YoYotta has not been able to resume the job, instead starting again copying onto the last tape. In this case the last tapes for each copy will need to be reformatted.
To resume the job follow these steps.
Open the LTFS panel and mount the first tape for the copy. Add this to the destination table as COPY #1 if not already there.
If performing a parallel archive to two sets of tapes, then also mount the first tape from the second copy. Add this to COPY #2 if needed.
Make sure the destination paths are set exactly the same as the previous job.
Click the refresh button above the job table.
Make sure that you see the correct number of files copied and verified in the destination table. Note that the number of files copied on each tape will be shown if the tape's COPY snapshot is selected in the Project Browser
If you don't see this then double check the destination paths to ensure they match the location of files on the tapes written so far.
Now click start, YoYotta will load each tape and then resume.
YoYotta will check the tapes and resume copying.