Destinations and Reports
Create single or multiple copy jobs complete with reports
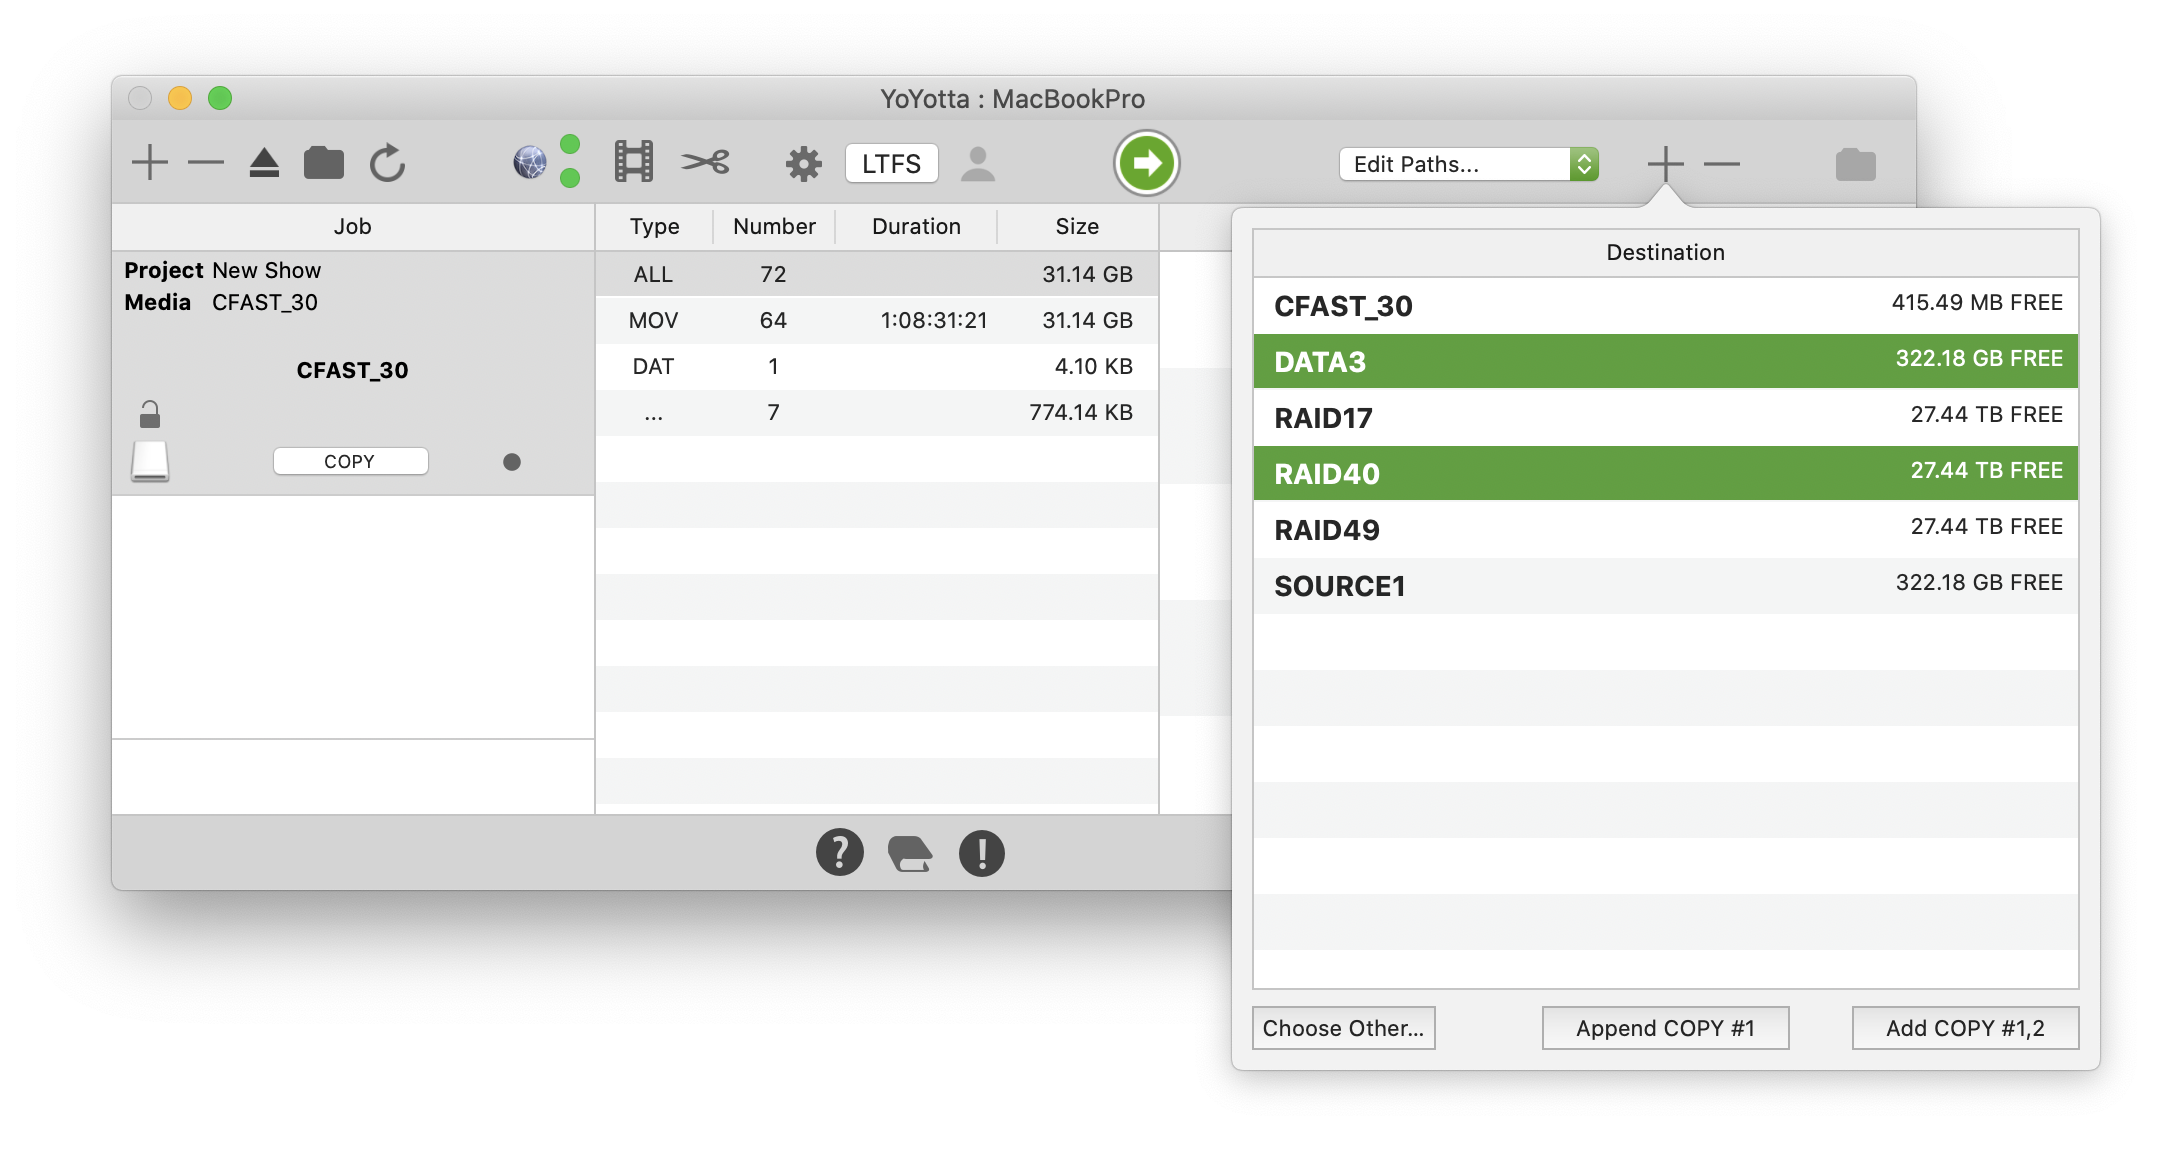
Add a destination
Mounted drives and volumes will be shown in the Destination panel.
Here a drive and an LTO tape are selected to make two copies in parallel. Click Add COPY #1,2
Or Choose Other... if the destination required is not shown in the table. This also allows selection of a destination folder inside a drive.
Or drag a destination folder from the Finder into the Destination table.
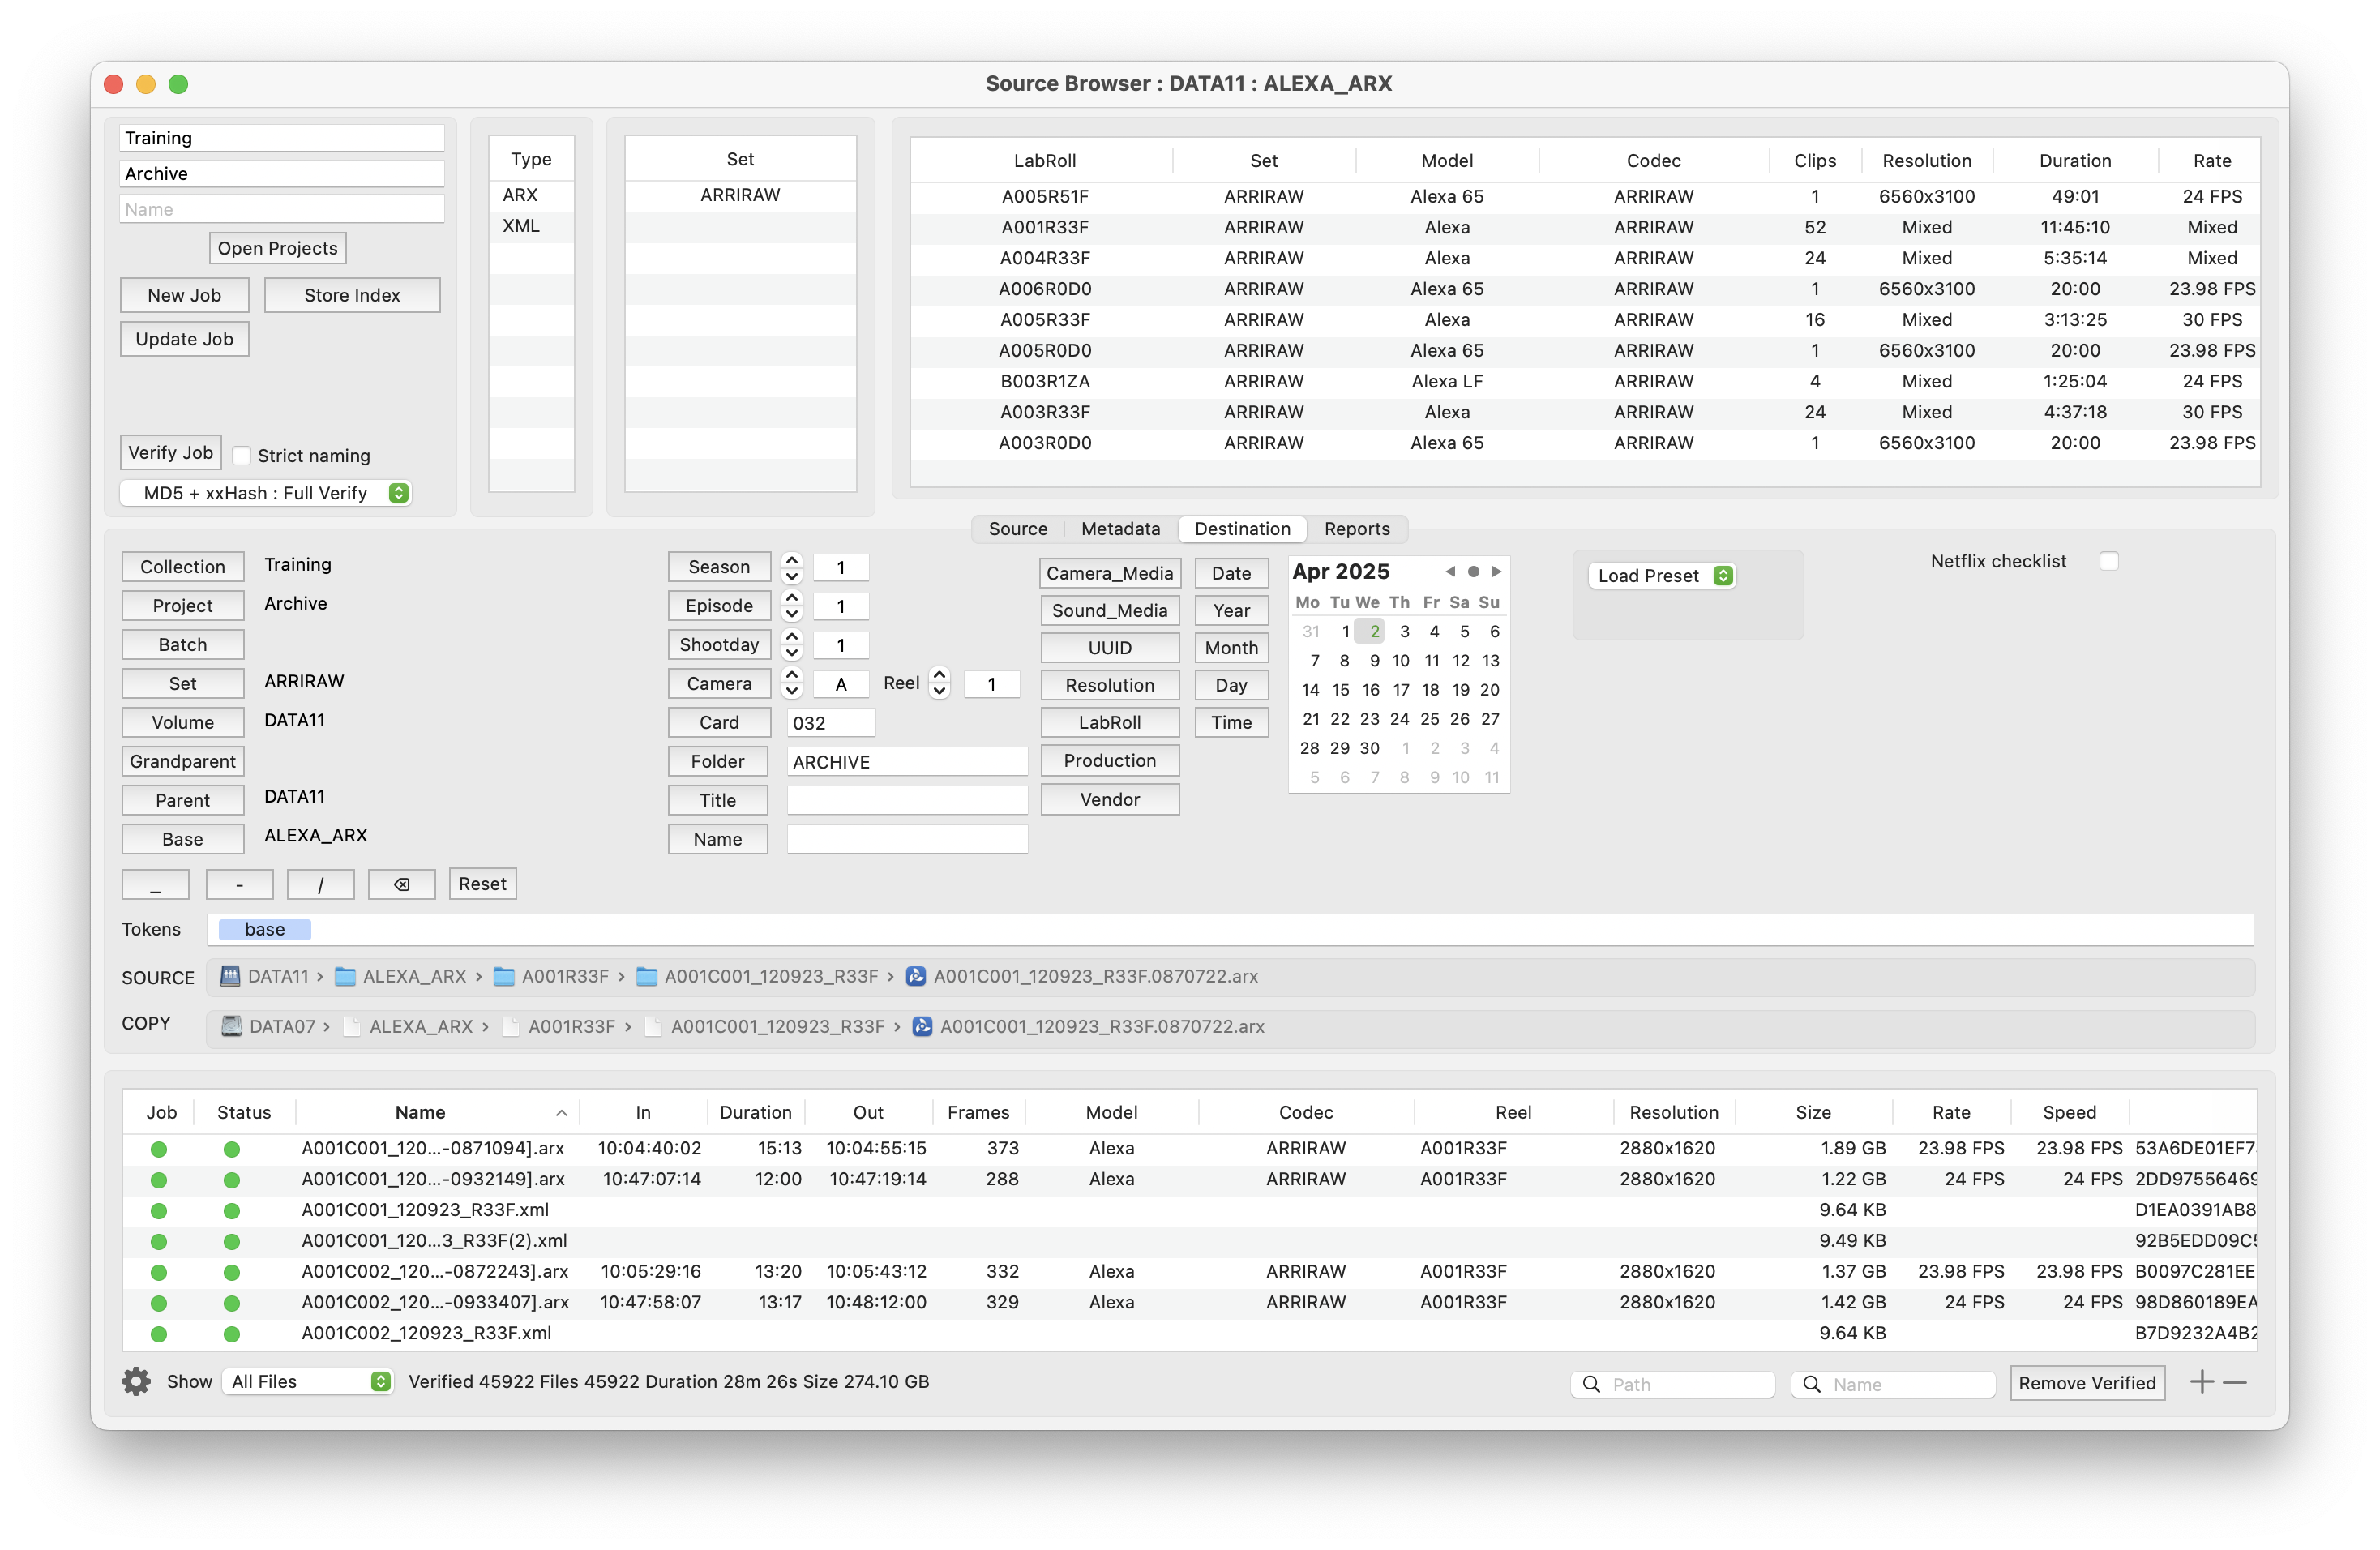
Destinations paths
To change the destination paths click the Edit Paths... button in the main panel, then click the button again to open the Source Browser.
Or open the Source Browser and then click the Destination tab.
When copying to each destination, folders can be automatically added to each file path.
The extra folders are defined by tokens that are shown in the Tokens box.
Select a file in the table and the SOURCE path is shown along with a preview of the COPY path.
So it is possible to see exactly where every file will be located when it is written to the destination drive or tape.
The source folder or folders dropped into the job table is called the base folder.
The default is to include the base folder. What does this mean ?
Say you are working with the Finder and there is a Day_1 folder with a report called shot_report.txt inside and the next days folder also has the same report inside.
Now if you copy the contents of each folders to the same destination then the shot_report.txt files will collide. Also the Day folder will not be included.
So what you would do is copy the parent folder instead of just it's contents. Now files with the same name won't collide on the destination.
It's the same with YoYotta, this job would need to have base in the destination path, otherwise the reports will collide.
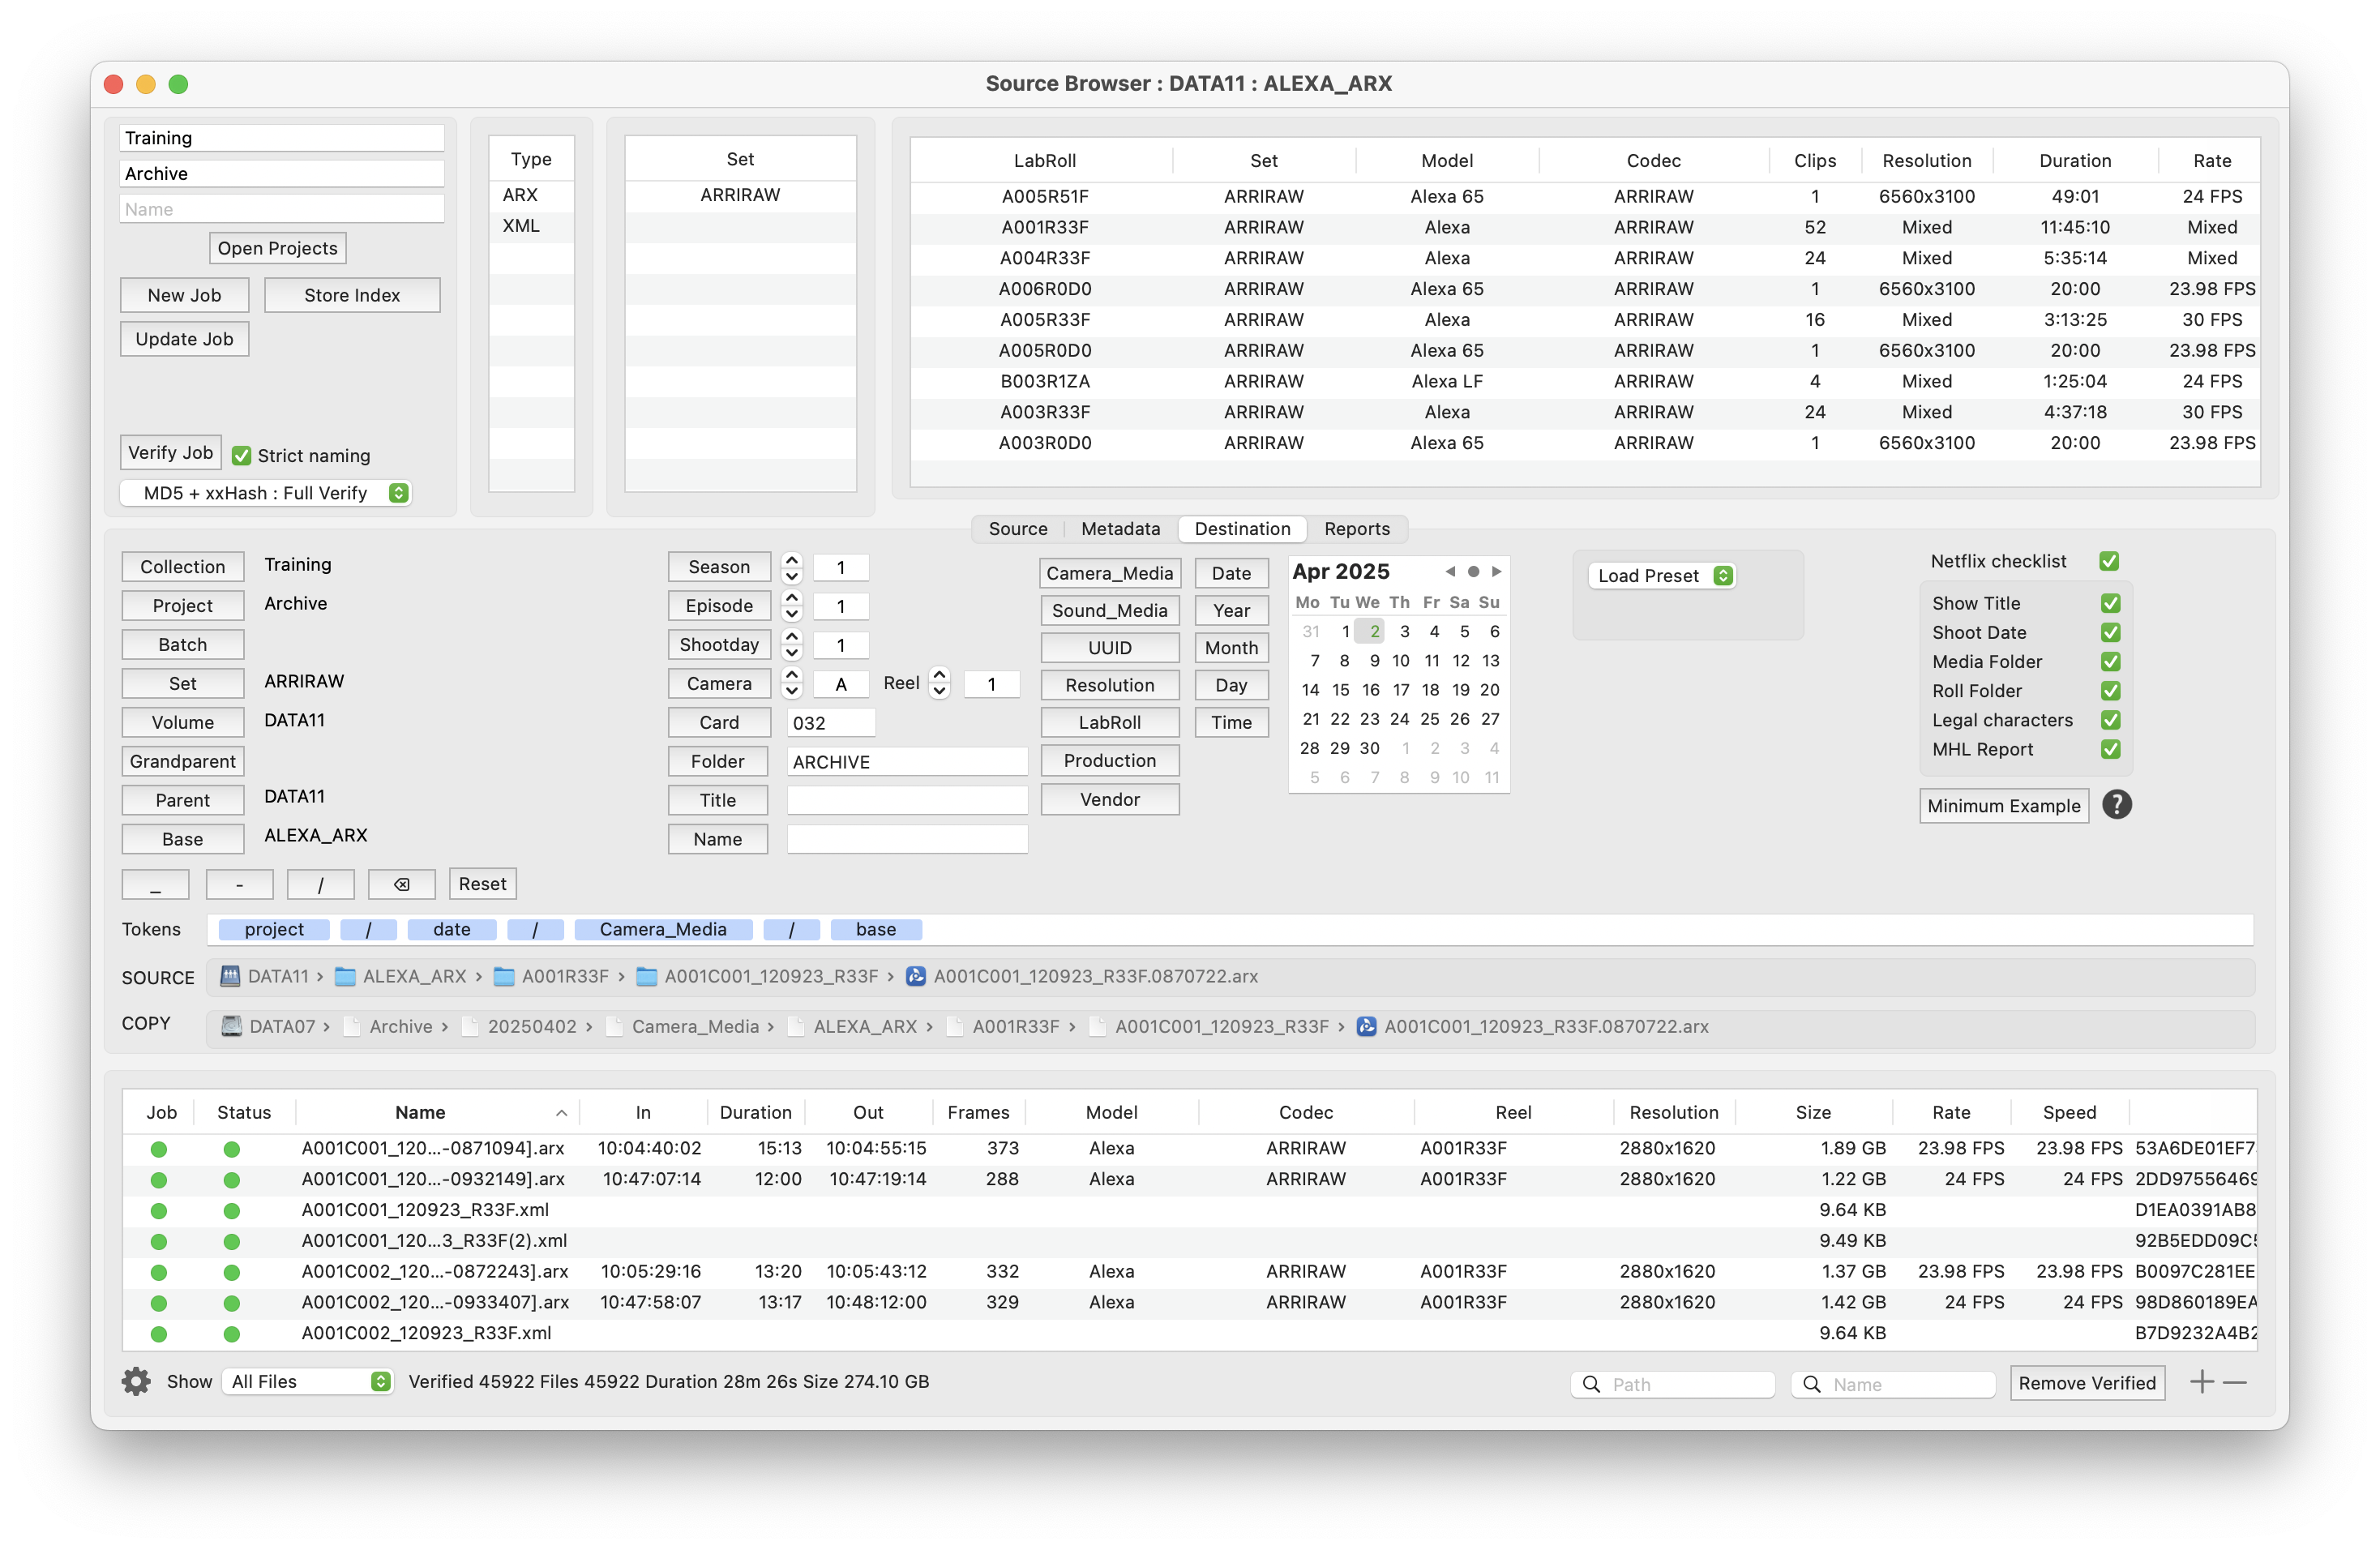
Other times the source folder would not be wanted in the destination path, for example the folder might be called ARCHIVE_FILES. In this case remove the base token.
If the source is a drive or card then the volume name will not appear as the base. Use the volume token instead.
To reset the Tokens to default (showing just the base token) click the Reset button.

In this example the tokens will add the project name, a datastamp followed by the text Camera_Media and then the base folder name.
A different date can be chosen using the calendar in the destinations panel.

The folders added by the tokens are always followed by all the original folder structure inside the job folder.
Click the button to add a token to the path, there are extra tokens available, to use them type the token name into the token path area.
The folders above the job folder are called the parent, grandparent and greatgrandparent folders.
The shootday button inserts the text DAY_ and token shootday which become a 3 digit day like DAY_007.
Another example is the text SHOOT_DAY_ and token shootday2 will become SHOOT_DAY_07.
For timestamp folders use the Date, Year, Month, Day and Time buttons or hours, minutes and seconds. Years yyyy or yy. Months mm. Date dd.
There is more information about folder structure for studio delivery here.
Destinations reports and email
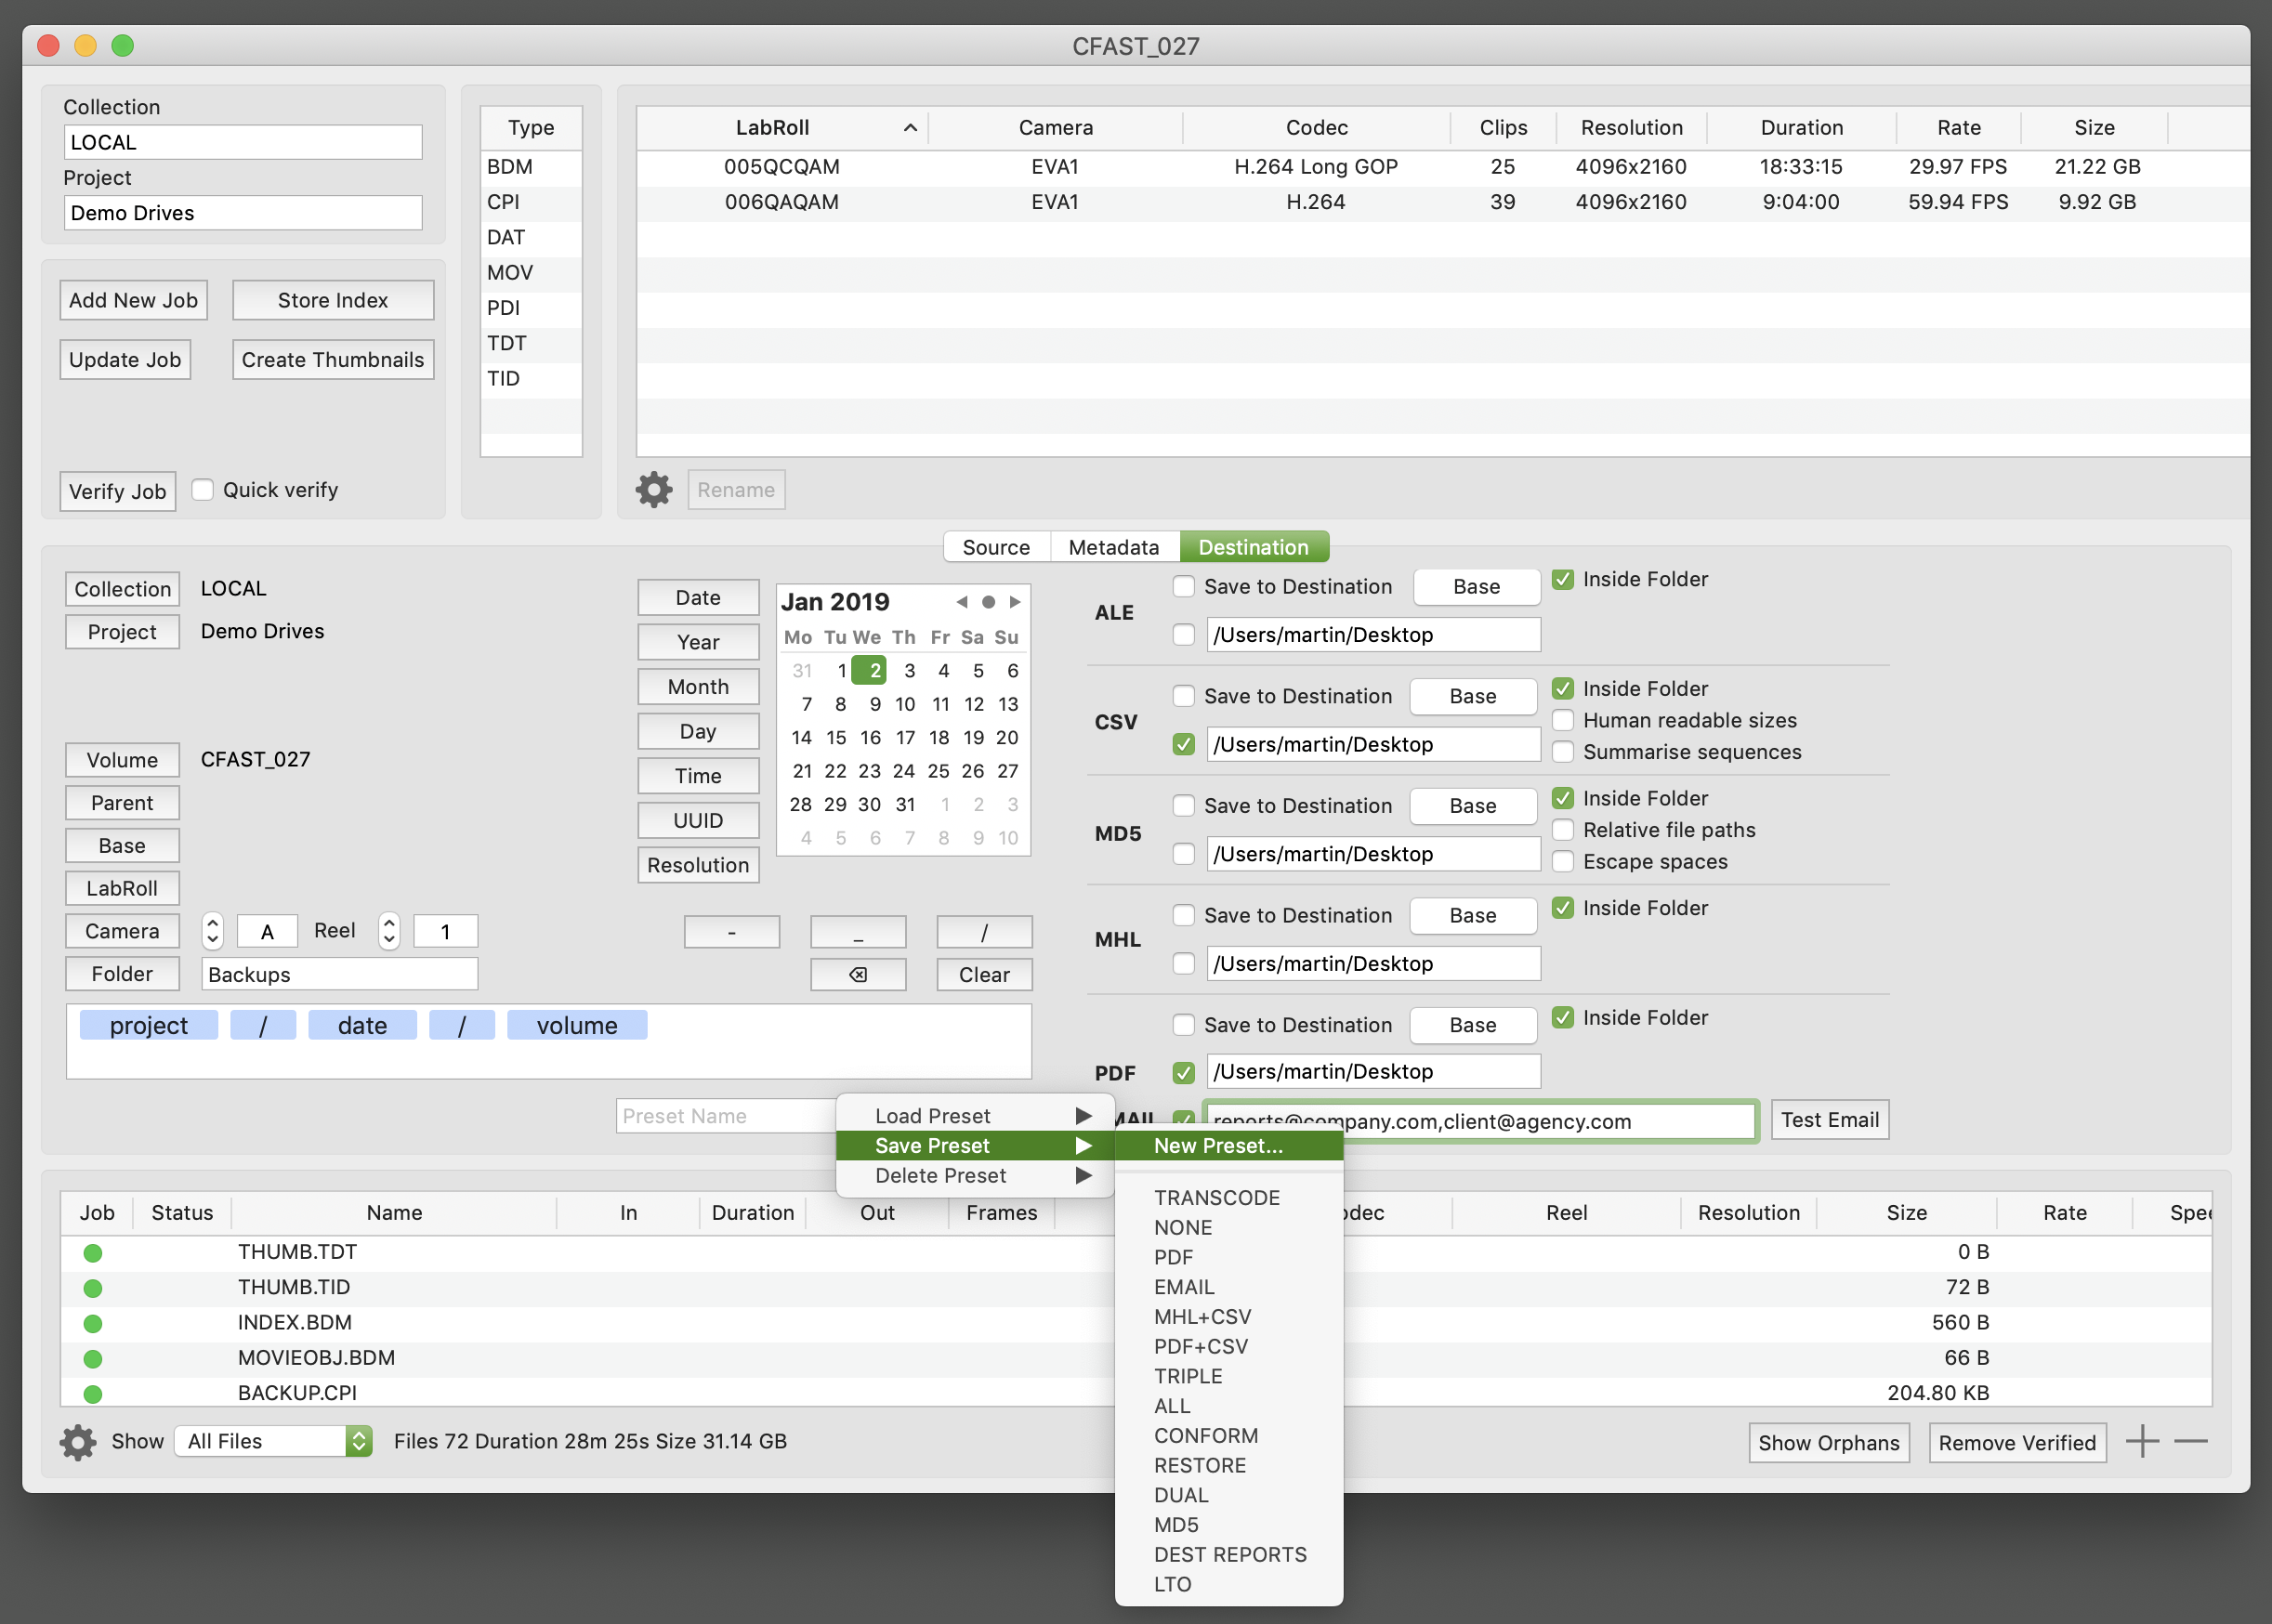
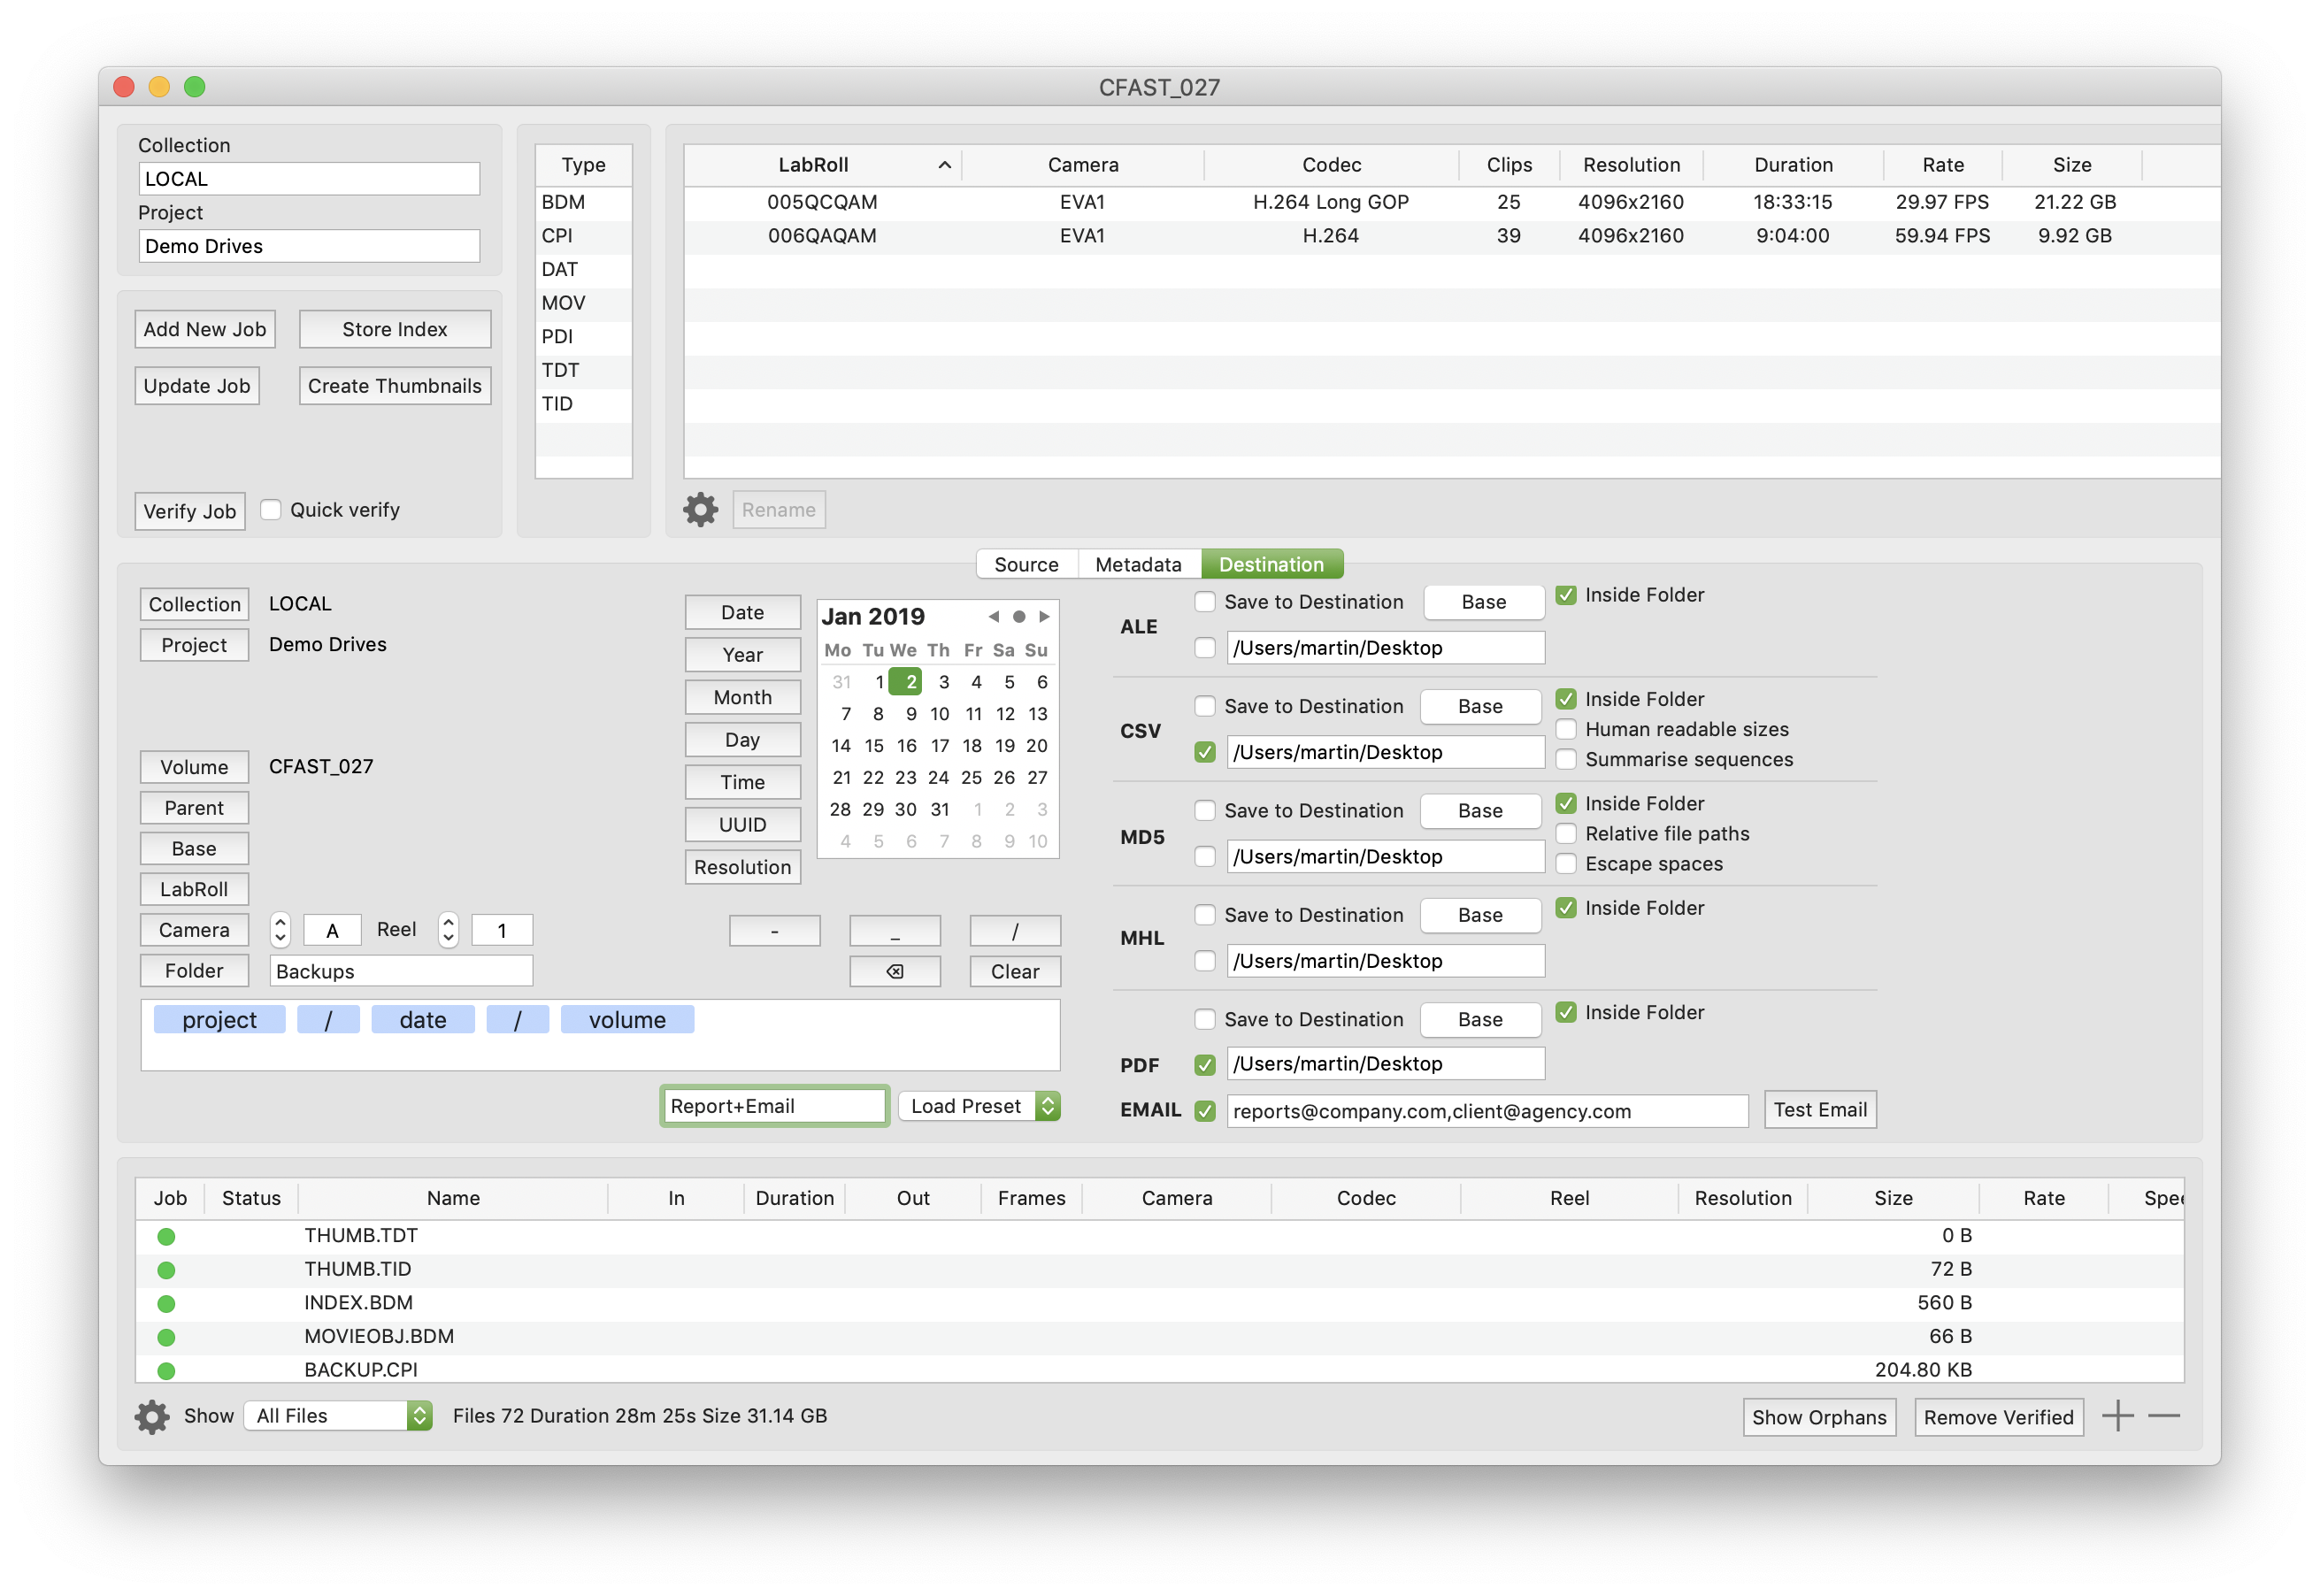
YoYotta creates reports when a copy job completes. You can select ALE for Avid, CSV for use with a spreadsheet, MD5 which has all the file checksums, MHL which is an XML formatted report and a PDF with full metadata.
The reports can be stored on a local drive and also saved to the destination.
In this example MD5, MHL and PDF reports will be saved to the desktop.
Date and time stamped reports will also be generated locally on a volume called SOURCE.
This setup can be stored as a preset for easy reuse. See below for details about Presets.
Setup for archive job with MD5, MHL and PDF reports
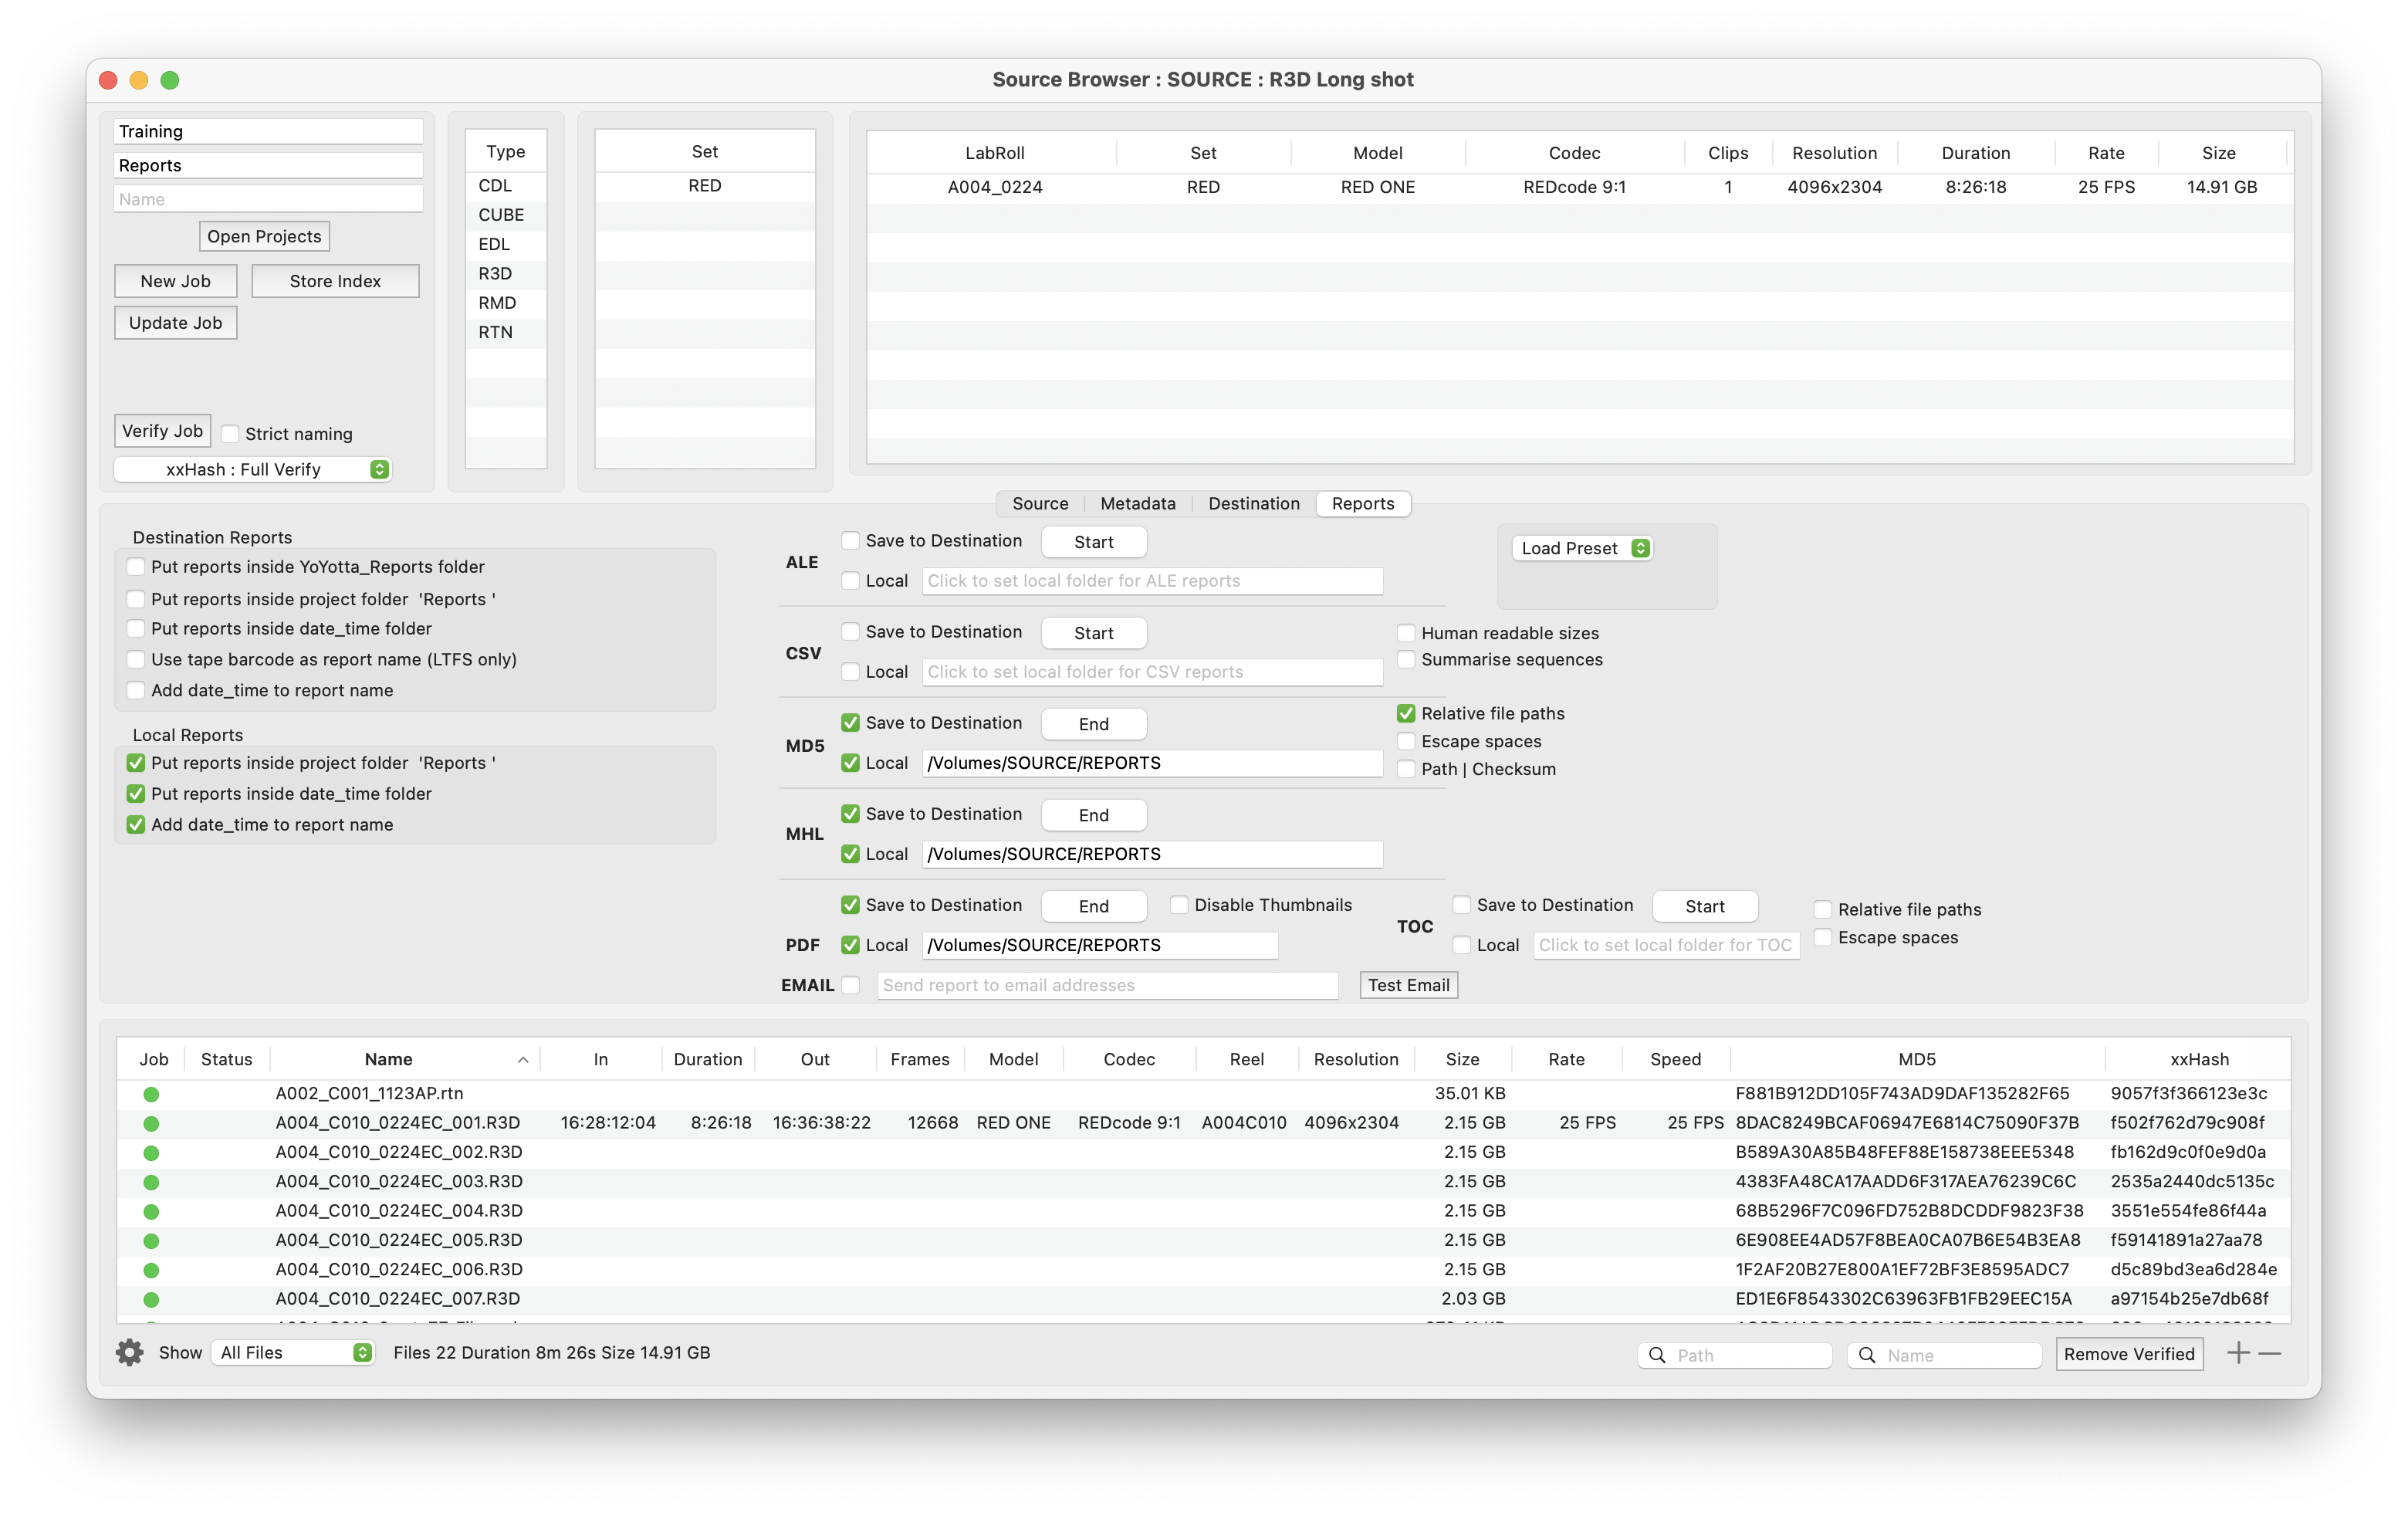
Destination reports can be saved at the Start or top level of the destination drive or tape.
Select End and then the reports will be created inside the last of destination folders specified by the tokens shown above.
When writing multiple sessions to a drive or tape choose End, so that the reports are kept separate.
Optionally turn on Inside YoYotta_Reports Folder for the reports to be created inside a folder.
There are also checkboxes for project and timestamped folders for both local and destination reports.
Note that MHL reports are not put into a folder as they have relative paths inside that rely on them being alongside your archive files.
Show full or relative file paths in Destination MD5 + TOC reports. Local MD5 + TOC reports will always contain full paths.
If the EMAIL option is enabled, then an email will be sent containing the PDF report. Add one or more email addresses separated by commas to receive PDF reports.
If there is a problem during the copy or verification, then a warning email will be sent and no reports will be generated.
There is a size limit of 18MB for PDF reports sent by email. Larger reports will just be saved.
If there is a firewall then to enable report emails allow outgoing connections to https://yo.tc port 443
MD5 report options
If MD5 reports are required then ensure the verification mode is set to MD5 + xxHash so that MD5 checksums are generated.Here are some examples of a single line from a MD5 report with different YoYotta output formats.
Note that the paths include spaces in folder names. It is best to avoid using spaces.
The recommended MD5 settings are Relative file paths enabled and the other two options disabled.
This is the most common MD5 report format in use in the industry and it is very simple to parse without any issues.
An MD5 checksum followed by the relative path from the root of the media.
8718743f1b1bfbb113b0a453045aef5c BMD 17K/BMD RAW/A001_02161425_C148.braw
This is a line from the report with the Escape spaces option. It adds a \ before any spaces.
8718743f1b1bfbb113b0a453045aef5c BMD\ 17K/BMD\ RAW/A001_02161425_C148.braw
This is with the Path | Checksum option. It shows the path first followed by a | character, then the MD5 checksum.
BMD 17K/BMD RAW/A001_02161425_C148.braw|8718743f1b1bfbb113b0a453045aef5c
Finally this is with both options enabled. It shows the path with escaped spaces, followed by a | character, then the MD5 checksum.
BMD\ 17K/BMD\ RAW/A001_02161425_C148.braw|8718743f1b1bfbb113b0a453045aef5c
Copy of a project folder or multiple source folders
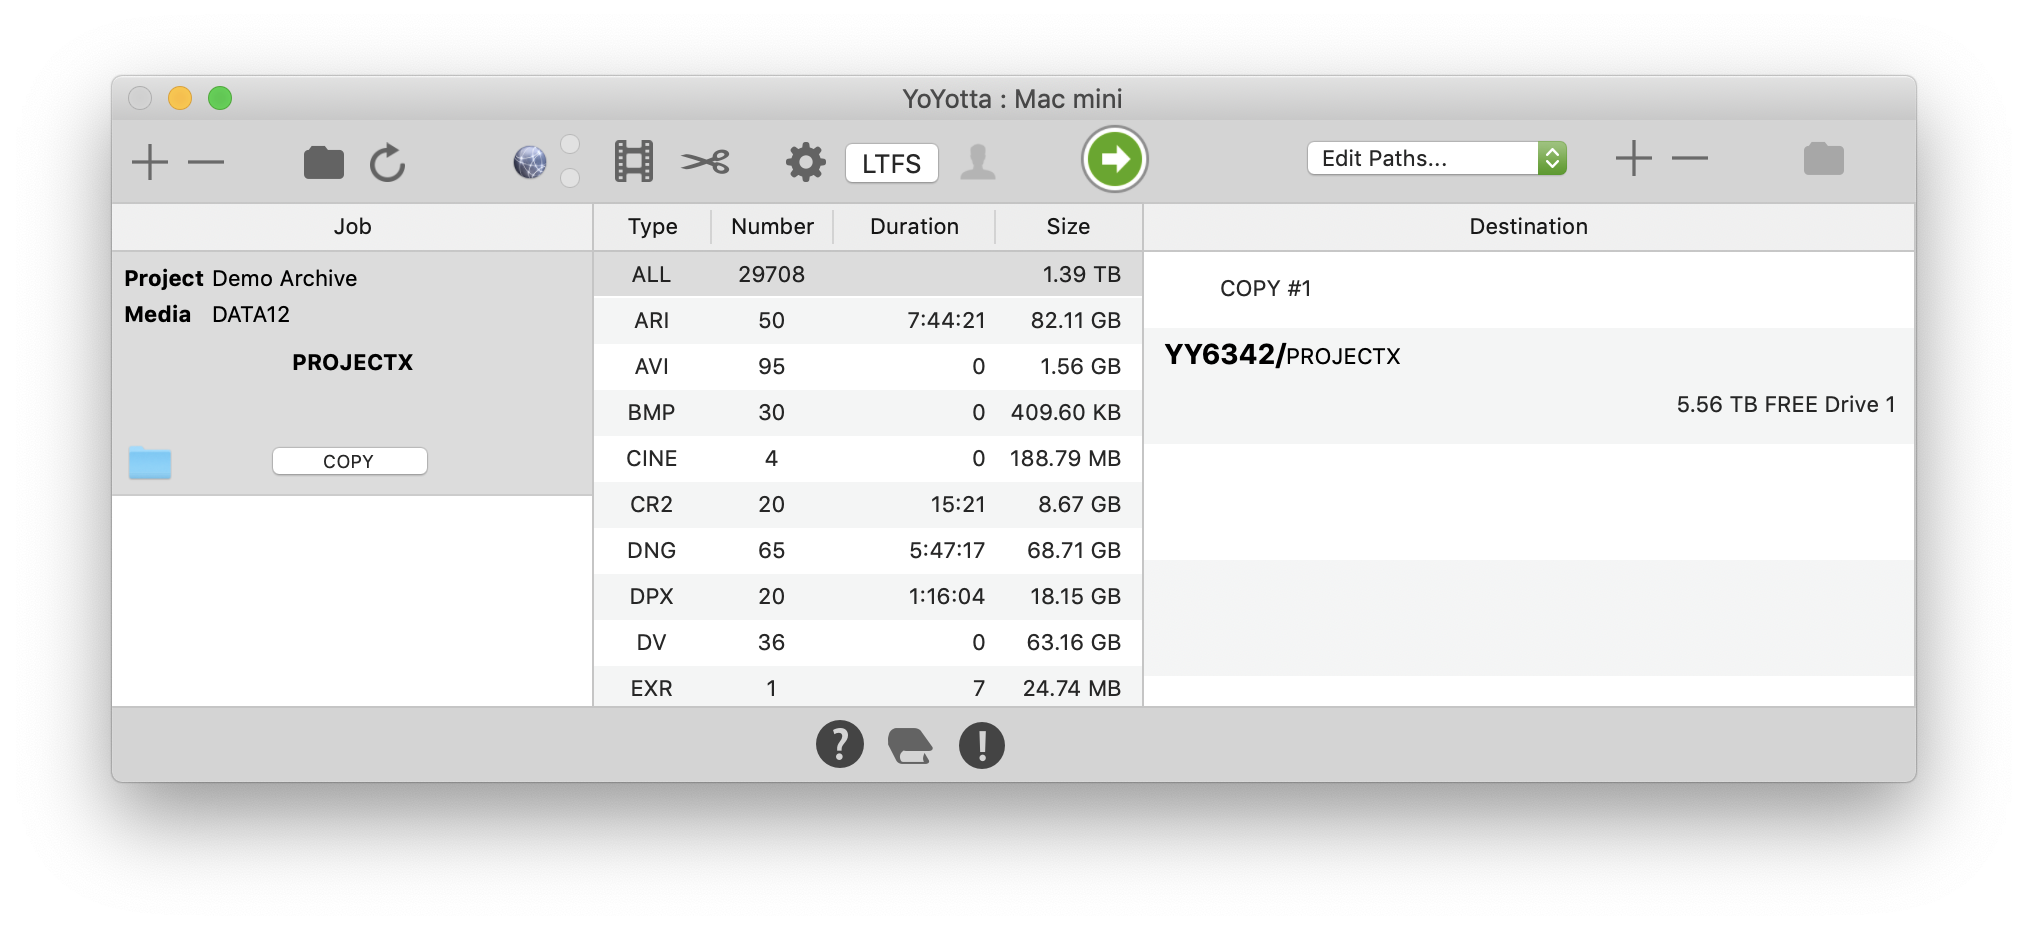
This job is going to copy from a folder called PROJECTX to a tape YY6342. The base folder is needed as part of the archive folder structure, so the destination path tokens have been set to base.
If multiple source folders are dropped in as a job then usually you will want to have base included in the path to preserve the first folder name or 'base' from each source.
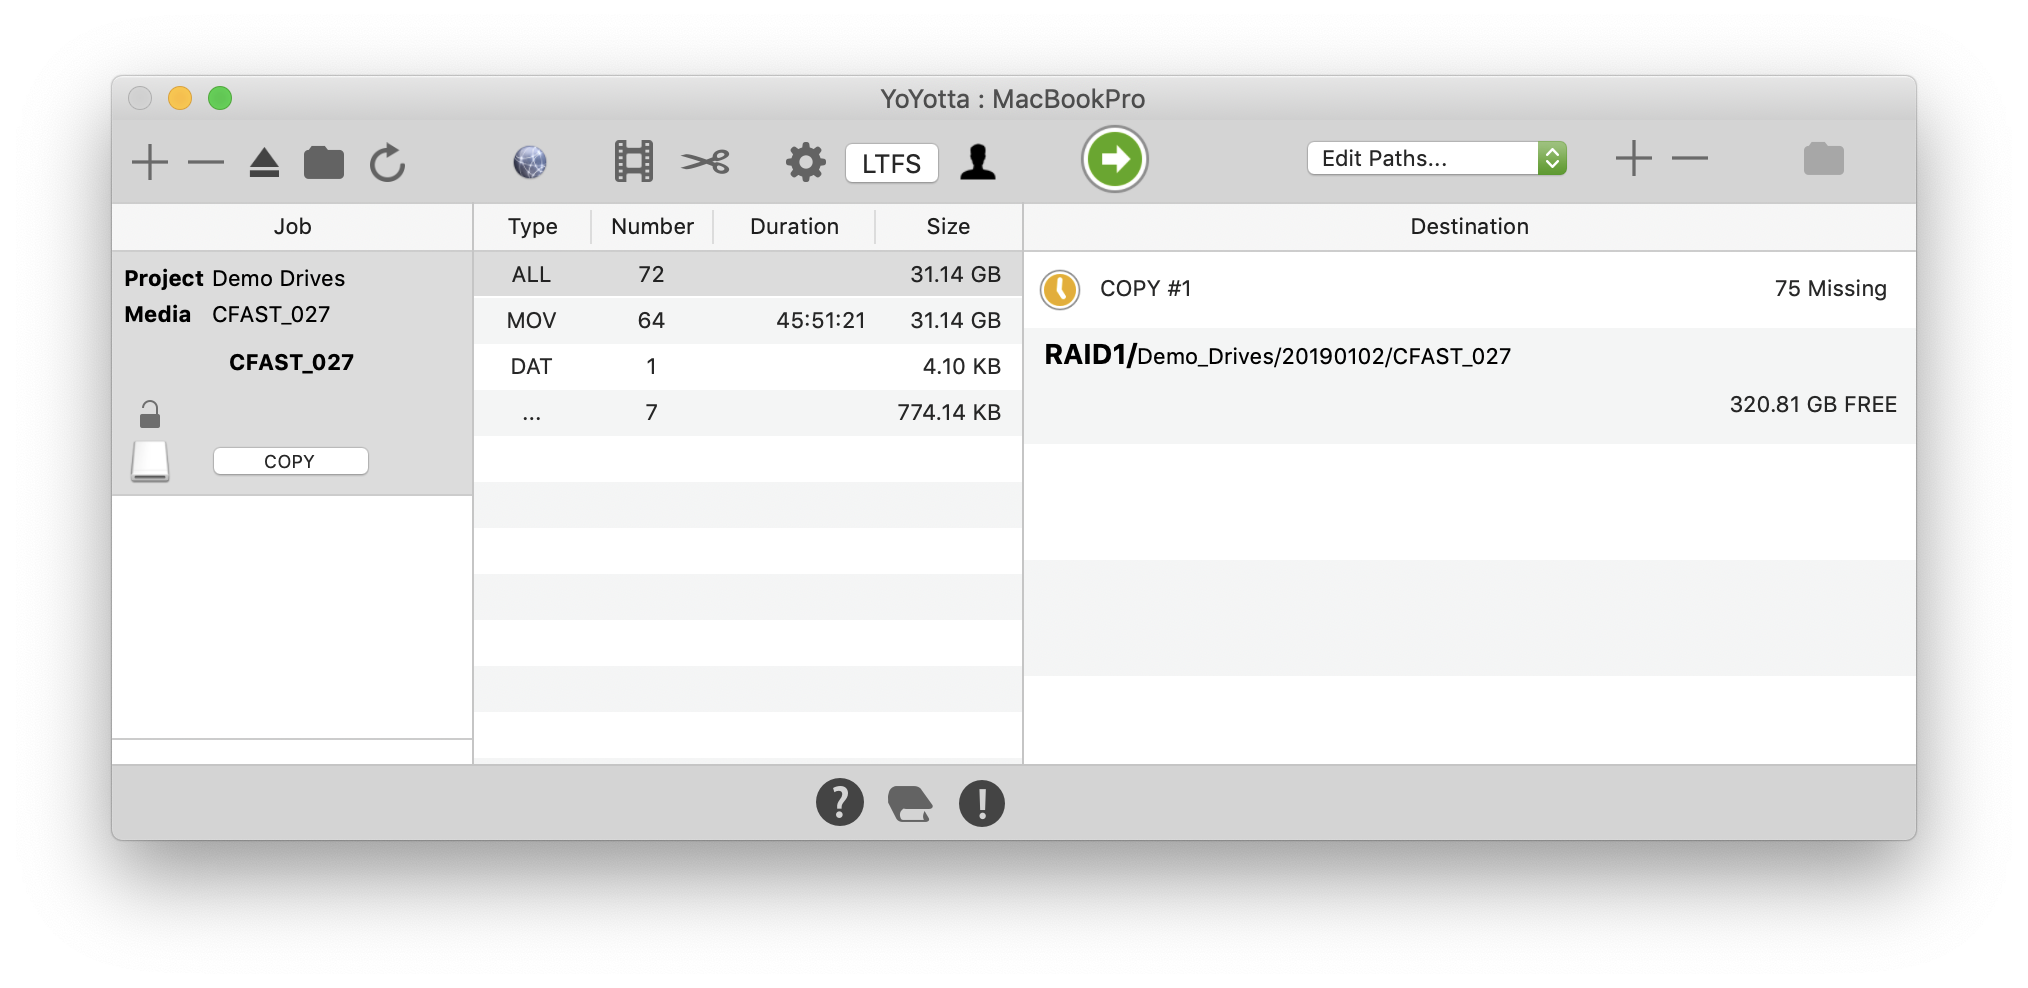
Copy of a camera card or entire volume
This job is going to copy from CFAST_27 to RAID1. The destination paths have been set to project, date and volume. These optional folders are always followed by the original camera card folder structure.

Copy from a scratch folder
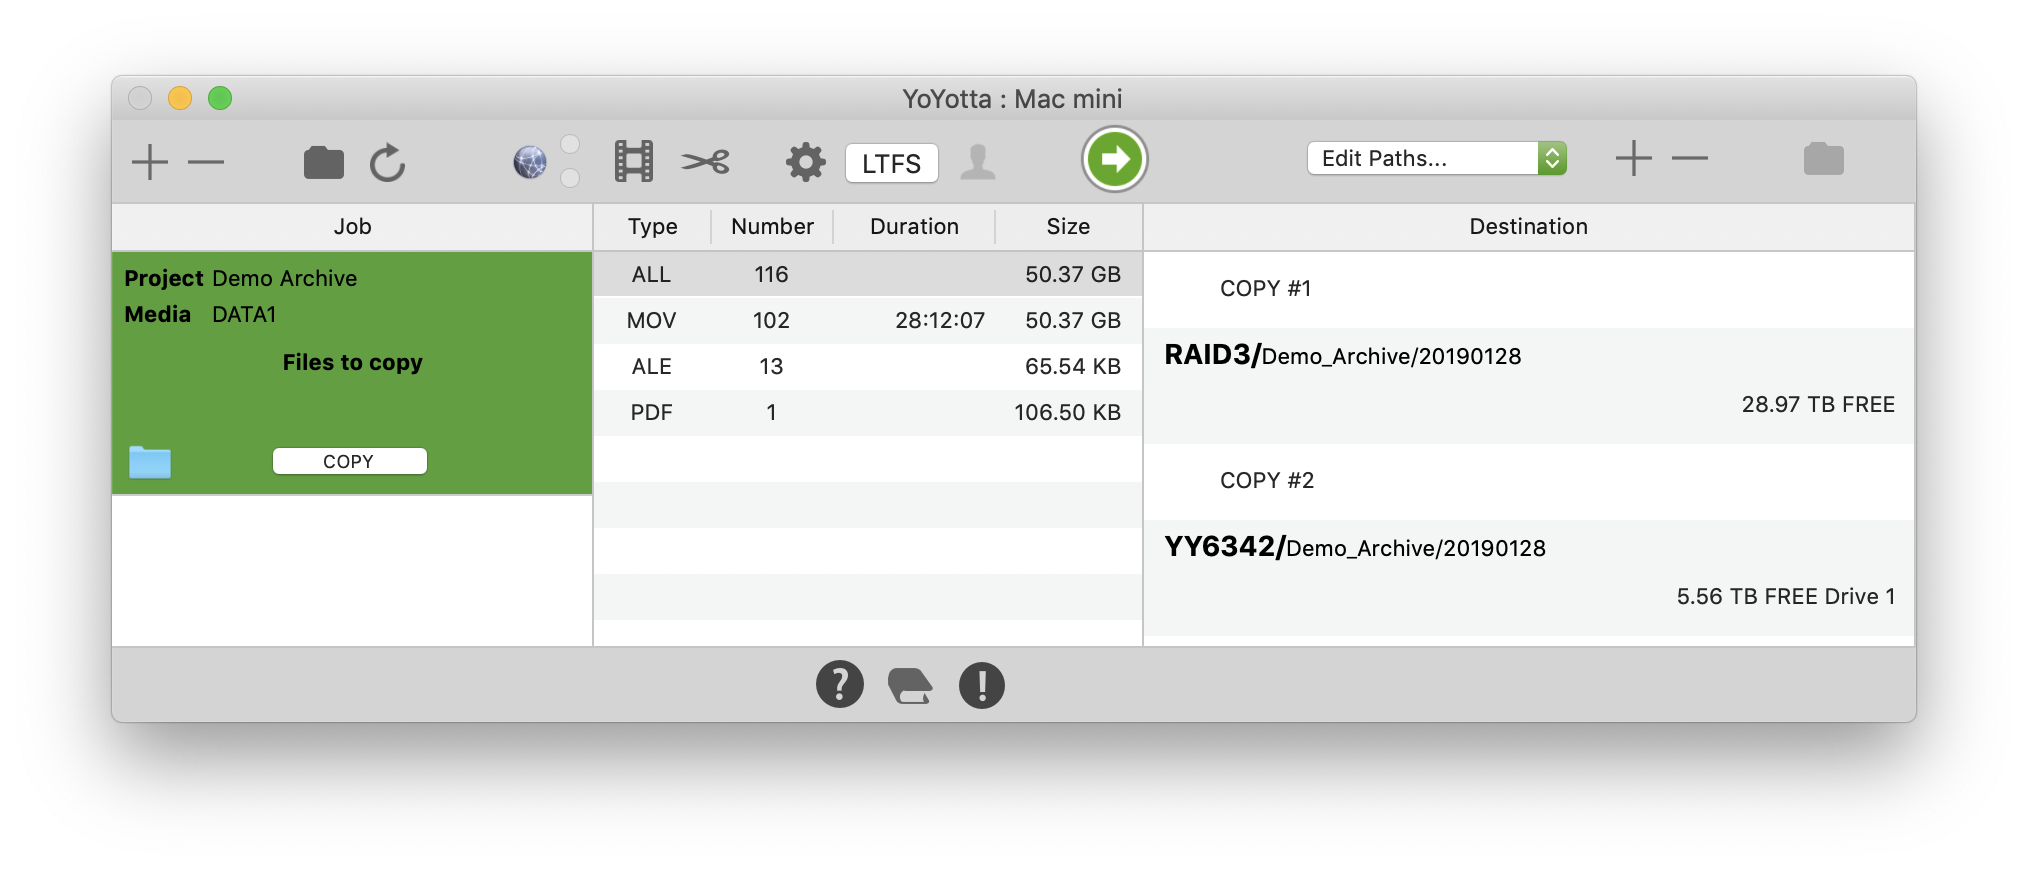
The job is going to copy from the source folder Files to copy to RAID3 and tape YY6342.
The destination paths have been set to project and date.
The base folder has not been included as this is not needed as part of the archive folder structure.

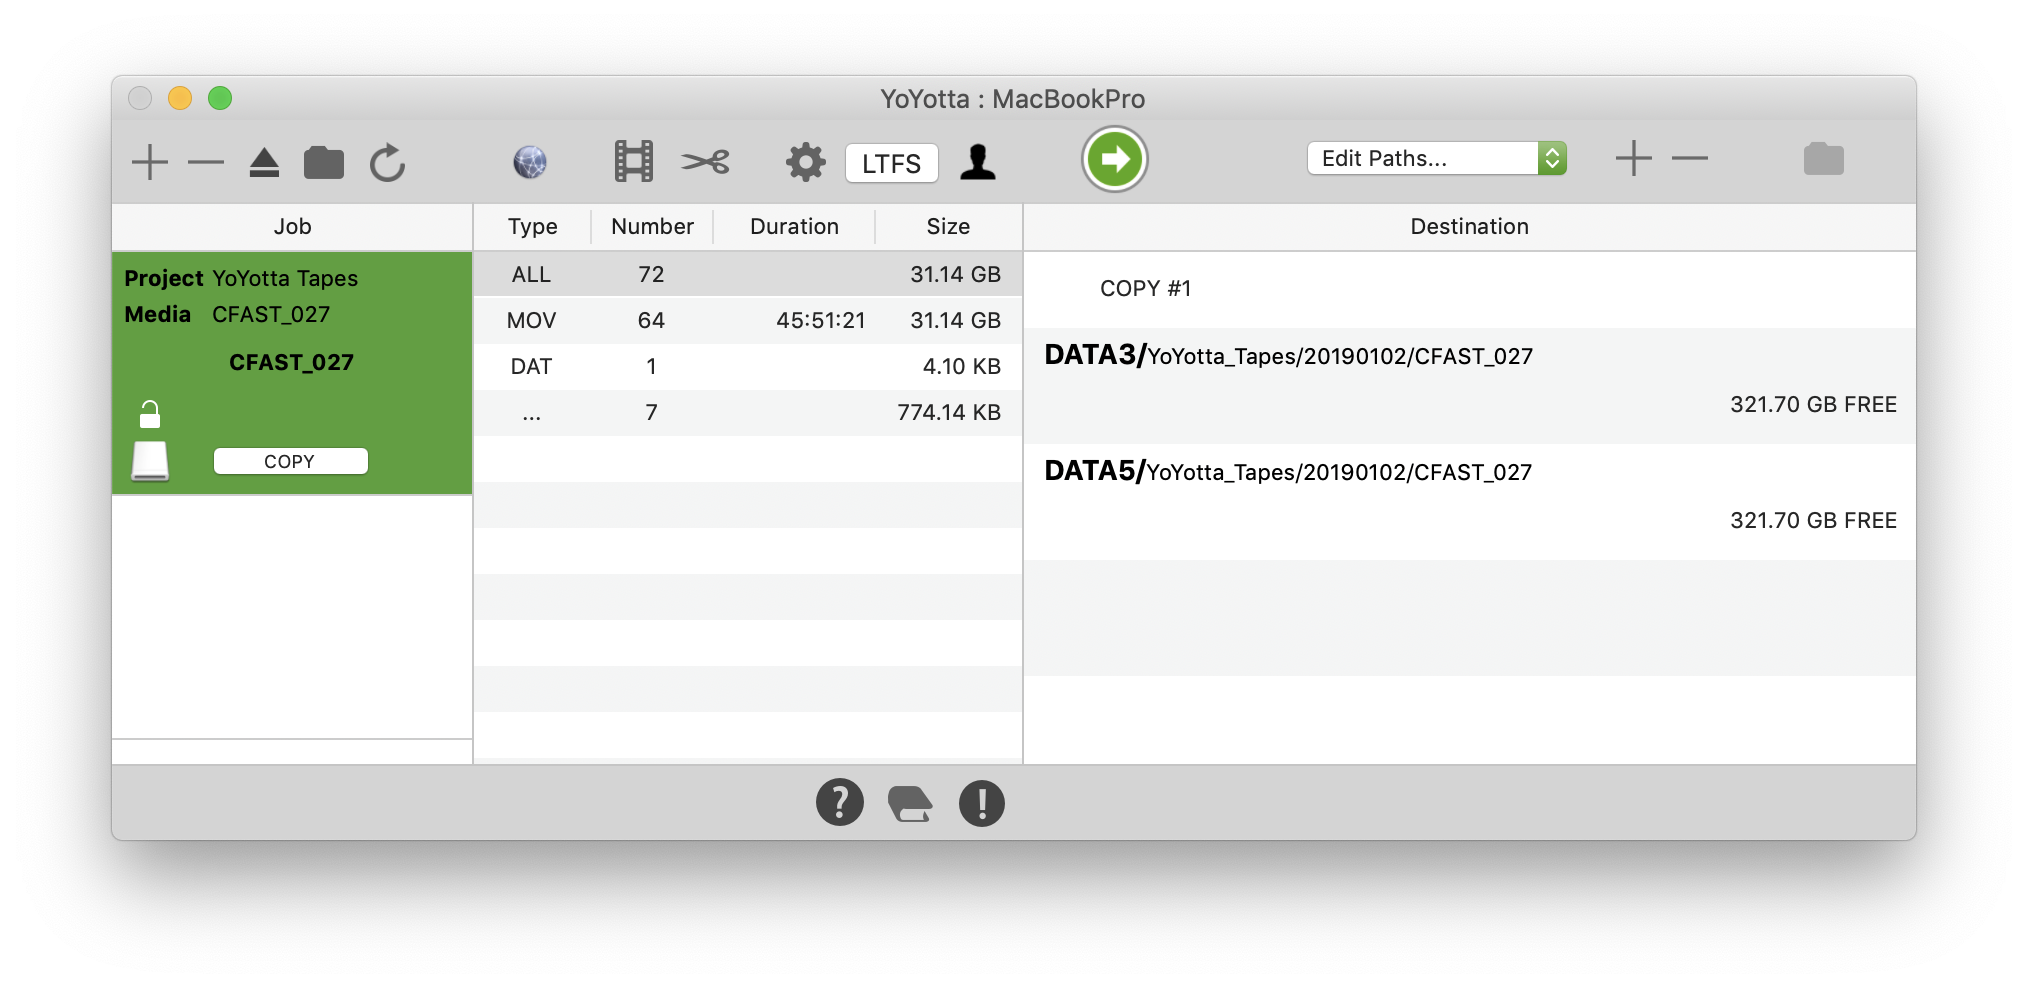
Save paths and reports as a Preset
As a shortcut the path structure and report choices can be saved as a preset. The preset can then be chosen from the Edit Paths menu.
The preset always saves the destination media. When recalling a preset if there are no destinations, then those in the preset will be recalled. If you have already setup a destination then recalling the preset will leave it unchanged.

Create duplicate copies
Here the source material will be copied in parallel to DATA3 and DATA5. With multiple LTO drives you can create multiple tape copies in parallel. With just one tape drive then you will need to repeat the job with a new tape. You can also make hard drive and tape copies in parallel. Add up to eight LTO drive options to YoYotta.
All copies will run at the speed of the slowest drive. So you may want to run two separate jobs so that one copy is available before the other.
If making multiple tape copies in a single job, then the tapes should be the same generation and the drives should be the same make.
The source data is just read once, MD5 and xxHash checksums created and then is written to each destination drive in parallel. This saves a lot of time and also considerably reduces the source bandwidth required.
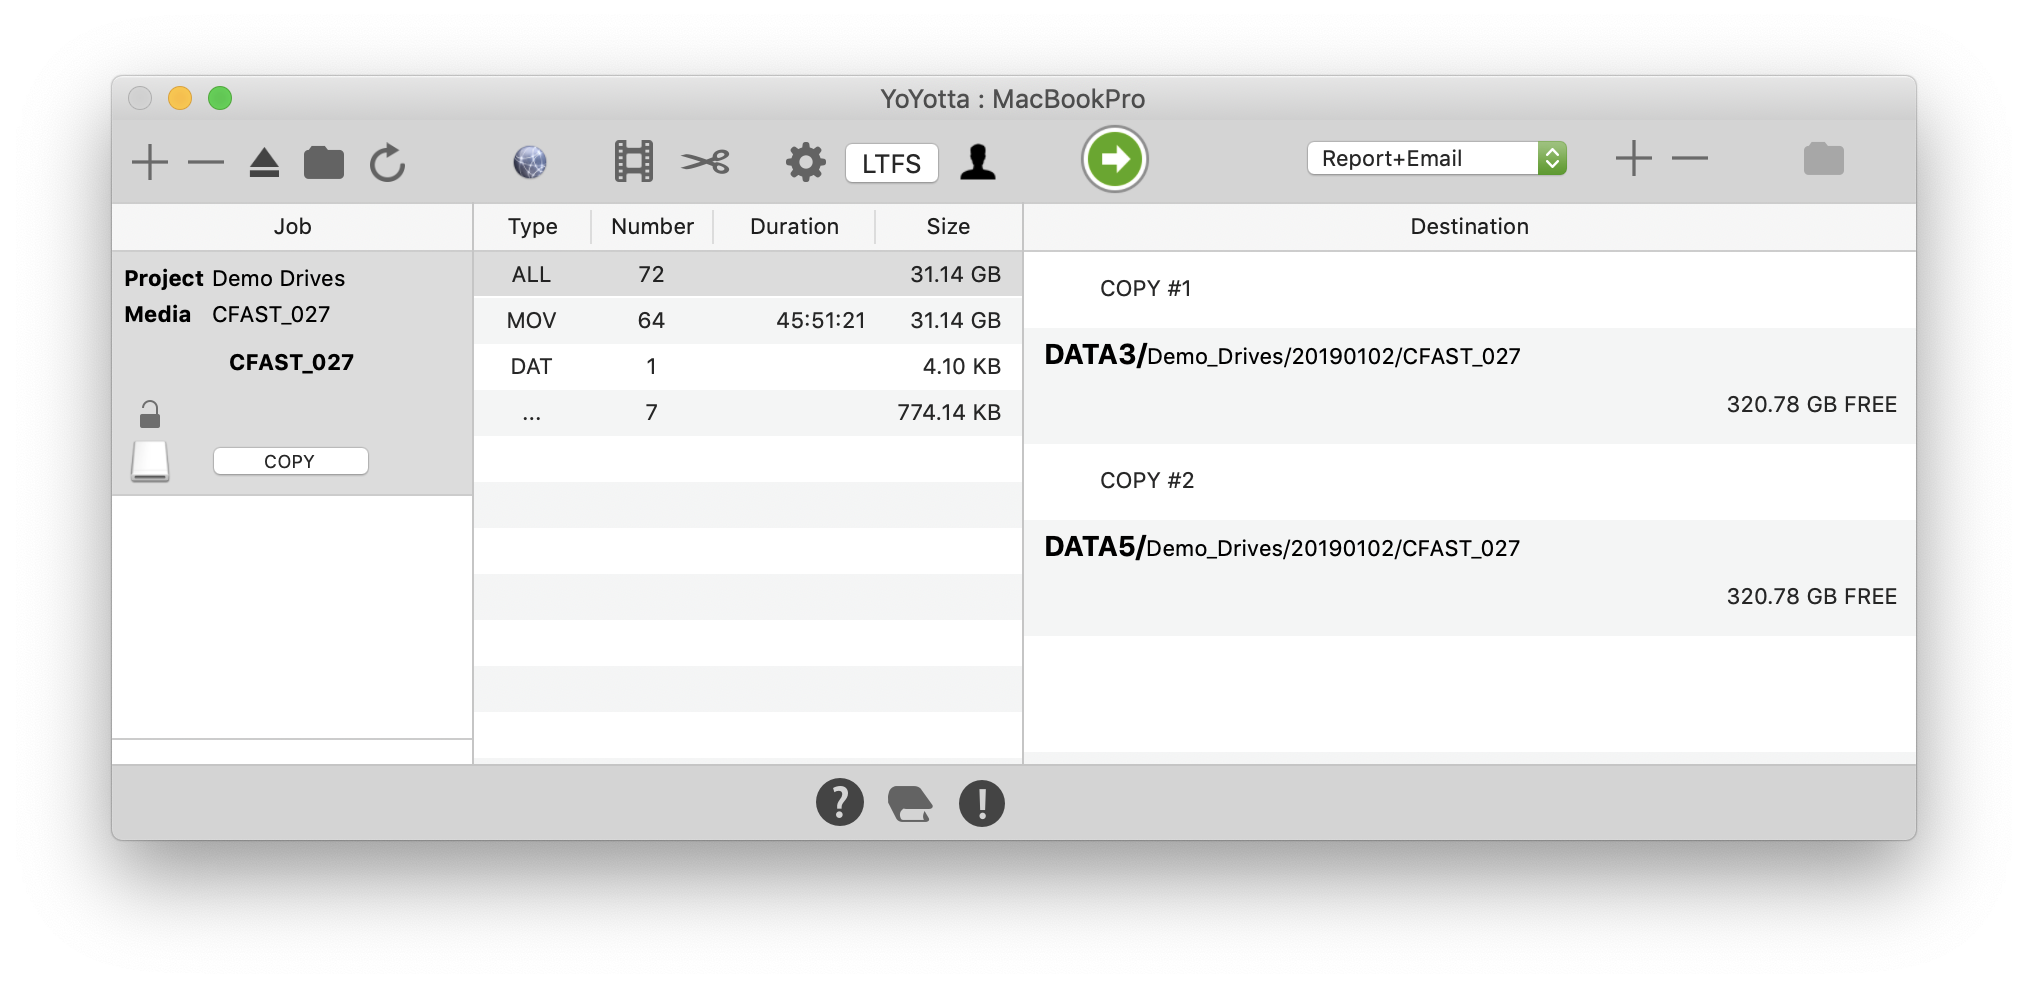
Two duplicate copies
COPY #1 will be written to DATA3 and COPY #2 to DATA5. When complete both destinations will contain the same files.
If two LTO tape copies are needed but only one tape drive is available, then when the job is complete, remove COPY #1 and add the safety tape as a new COPY #1. Then start the job again.
Spanning copy
Copy a large source by spanning across multiple drives or tapes. This job will make just one copy and will use DATA3 until it is full, then it will use DATA5. Append to COPY #1 rather than adding new media.