Project Browser
Open Project Browser
Click the book icon at the bottom of the main panel to open the Project Browser.
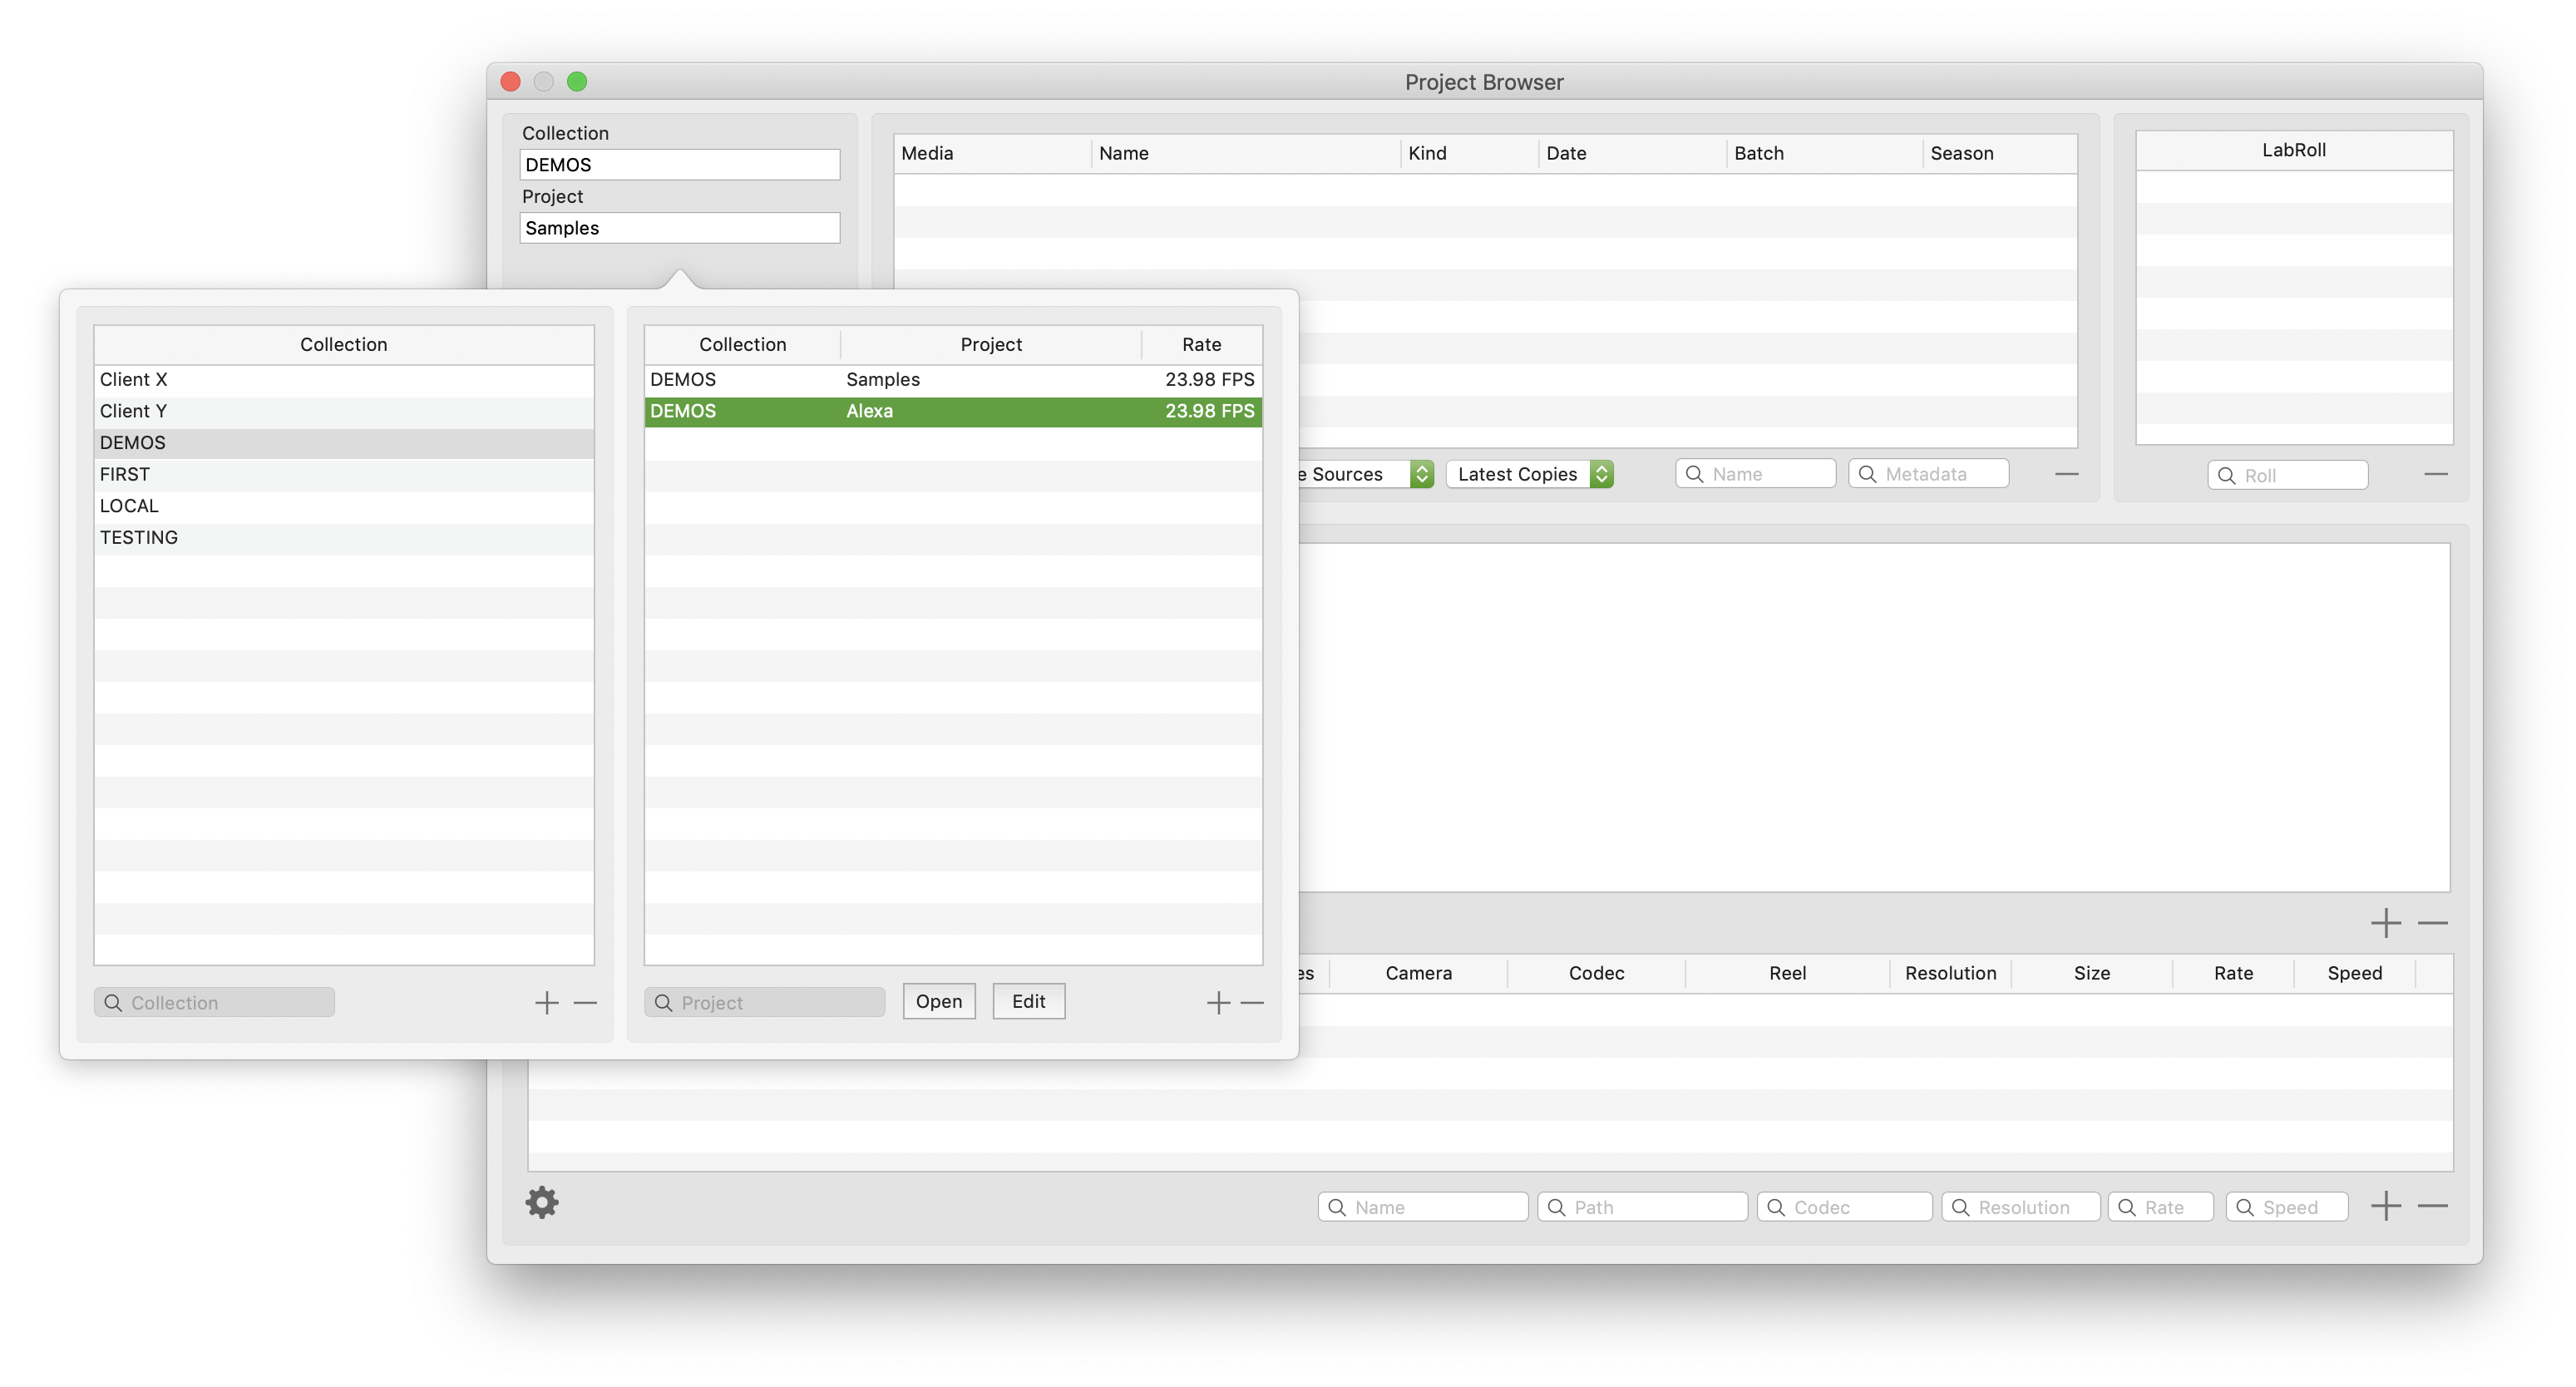
Click in the top left on the Collection and Project information to see all your Collections
and Projects.
Collections are a group of Projects.
Collections names could be clients, years, type of work or there can be just one collection
for all projects.
Select a collection, double click a project or select a project and click Open.
Opening a project does not affect existing jobs. Existing jobs will retain their
current project.
New jobs will use the current project open in the Project Browser.
Each job can be assigned to a different project, the project name is shown in the
job table.
Open the Source Browser to change the project for an existing job.
See Assigning a job to a different project.
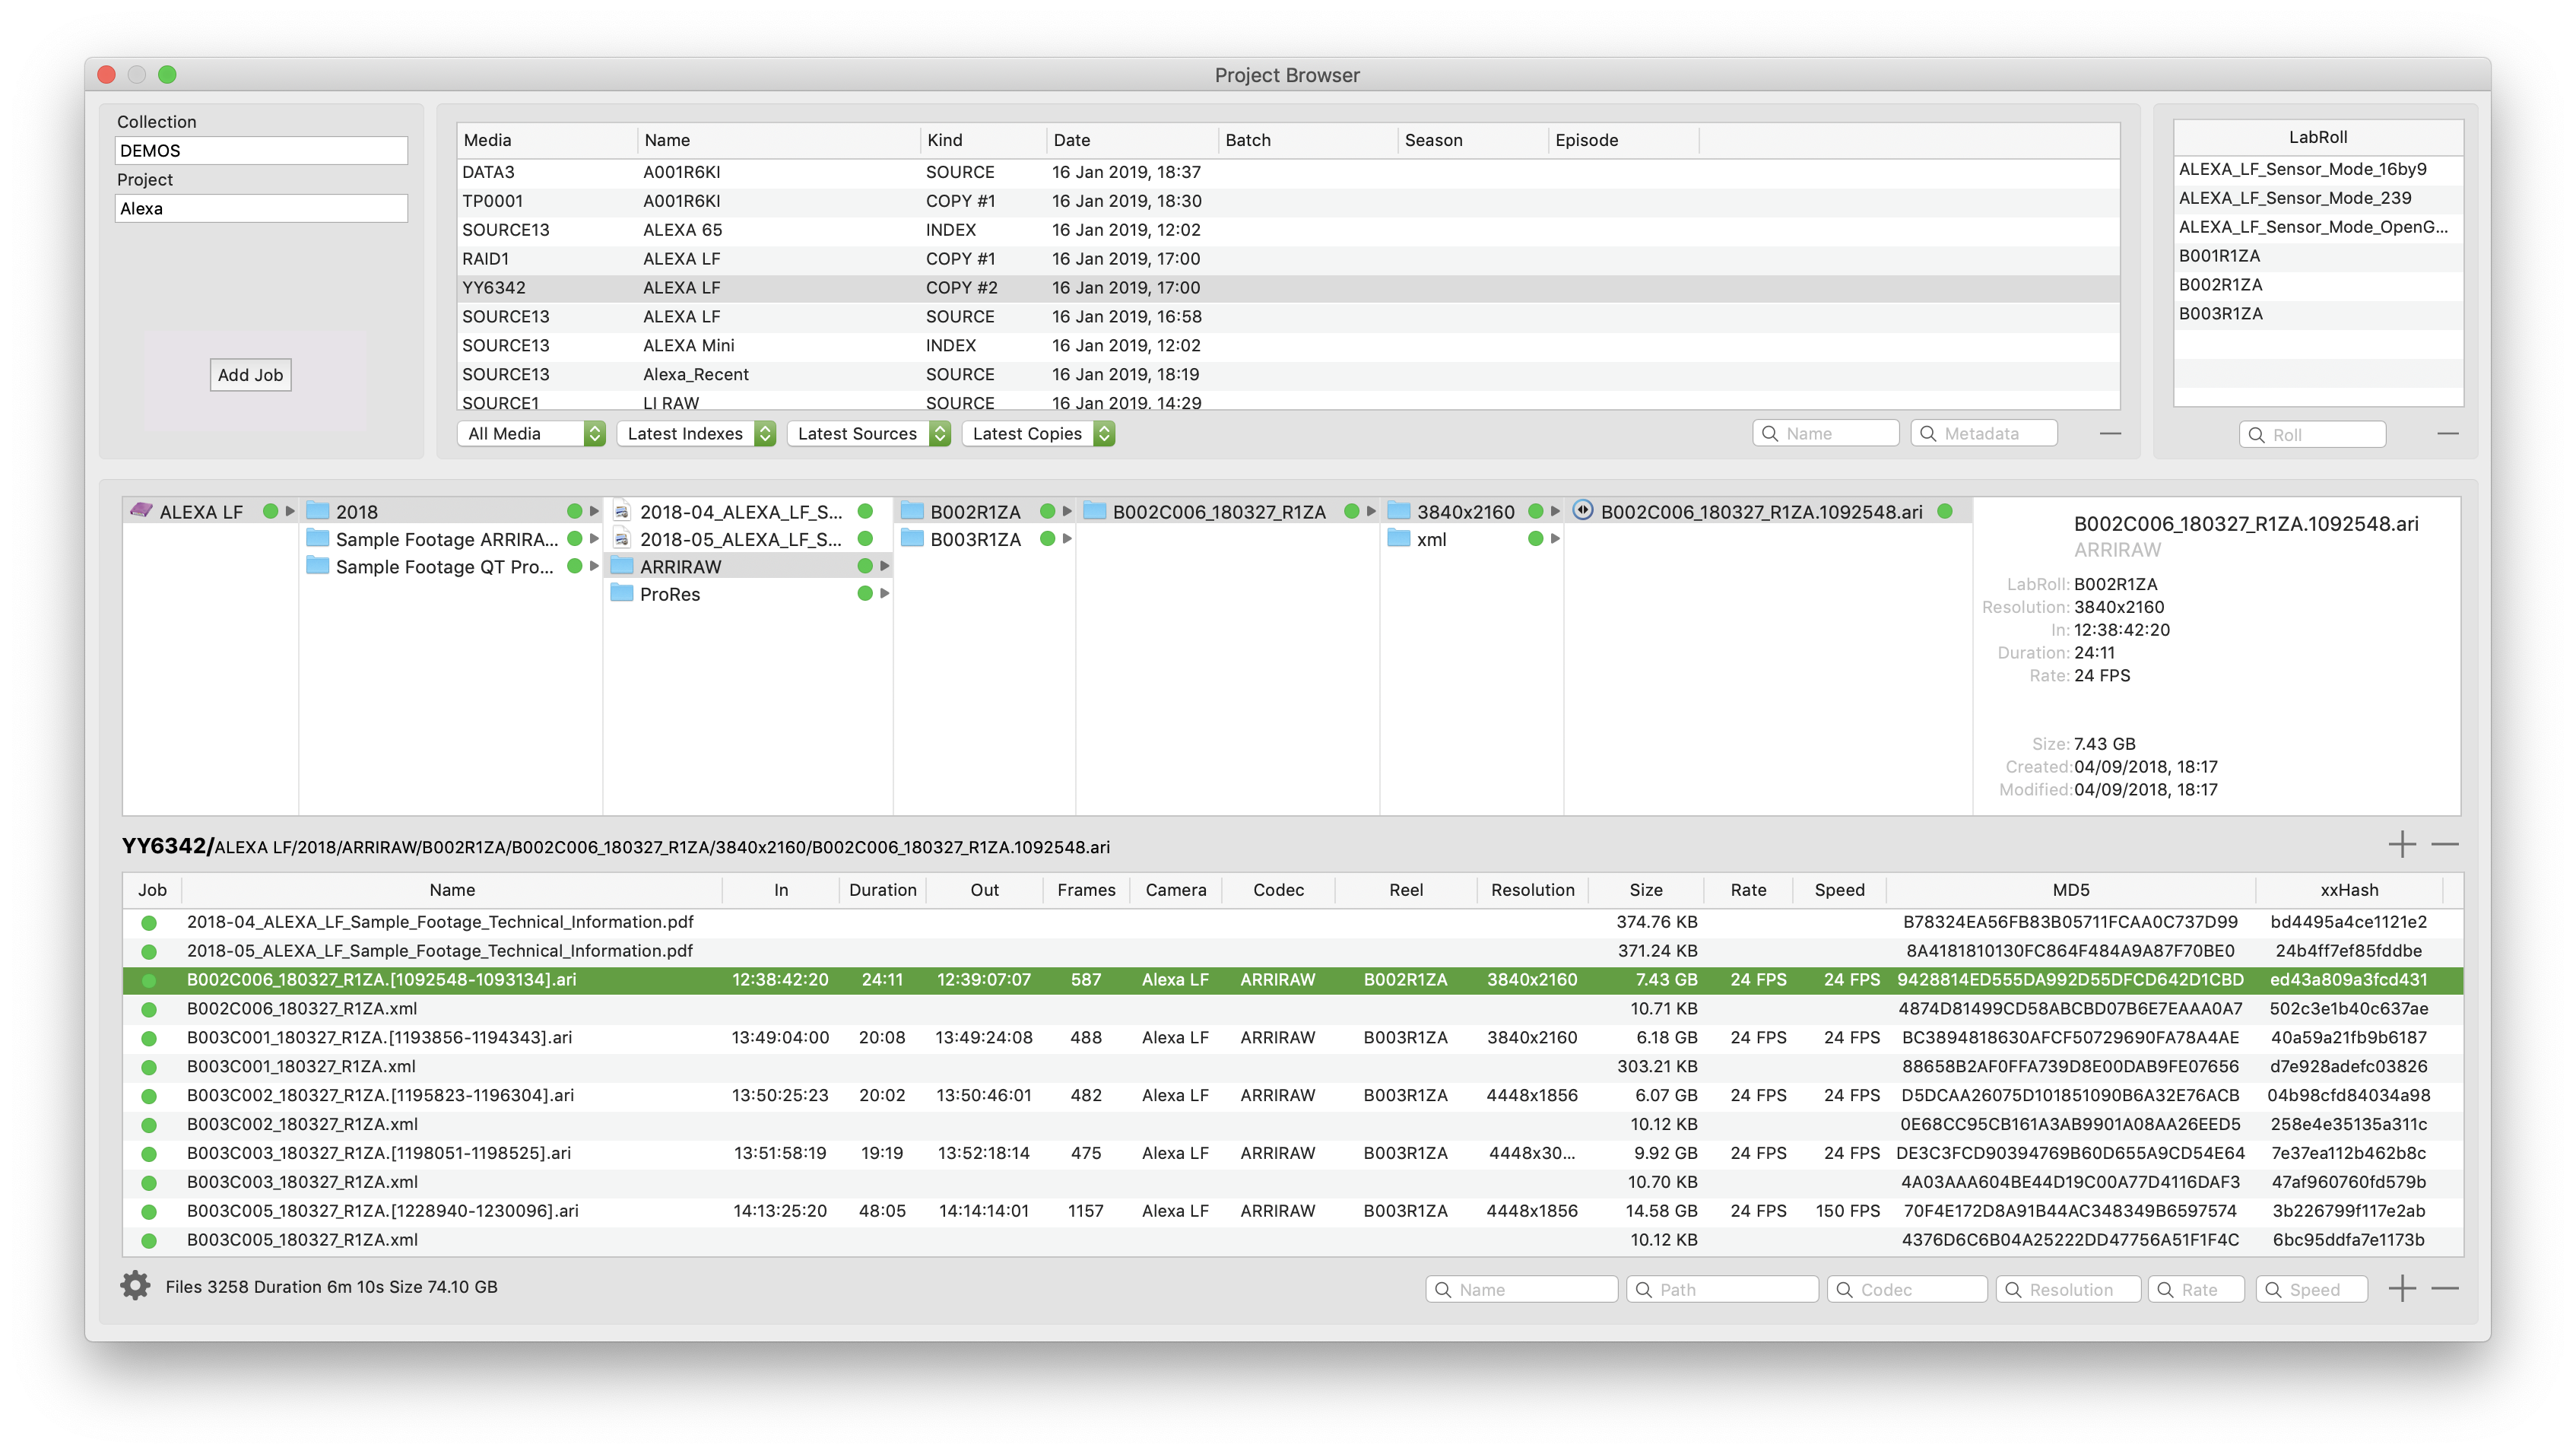
Project Browser
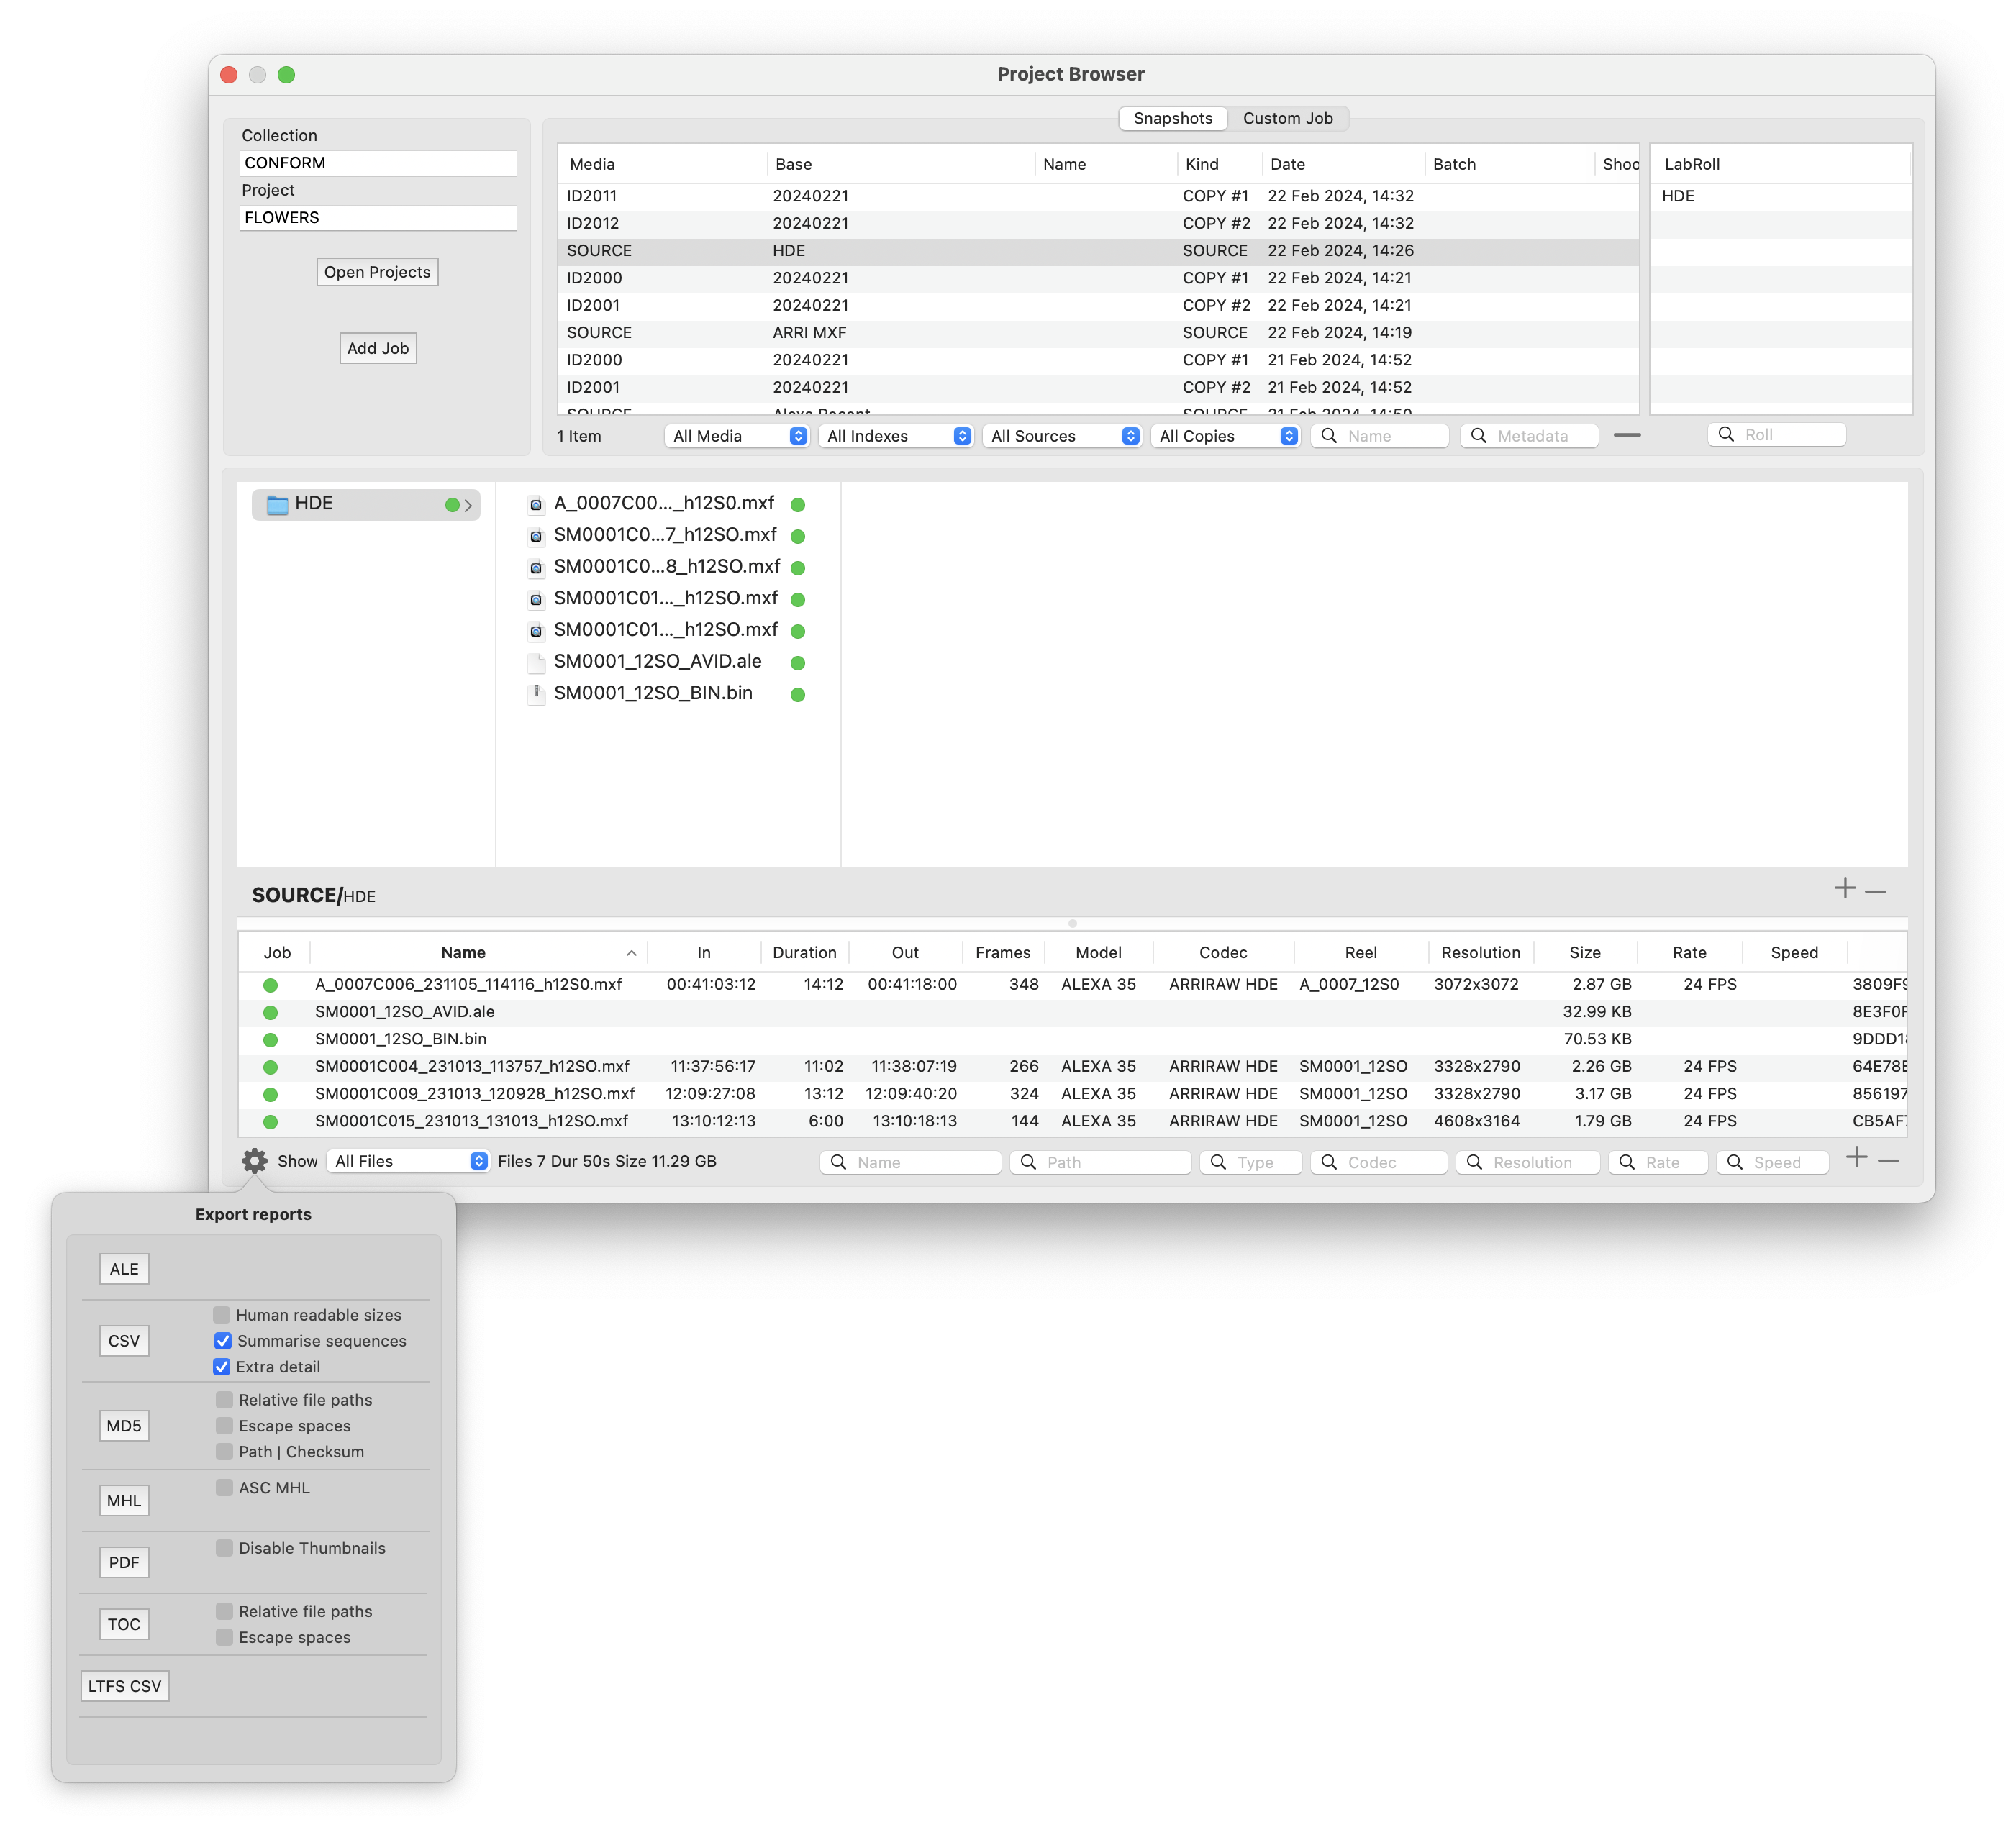
The table at the top shows three kinds of snapshots.
- INDEX : Created by clicking Store Index in a Source Browser or if Index tapes after verify is enabled
- SOURCE : Created automatically when a copy job starts. This is a list of all files on the source media.
- COPY : Created and updated as files are verified, these are files on the archive copy media.
The dropdown menus allow any of these items to be hidden if required.
If files have been added or removed from a drive or tape and it is indexed again, then
another snapshot will be created with a new time and date. Selecting All
Indexes/Sources/Copies will show the history for particular media.
SOURCE snapshots are useful to see where files came from. However once a job is over
the original files would probably have been erased, so they are not used when restoring. If desired select
Hide Sources so they are not shown in the Snapshots table.
If snapshots are out of date or incorrect then they can be deleted. Select one or more and click the - button at the bottom right of the Snapshot table.
COPY snapshots are created when the verify starts and built up as the destination files are verified.
When making duplicate copies there will be a COPY snapshot for each destination, so COPY #1, COPY #2.
During verification the COPY snapshots will be incomplete, but at the end they will exactly match the SOURCE.
If a COPY snapshot has fewer files when compared to the SOURCE, then this suggests that the verify did not complete.
Maybe the job was stopped during verification or there was a software or hardware issue.
In this case there will not be any job reports, the optional completion email with PDF report would not be sent.
Also an error message will be shown in the popup log.
The COPY snapshot date will show when the verification stopped or the job completed.
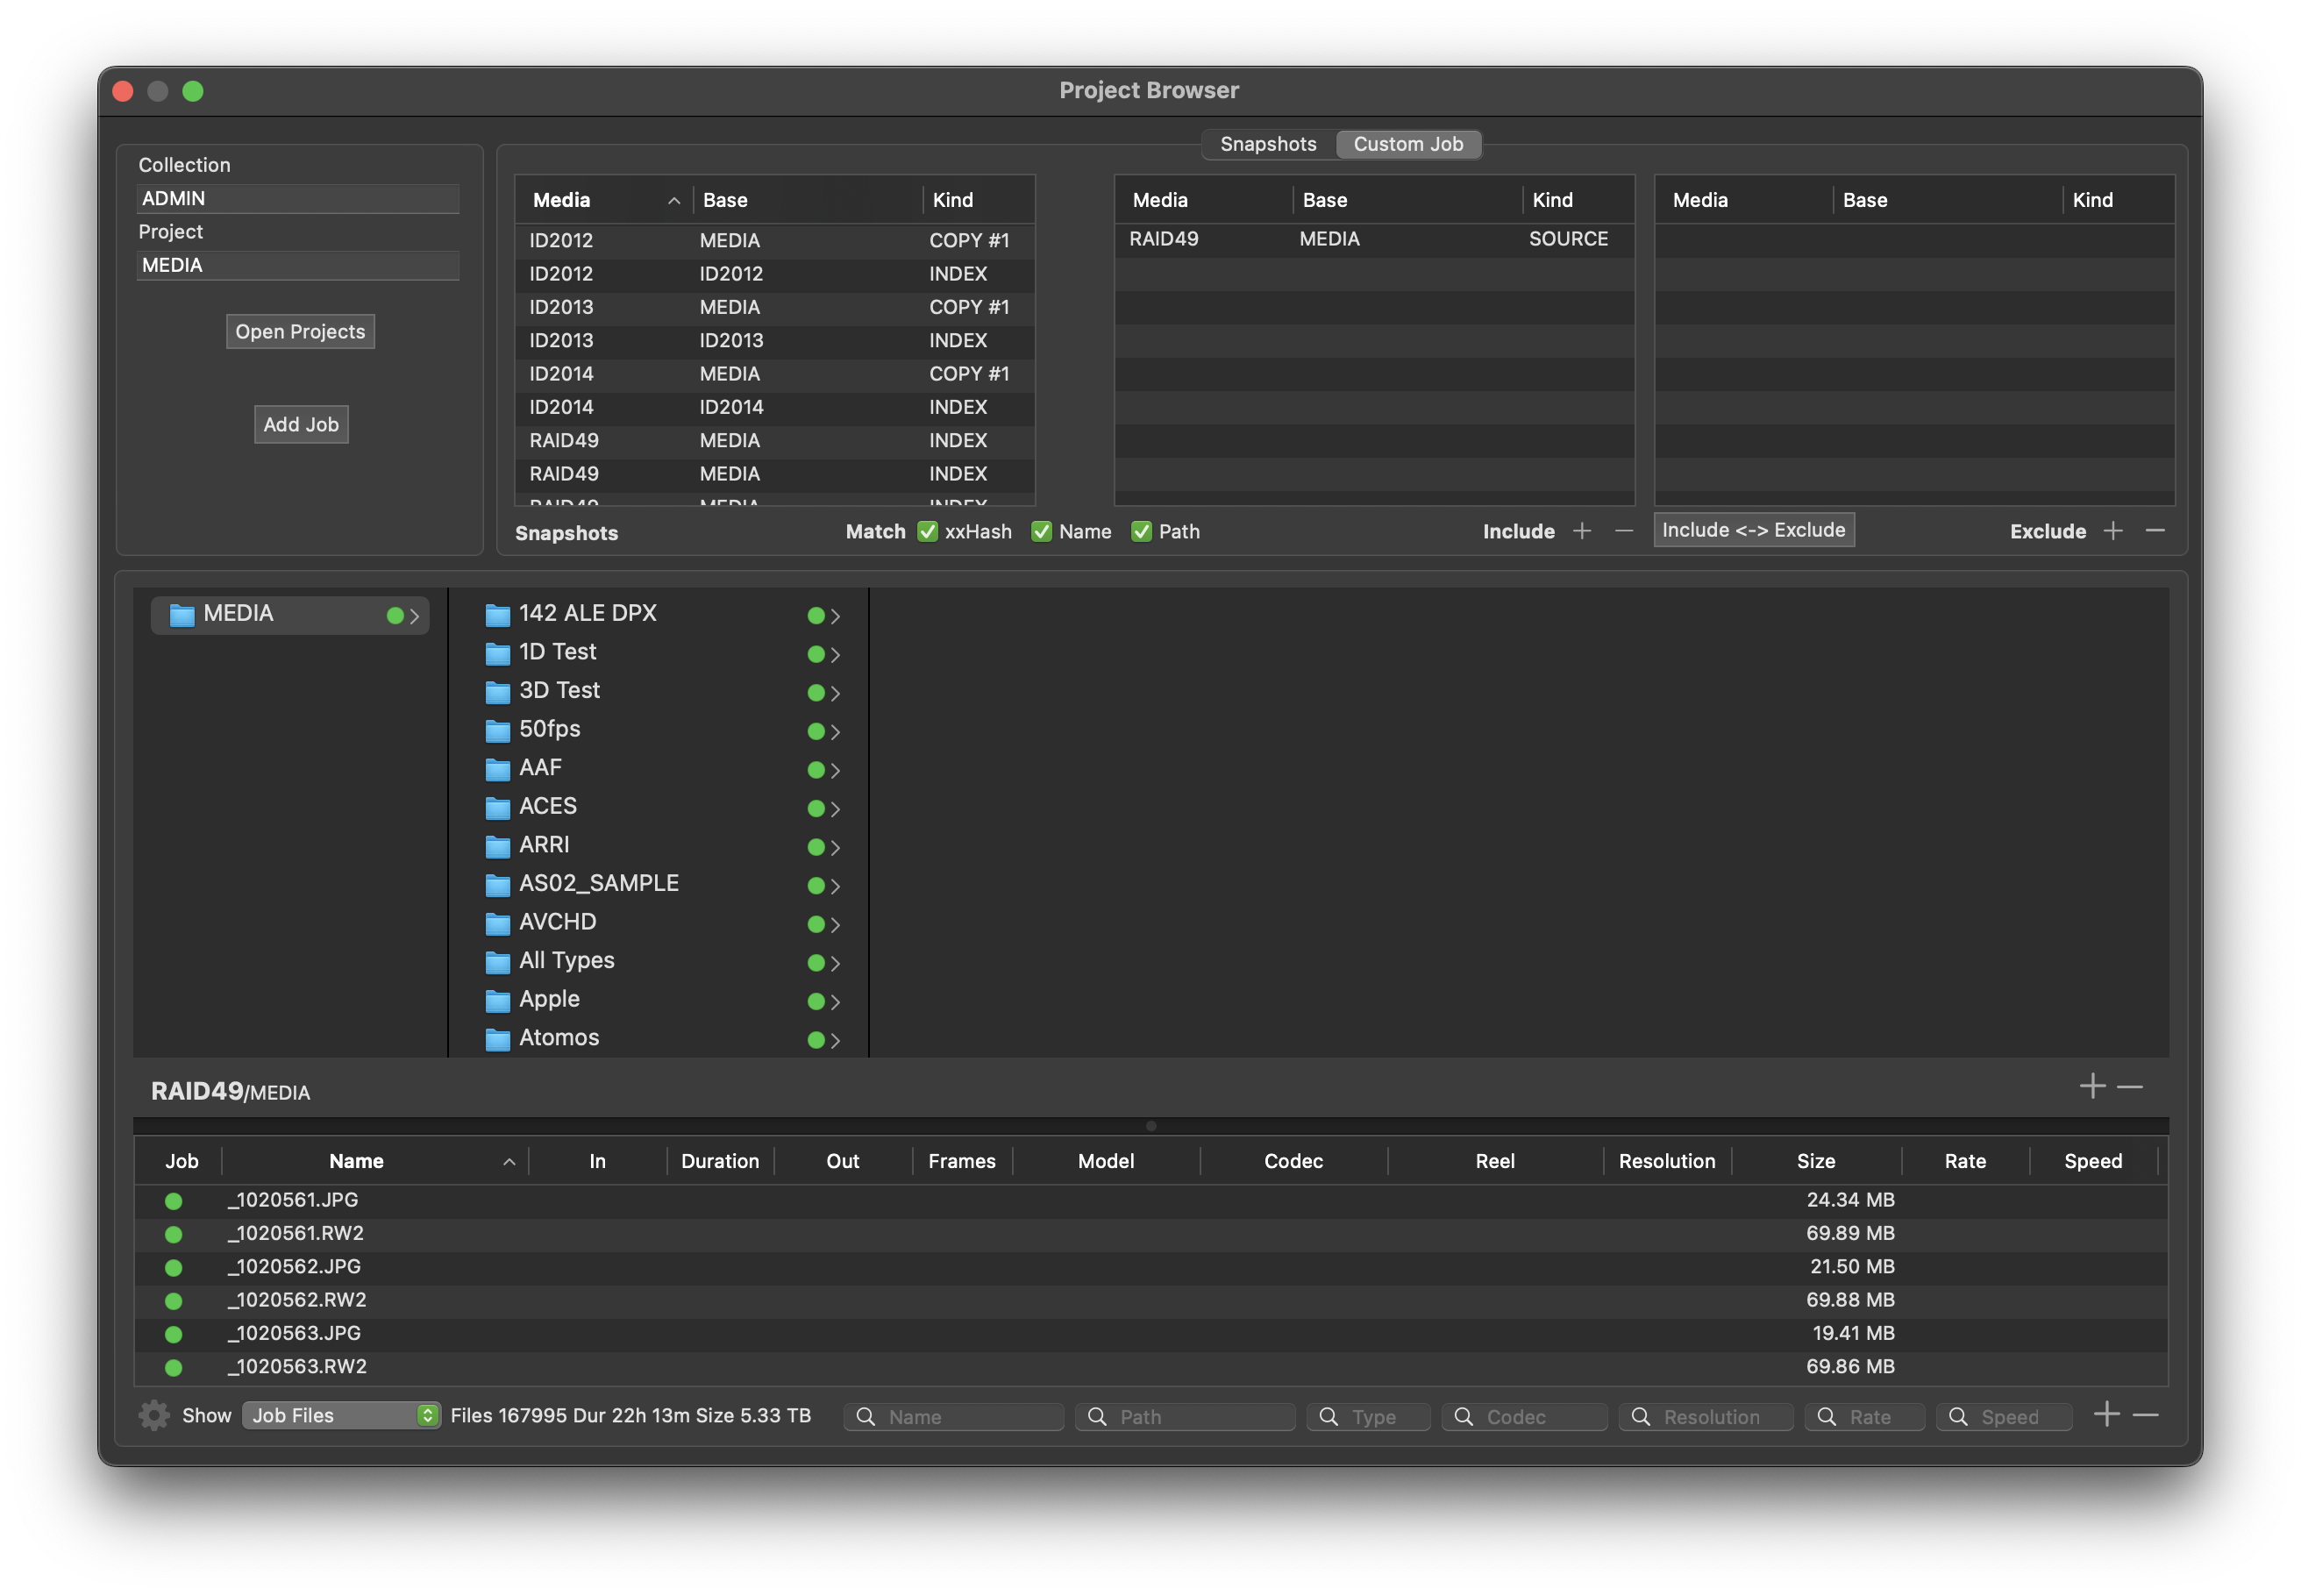
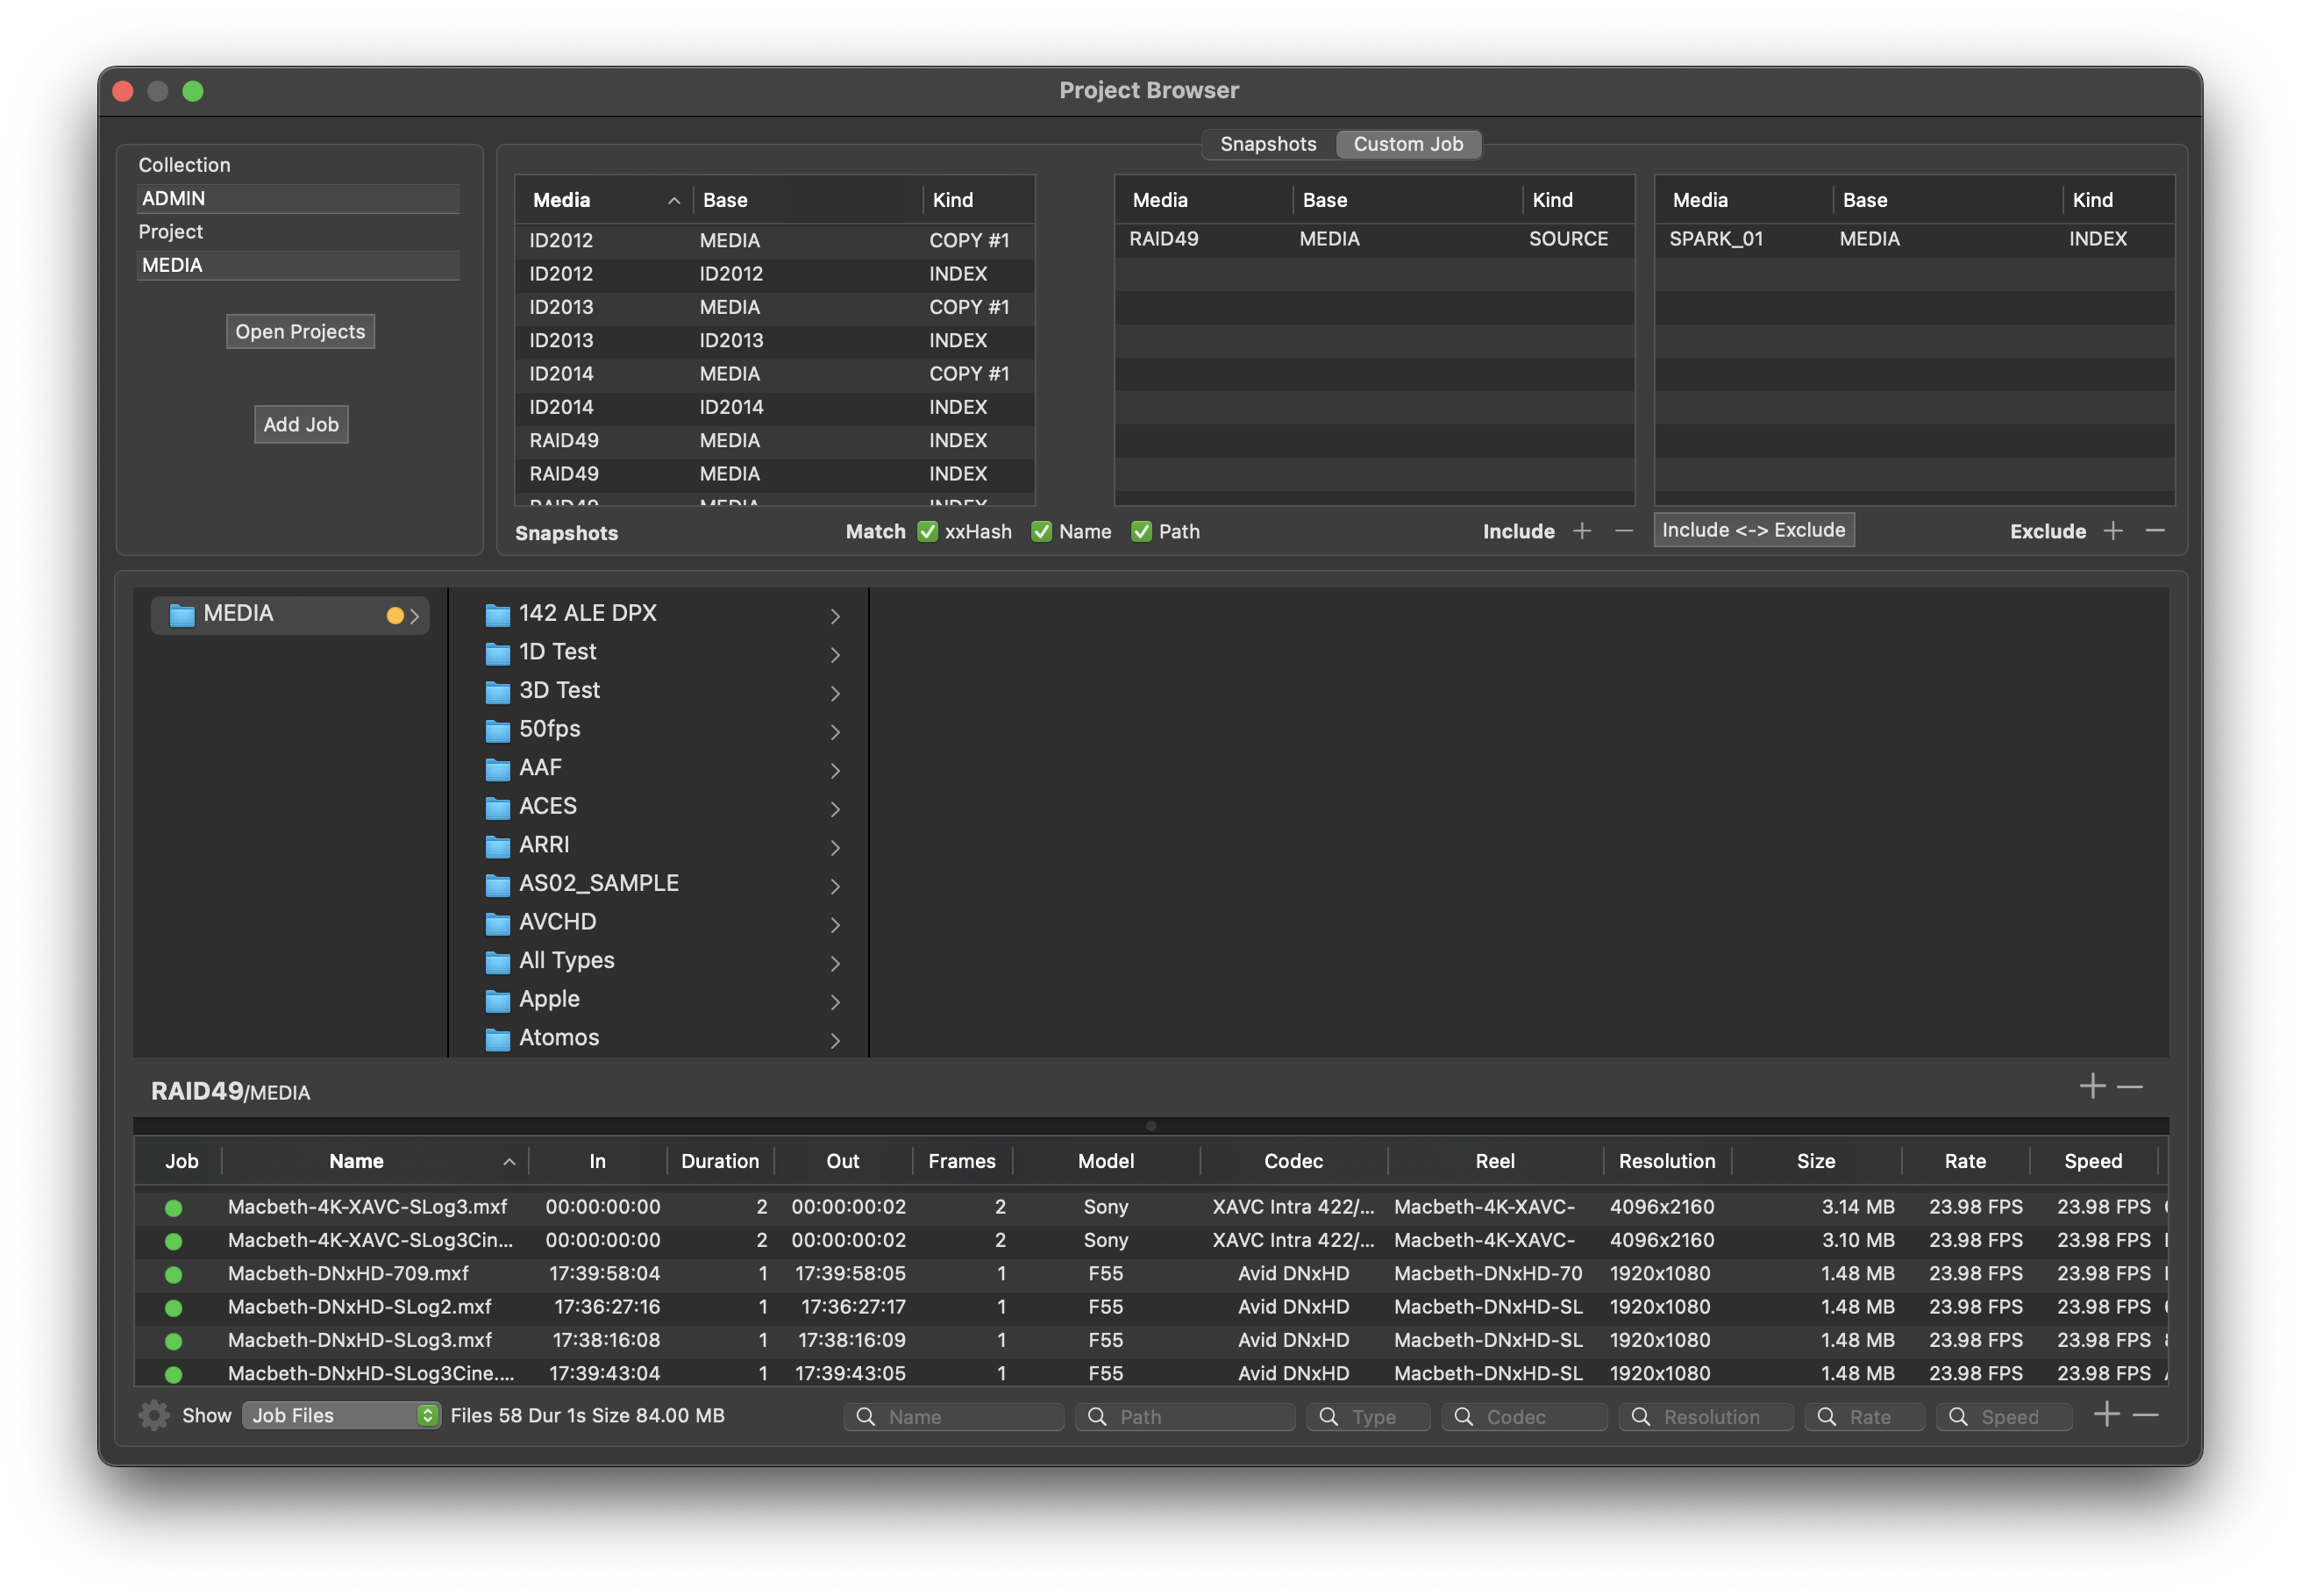
The custom job feature can be used to quickly compare the contents of different media. See further down this page.
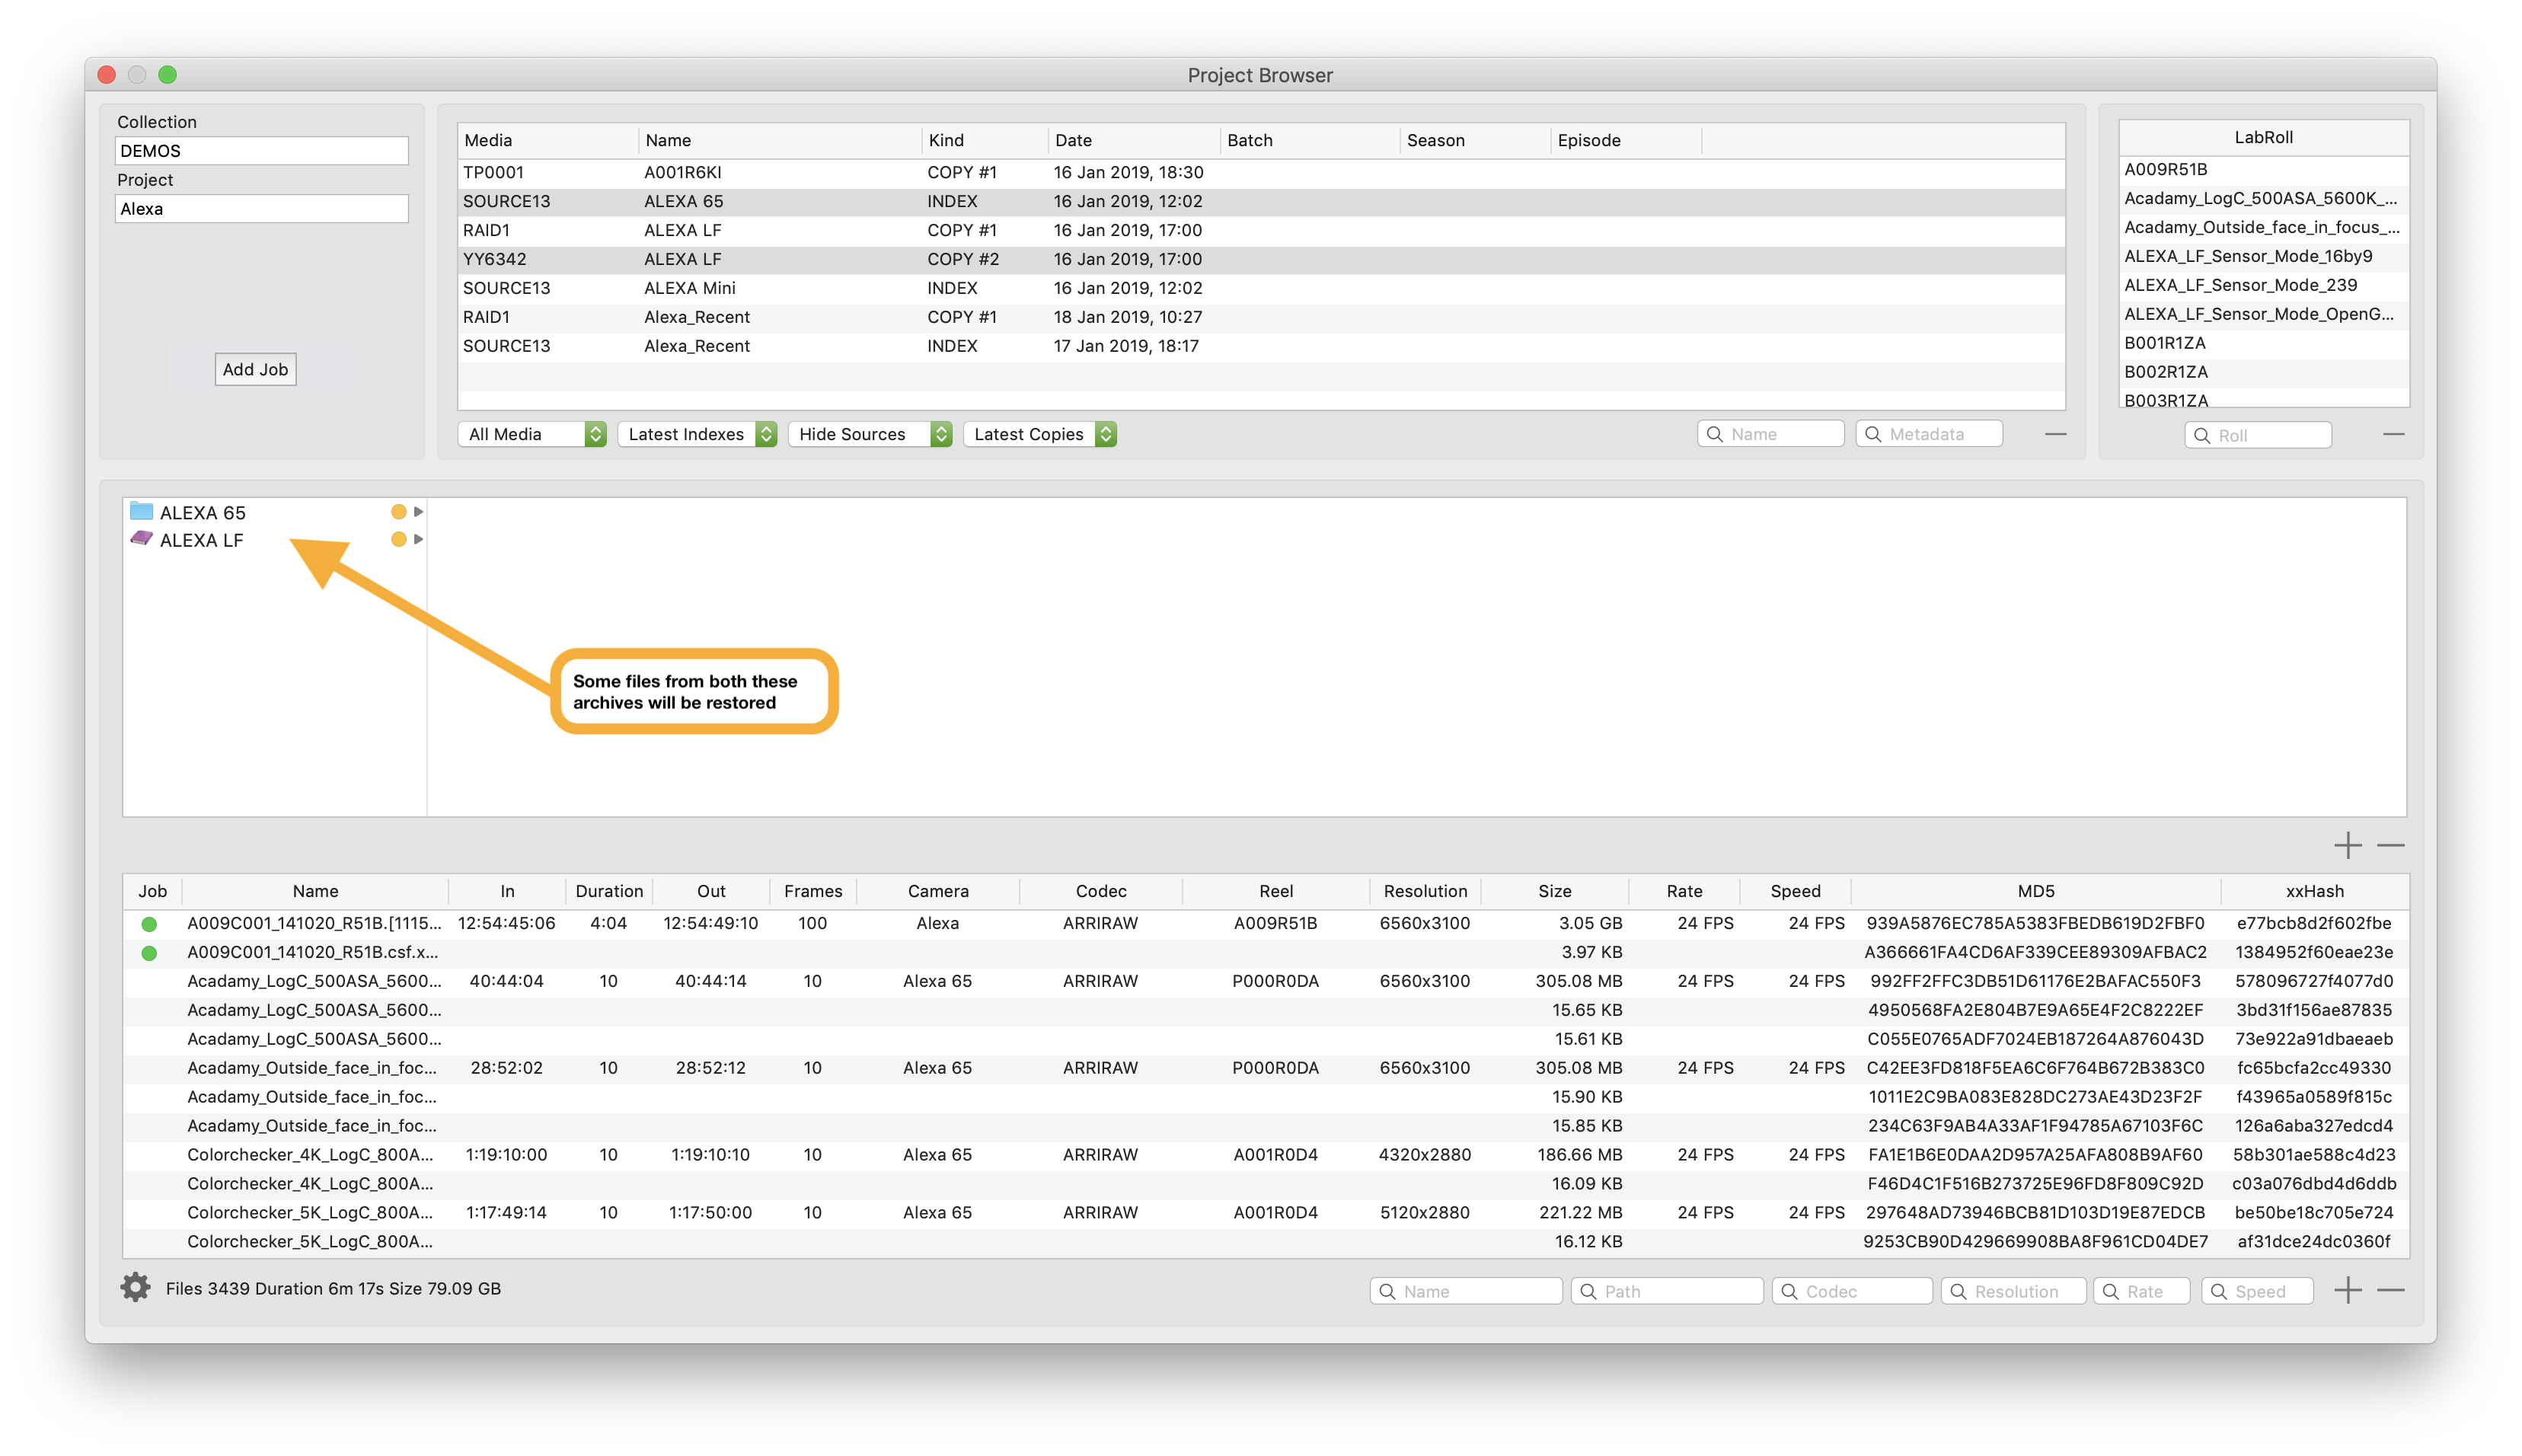
The Browser in the middle shows a Finder style view of the folders and files in the
selected snapshot. Use it to navigate around tapes and drives that are offline.
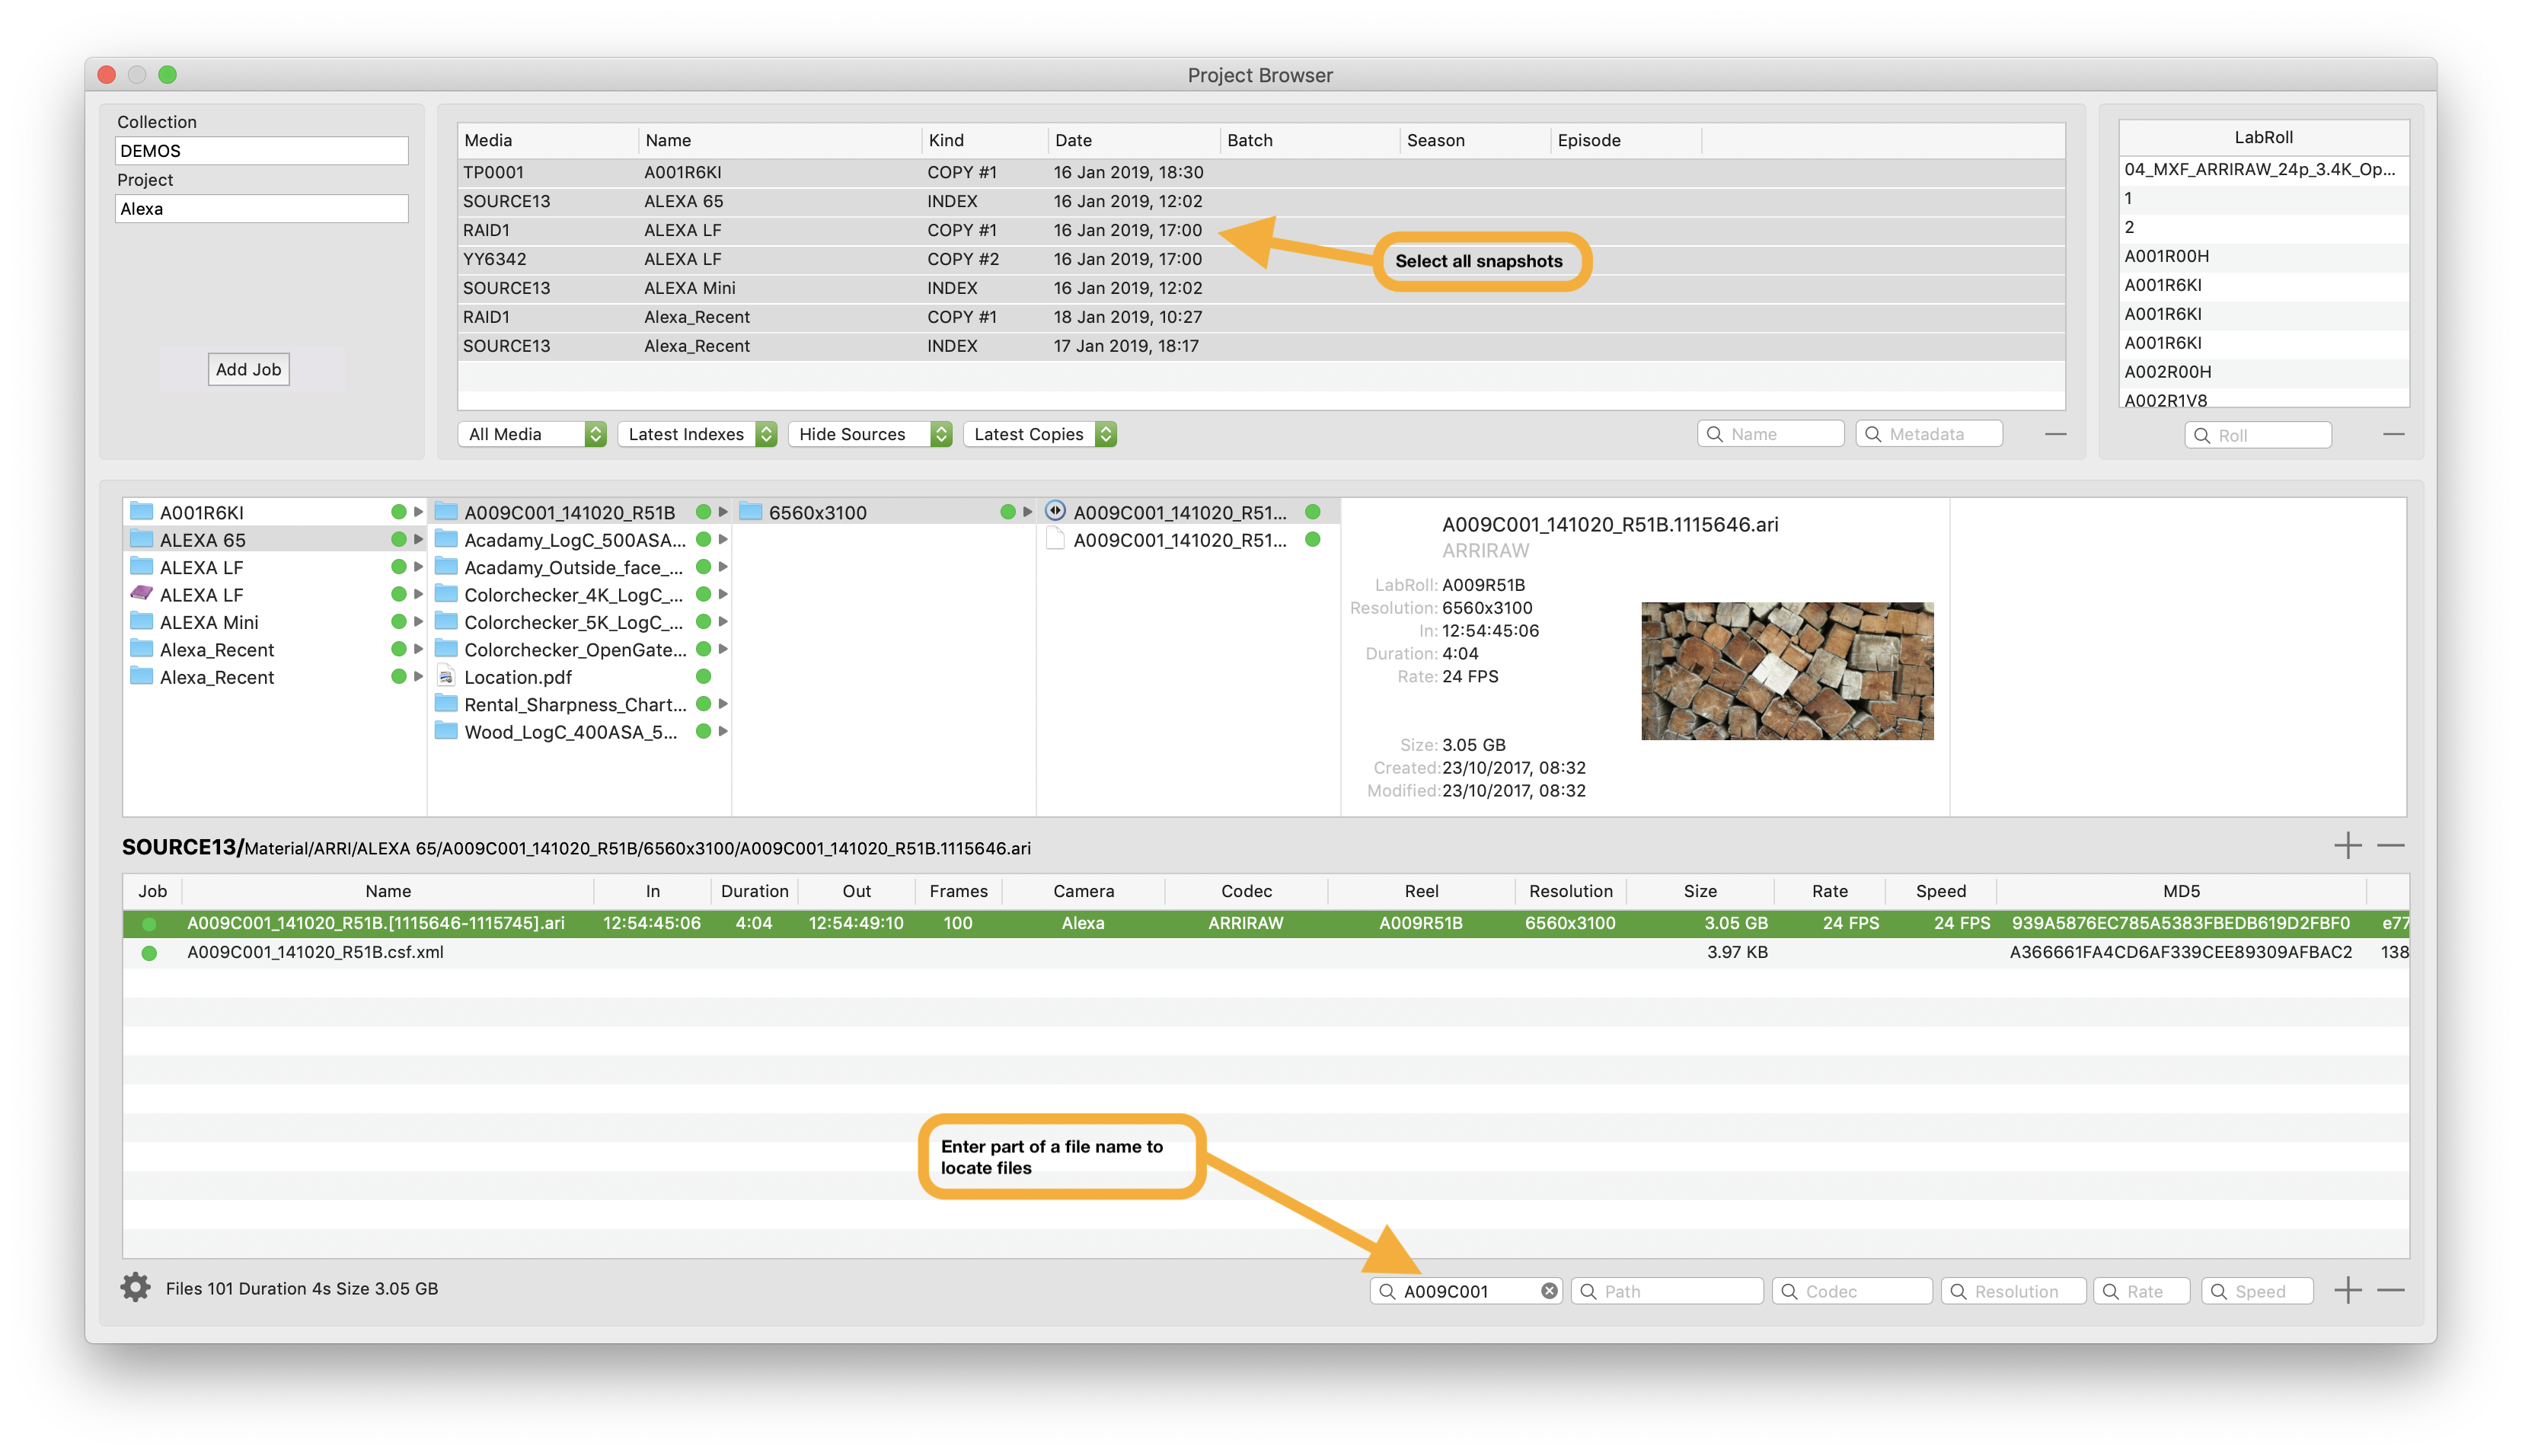
The File table in the middle shows metadata for all files selected in the Media
Browser. Use it to navigate around the snapshots of archived tapes and drives. The media
does not have to be online at this point.
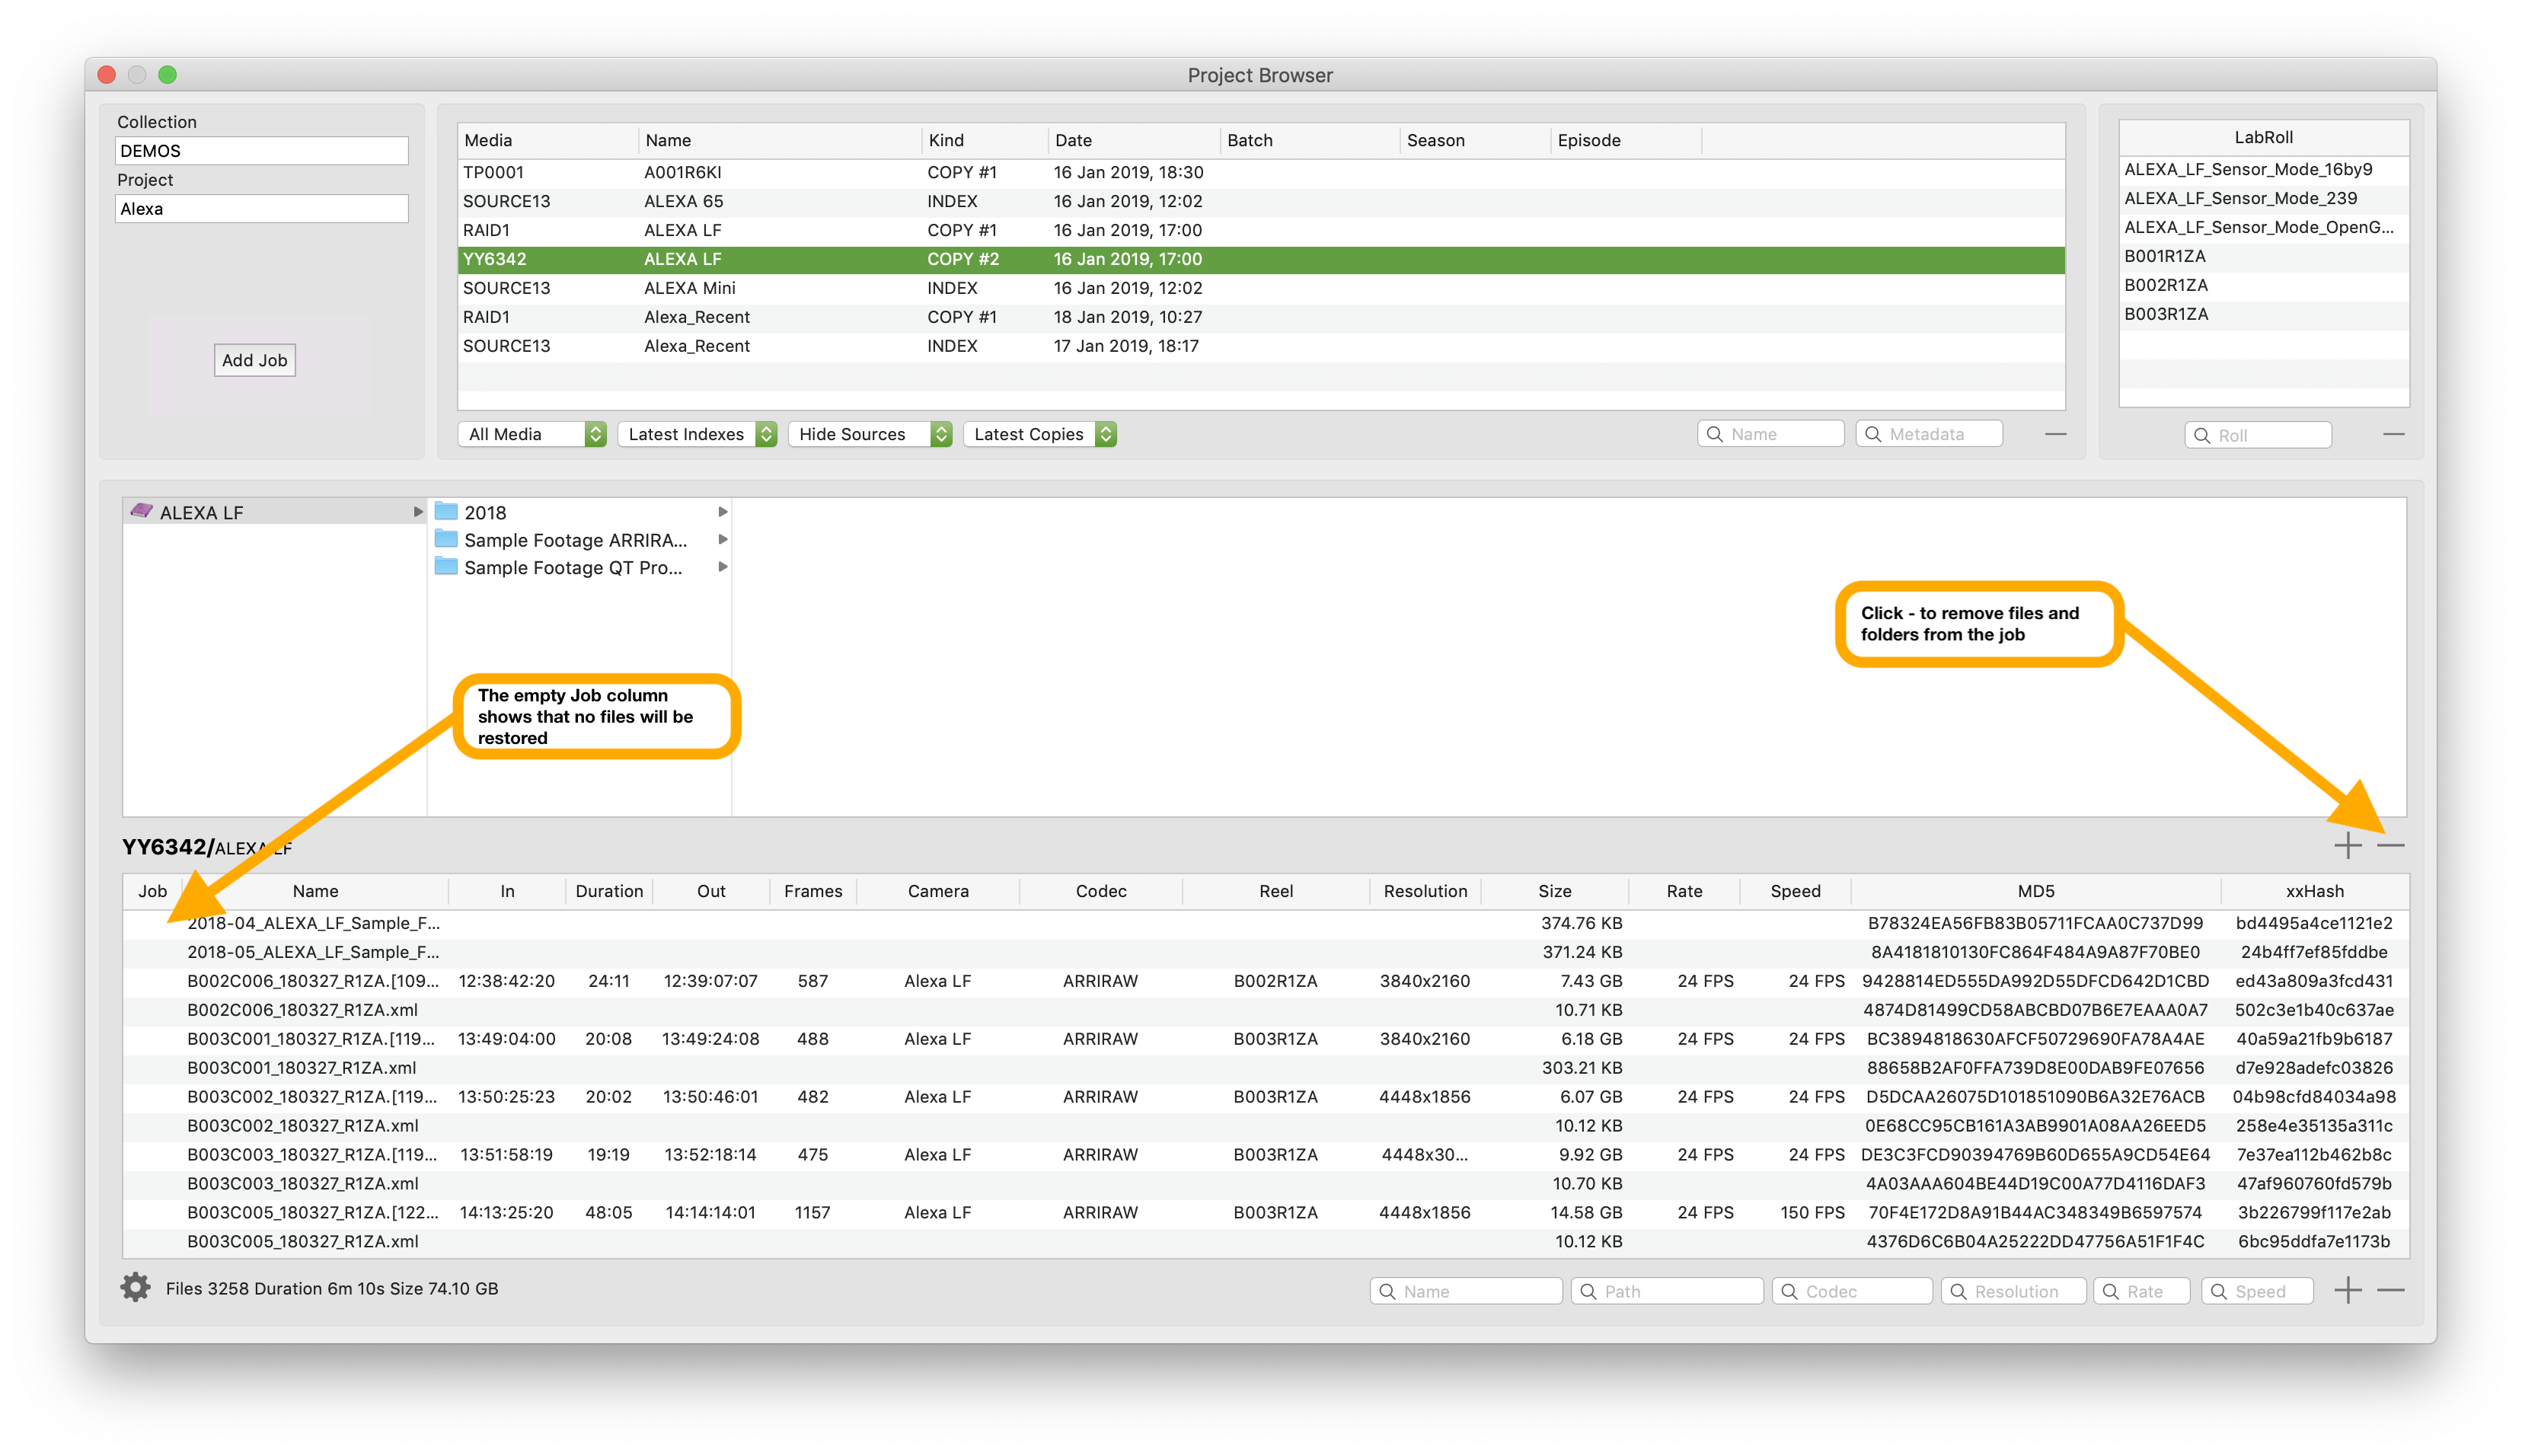
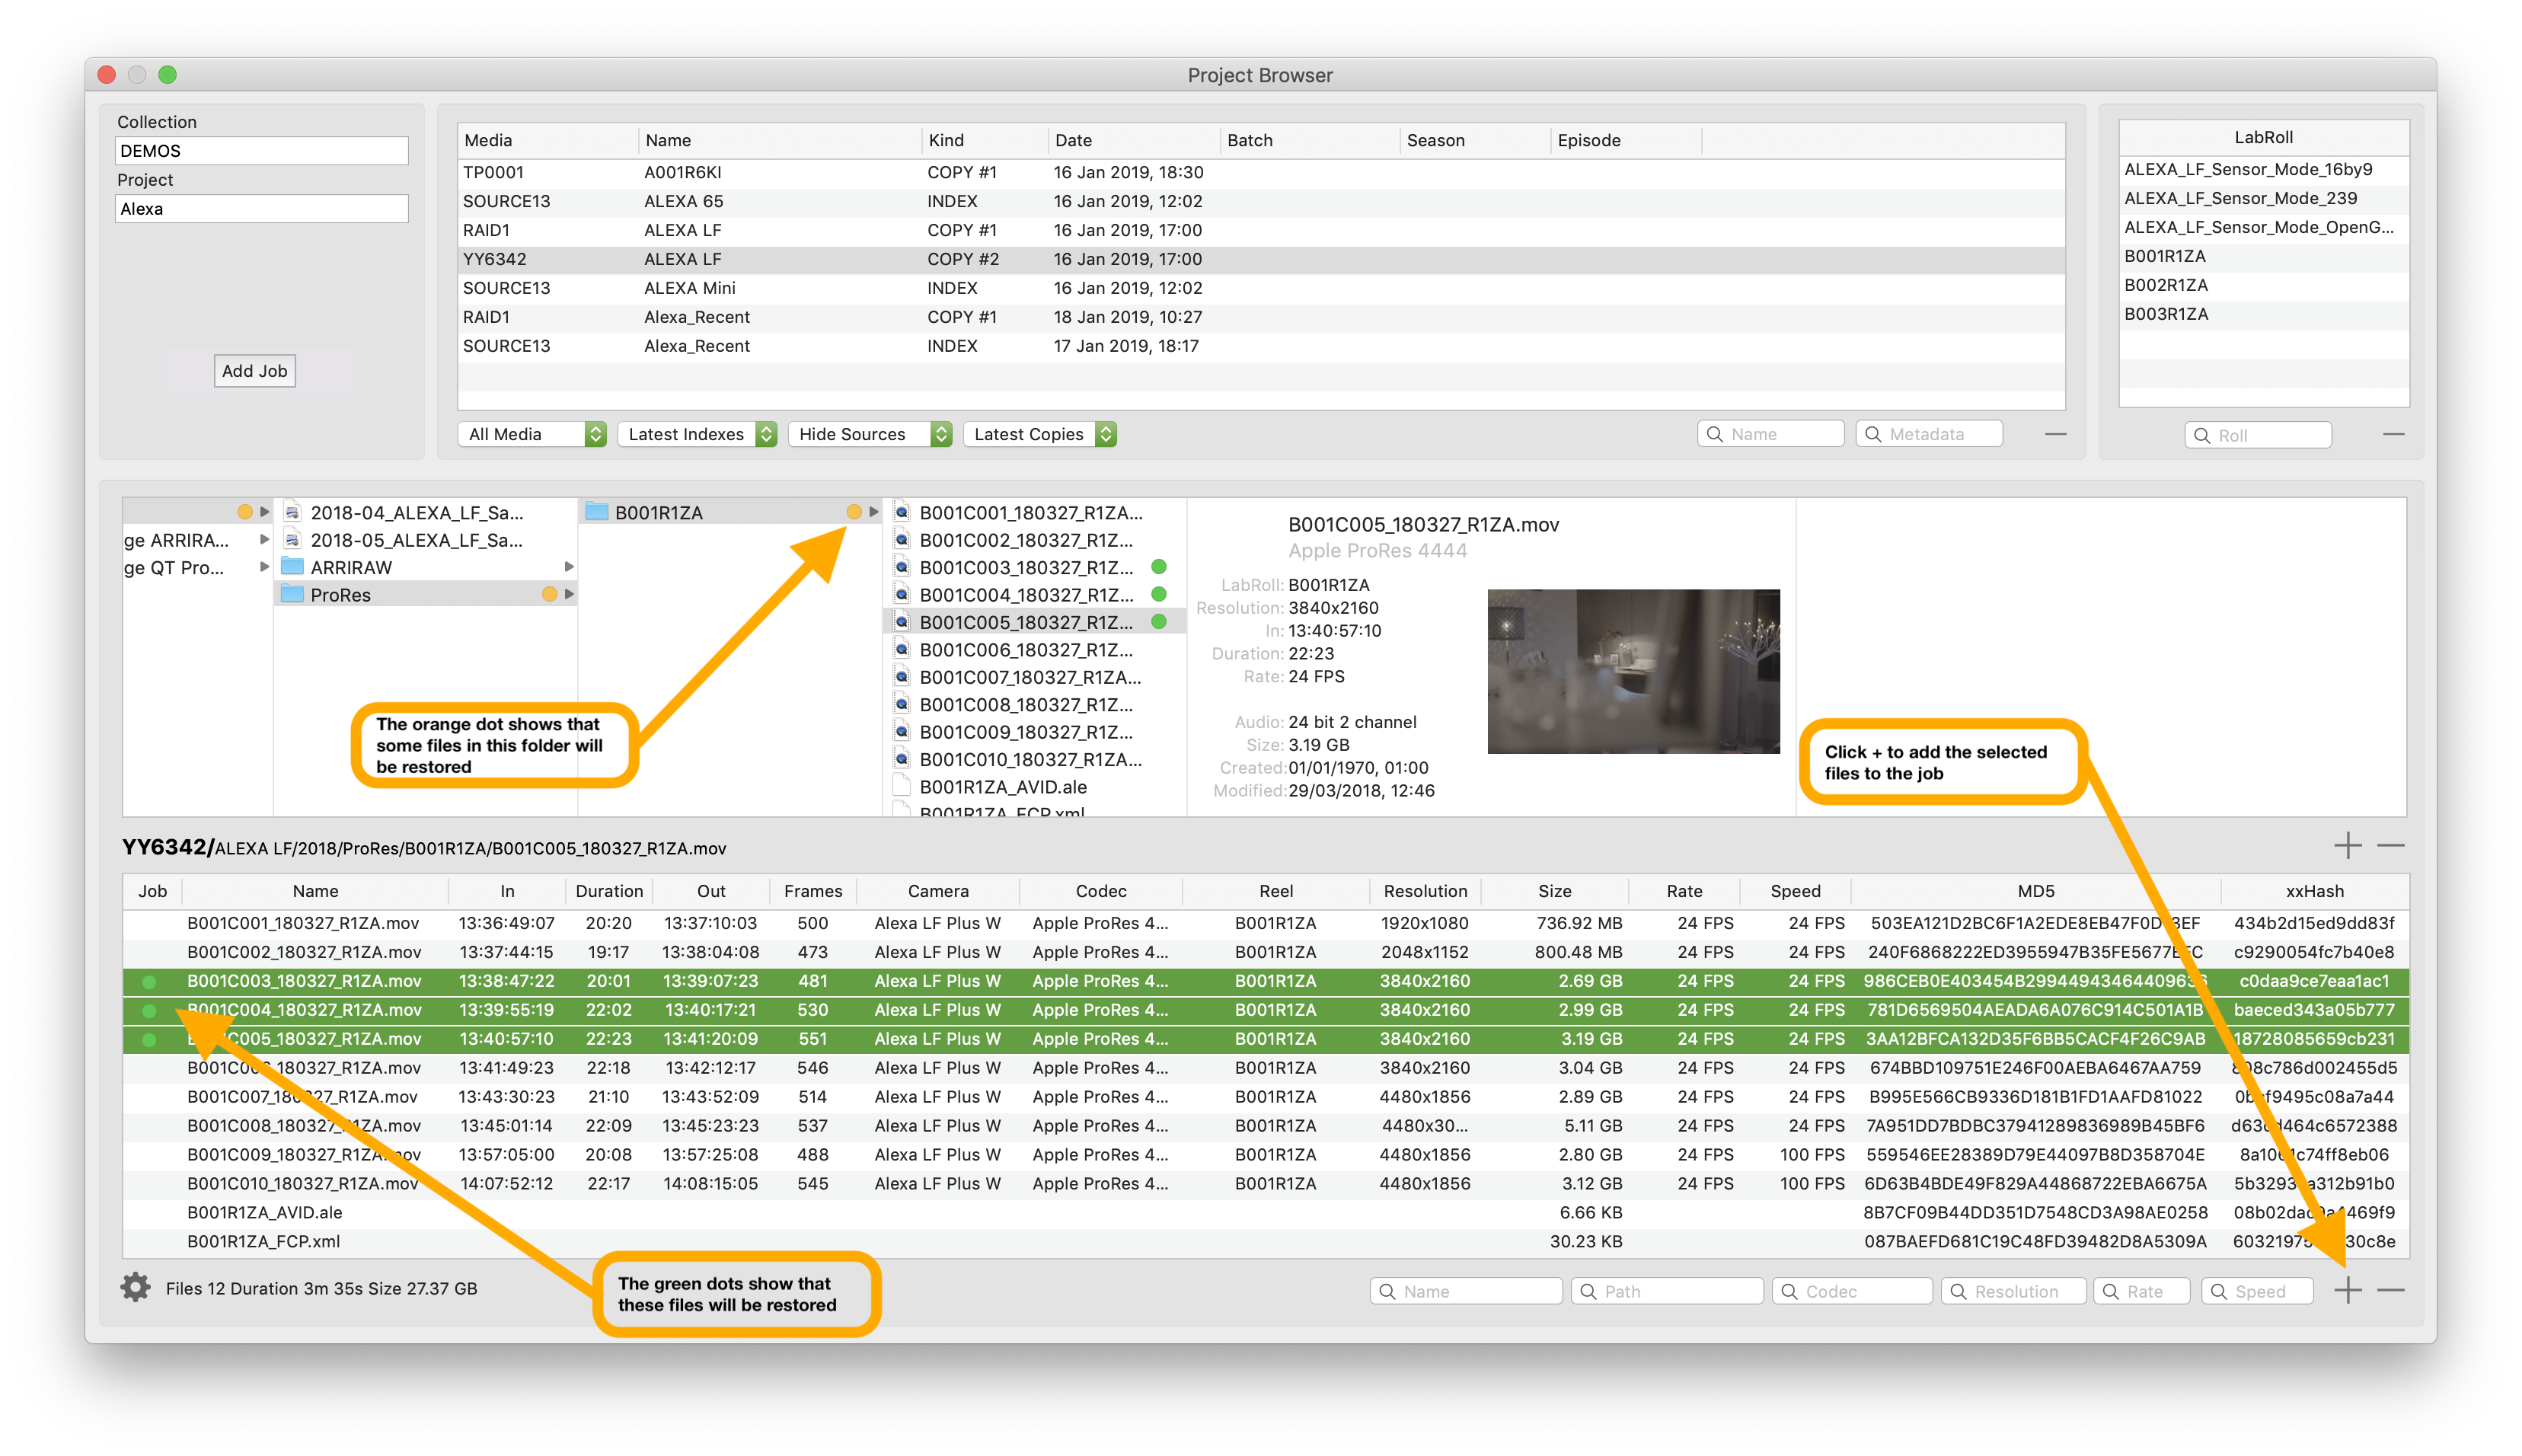
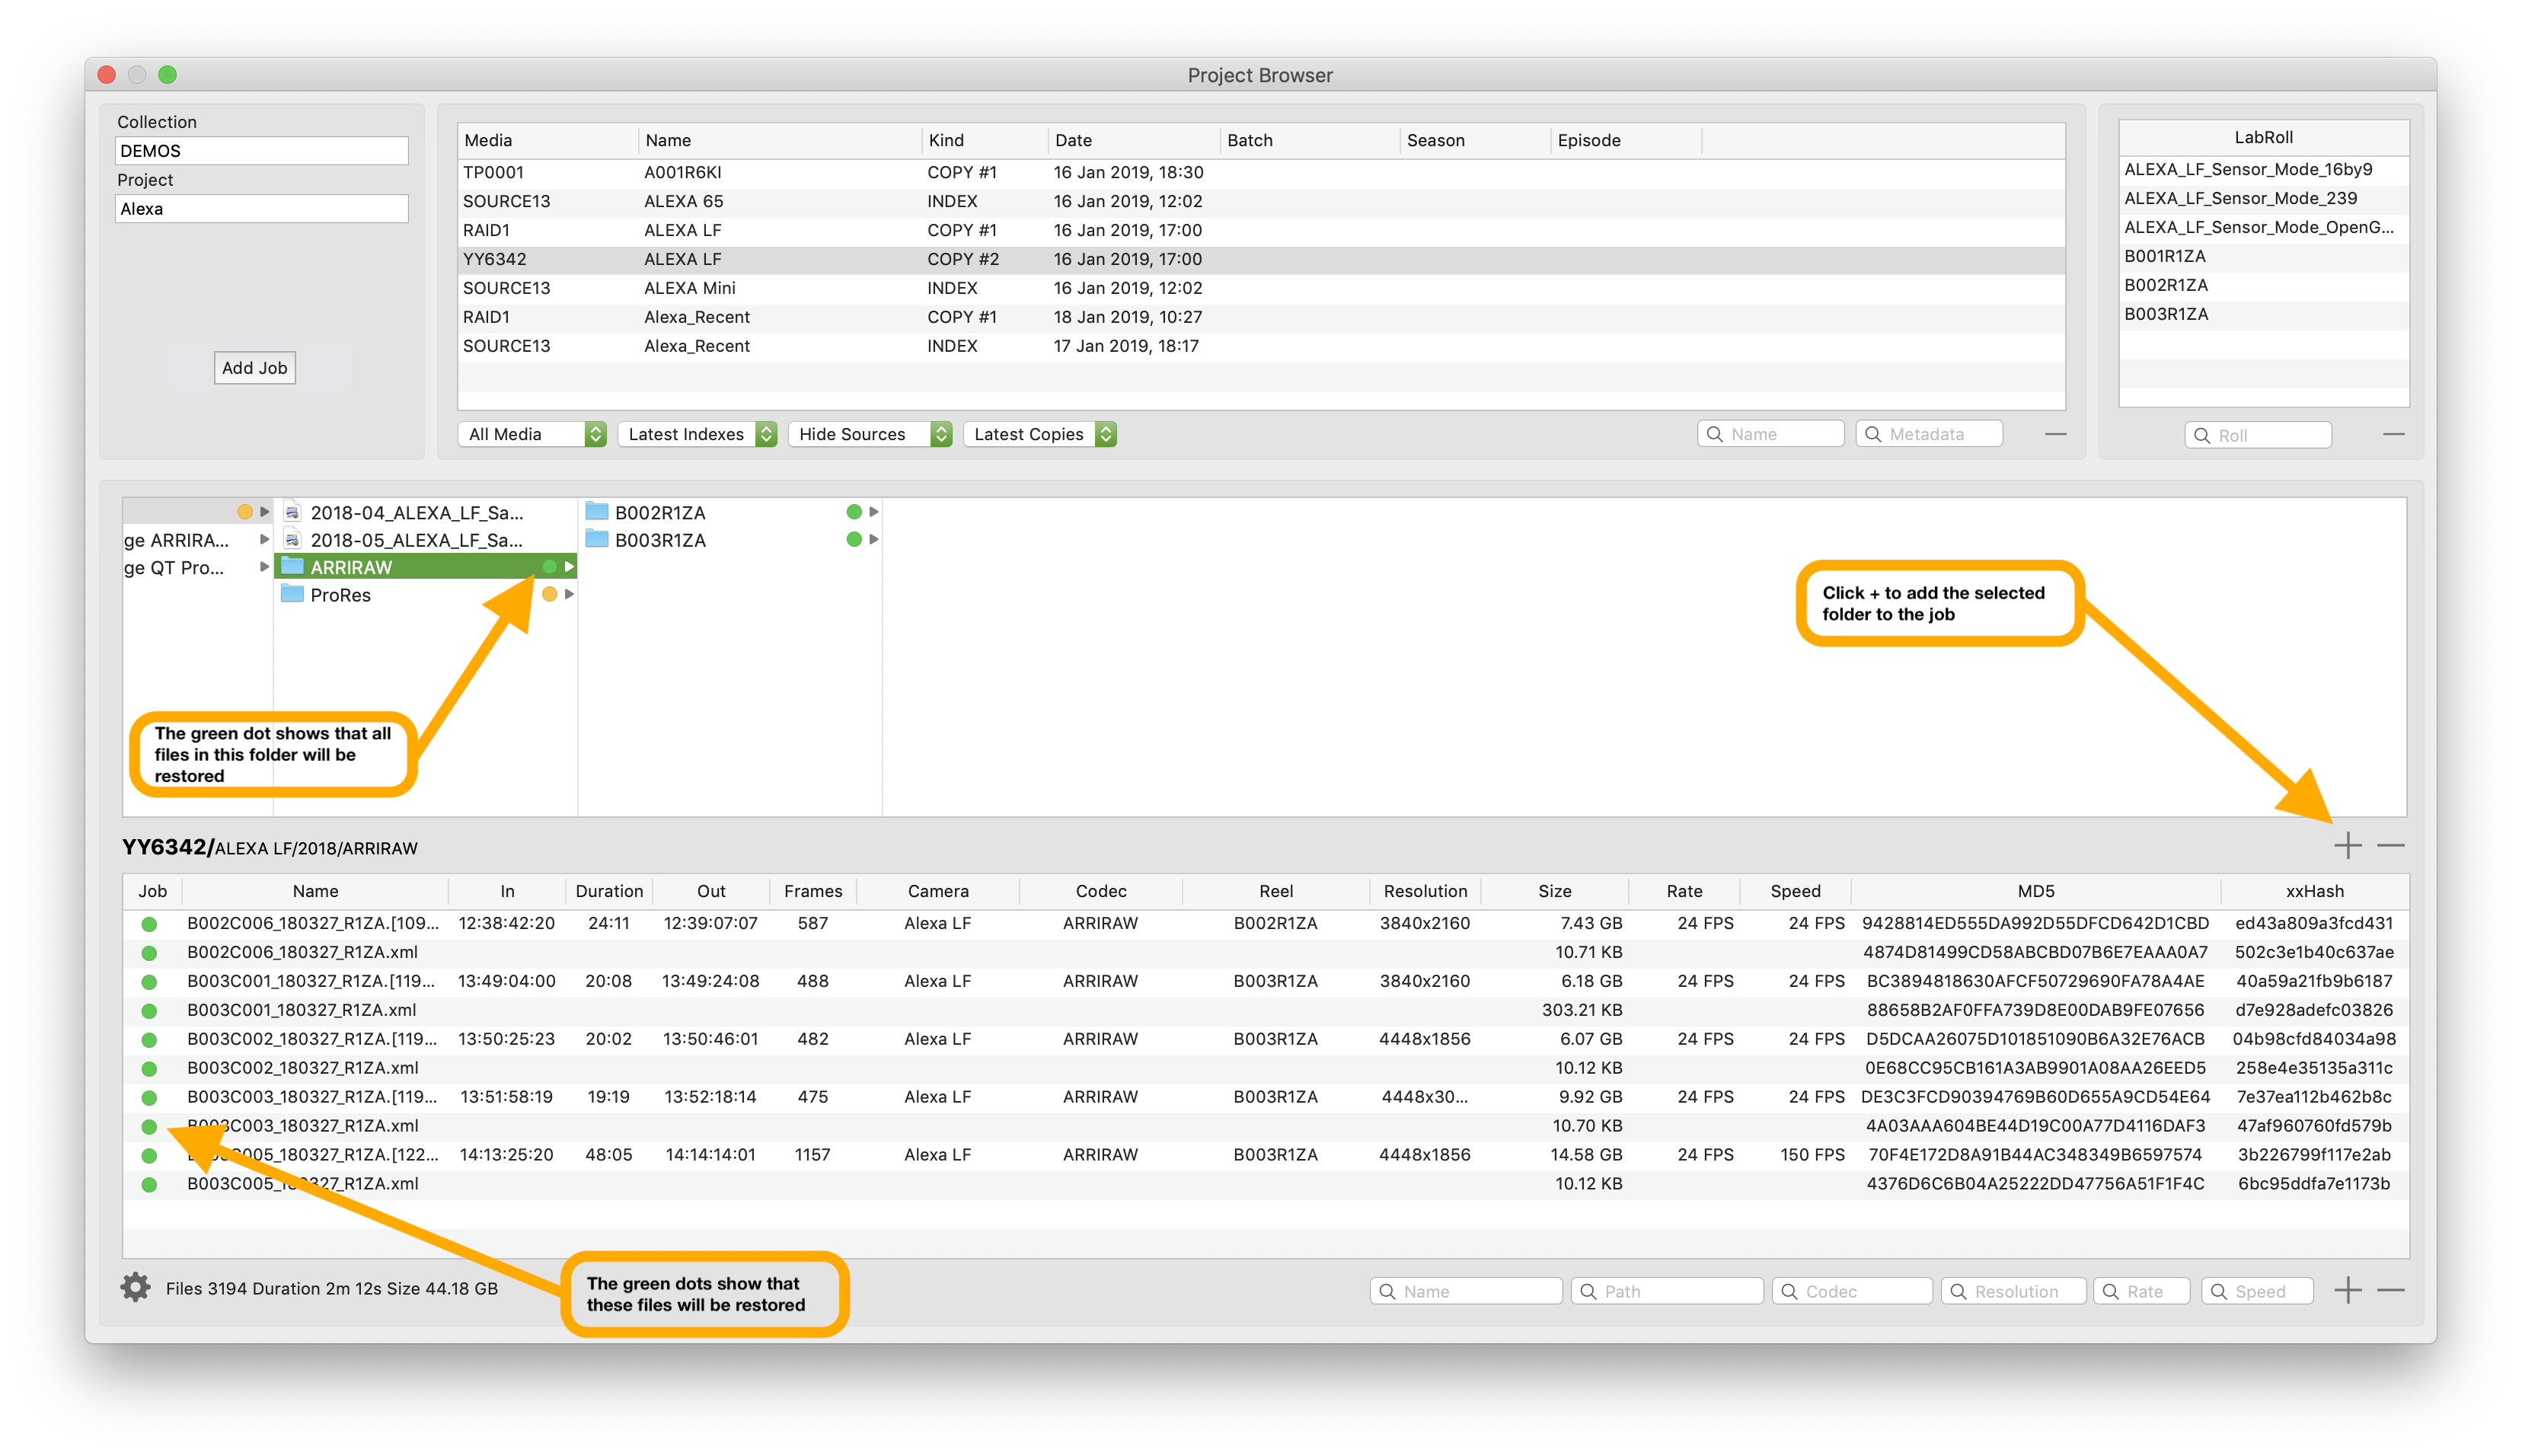
Both the Media browser and the File table have + and - buttons. Use these to
choose which files are restored.
Select a snapshot and check that it has the files you want to restore.
If restoring from a drive or shared volume, ensure that it is mounted.
If restoring from tape load the tape into a standalone drive. Or load tapes into an LTO
library. No need to mount the tape. Then click Add Job.
If the drive or tape source is not online, then no job will be created. Connect the drive
or load the tape (no need to mount the tape) into the LTO drive or library. Then click
Add Job again.
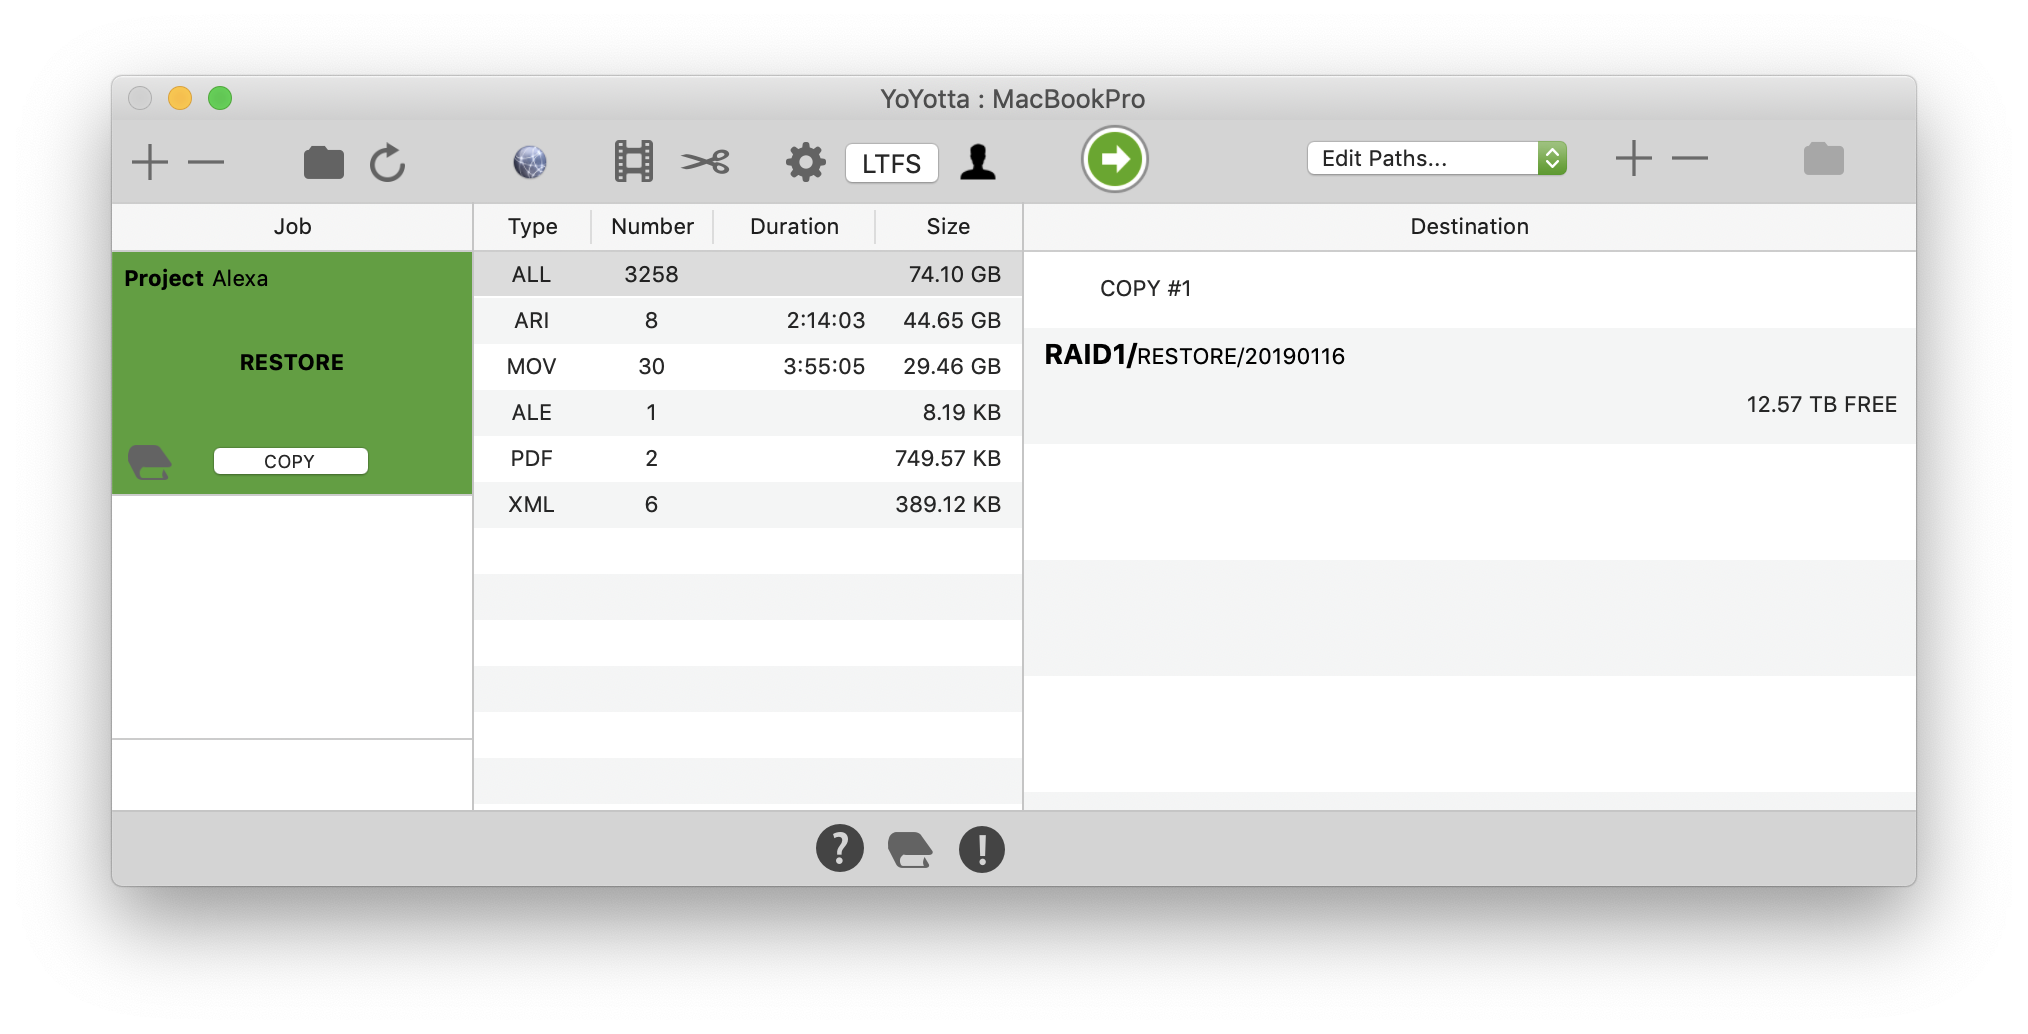
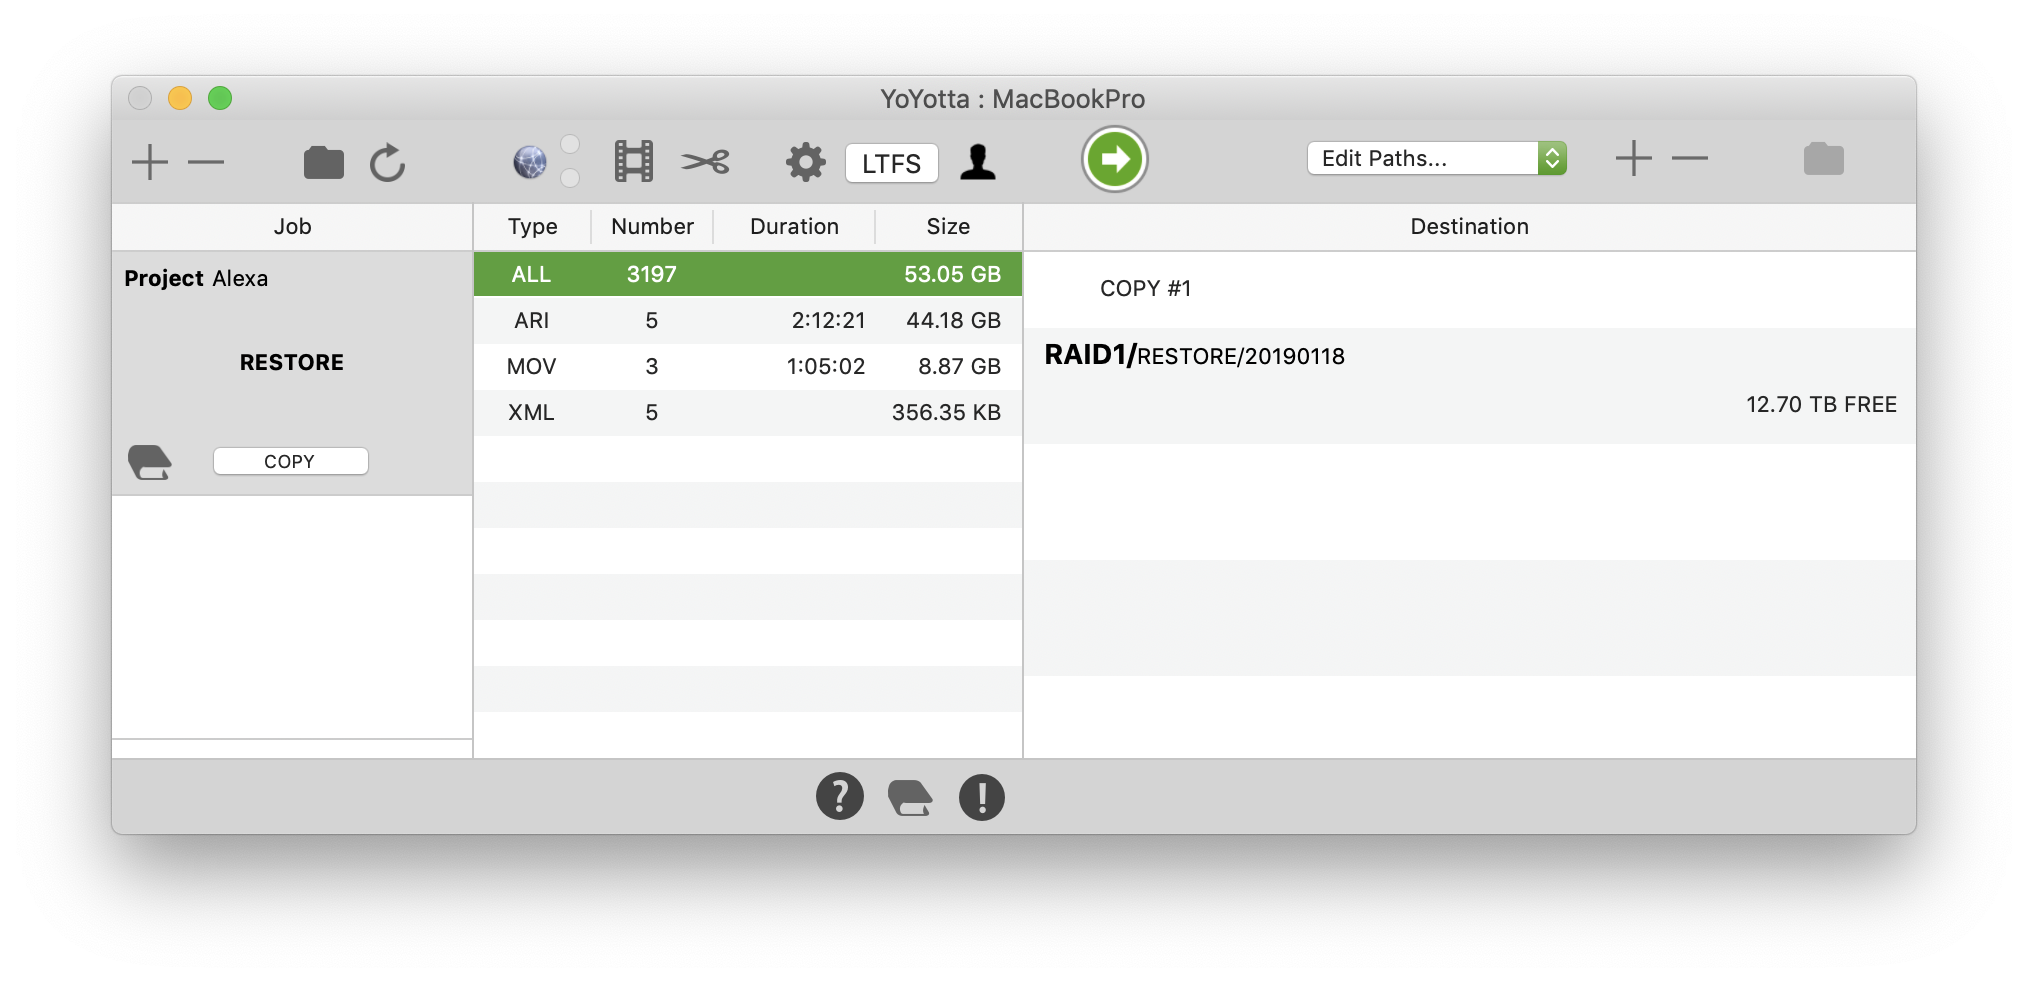
Restore the entire archive
After clicking Add Job if there is a preset called RESTORE, this will be automatically
recalled to setup the paths and reports.
Click Edit Paths to adjust the destination paths and setup any required reports.
Click the start button to restore all the ALEXA LF files from the tape.